Fishing Rod Selection - Technique Specific Applications

In the last article, we defined the terms “power” and “action” while discussing the benefits of specific types of each.  Those terms are fairly objective, which makes the next part of the process more difficult. The perfect walleye jigging rod if you will, can often only be perfect in the eyes of the beholder. Still, there’s a number of features in any fishing rod which hold for the angler, key advantages in any fishing situation; shallow or deep, walleye or bass, with lures light or heavy. That is why I will offer a few popular lengths, powers, and actions along with typical applications so you can have the right tool for the job.  No matter what your price point, we’ll focus on finding the right fishing rod characteristics to handle the task at hand.

It is surprising how many people select rods based on species alone, as if there were separate rods to use for bass or walleye or pike.  Instead, the focus should be placed heavily on technique and the interplay between length, power, and action.  Fishing rods perform best when fished with lure-types, and most importantly, lure weights, that fit the build and design of the particular rod in-hand.  This places an emphasis on situation-specific rods that place an emphasis on handling a certain scenario in the fishing world.  Again, you can use a screwdriver to knock out bolts, but a hammer and punch are far more effective.

Still, there are species-specific considerations, often based on tradition, that creep into rod design.  Take the split-grip phenomenon for example and how prevalent it is in bass rods.  Walleye anglers on the other hand, tend to lean more towards full cork handles that have typically been more commonplace.  Spinning vs. casting does also offer a few changes to the mix, as each of them fish differently for different fish species, with spinning being far more common for walleye, trout, panfish, etc., and casting rods getting the nod for bass, pike, musky, salmon, and catfish. 

There are far too many ways to fish for a list of all technique-specific recommendations, however, here is a few common ones that I feel will offer you a distinct advantage on the water, and get you thinking of the interplay between length, power, and action:

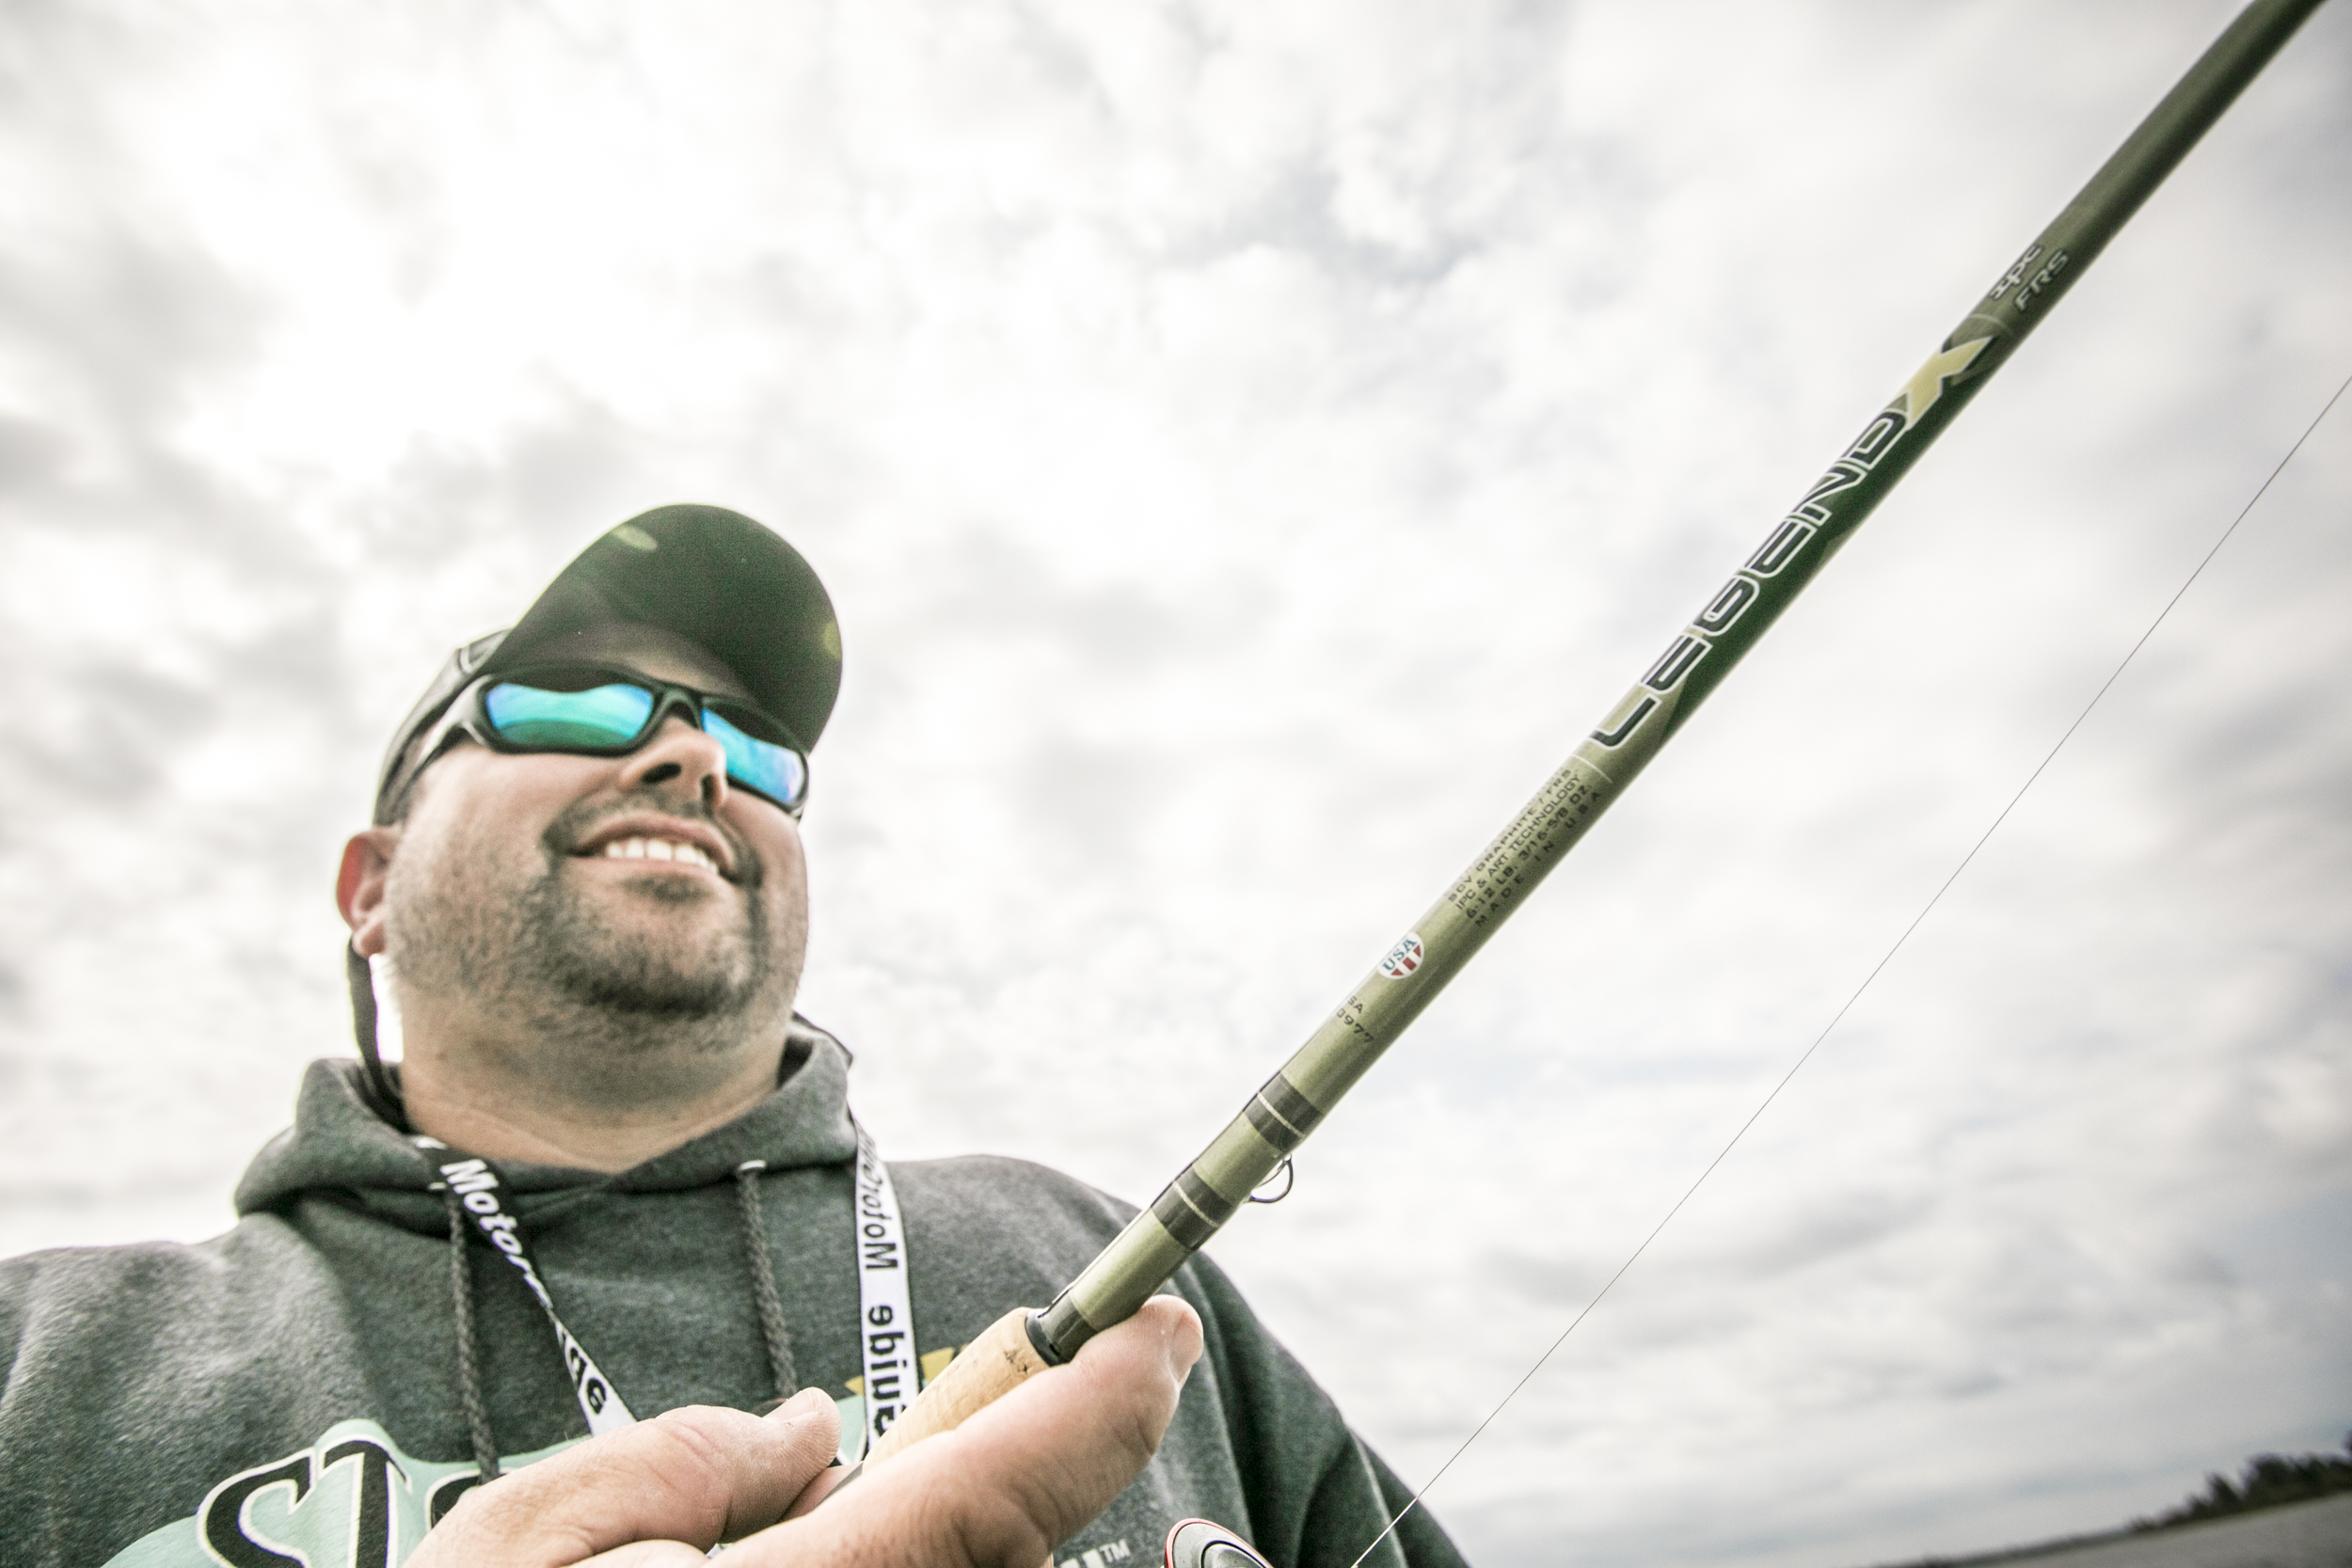
Pitching/Casting Jigs – Material – Carbon Fiber - Power – ML, M, Action – XF, Length 6’ 6” – 7’ - If there were ever a case where the best of the best makes a big difference, jig-fishing is where.  Better blanks have lighter, faster actions that translate to more hooks in more fish.  Pair common jig sizes fished to the range of weights that rod handles as listed on the blank.

Vertical Jigging – Material – Carbon Fiber - Power – ML or M, Action – XF, Length 6’ – 6’6” – Most anglers prefer the rod tip a bit closer to them when jigging over the side of the boat.  Line watching and overall management is far easier, while still having enough length to keeping big fish buttoned up.

Rigging – Material – Carbon Fiber - Power – ML or M, Action – Fast or XF, Length 7’ – 8’6” – Live bait rigging involves feeling a fish before it feels you, making Fast and Extra Fast (XF) actions perfect for the task at hand.  Riggers also have to manage the length of a snell boat-side as they net fish.  Longer rods do a great job of keeping the fish hooked up with a bouncing sinker and long leader lengths, though sometimes at the expense of feel in a big wind.  Choose accordingly.

Casting Crankbaits – Material – Carbon Fiber/Glass Blend or all Glass - Power – M - MH, Action – Moderate, Length 6’6” – 7’6” – Casting crankbaits happens for a variety of species, but the highlight of any good crankbait rod is some give in the middle section, hence the moderate action.  Crankbaits notoriously pull out of fish’s mouths if the rod (or line) doesn’t have enough give to let the fish engulf it in the first place.  The next key is pairing common bait sizes to the range of weights that each rod handles as listed on the blank. 

Trolling Crankbaits – Material – Carbon Fiber/Glass Blend or all Glass - Power – M - MH, Action – Moderate, Length 5’ – 10’ – Again, the key component of a good crankbait trolling rod is the moderate action and give that it offers.  You’ll see a very large range in lengths, and that’s because most trollers are trying to pair multiple rods at various lengths to cover the most water without tangles.  For example, many trollers pair 8’-10’ rods with a set of 6’ rods to be able to troll 4 lines un-tangled.

Finesse Jigging/Drop-Shot – Material – Carbon Fiber - Power –  L - ML, Action – Fast/XF, Length 6’6” – 8’6” – Fishing small baits for panfish, bass, or walleye, requires a blank matched to the weight of that specific jig.  Longer rods make for further casts of small baits, so consider going as long as your rod locker has storage for and you’re comfortable with.

These recommendations are only basic guidelines, as there needs to be some wiggle-room for hard-earned experience and personal preference to inform the process.  One last piece of advice is to buy the best rod you can in terms of price point, while adhering to the basic rules of length, power, and action.  Especially for light-biting fish, you get what you pay for in that higher price-point rods are typically lighter, more sensitive, and help you experience a technique in the best way possible.  With today’s materials and craftsmanship, you can get a good rod at a great price, but it’s not a sales pitch in saying that the net result of higher quality is more bites and more fish.

How to Clean Your Wild Turkey

joelknife.jpg

Turkey hunting can take you through the complete spectrum of extreme emotions.  From zero to hero, then back again.  Just when you thought the gig was up, and your opportunity was fading, you connect on the spring gobbler of your dreams.  After the high-fives, texts, and immediate calls to buddies are over, and a heaping plate of pancakes has been eaten, you should be thinking about what you’d like to do with your bird.  Well before the celebration even, you might consider just how you’d like to preserve the memory, and prepare the meat.

The good news is that you usually have a few hours, especially if the weather is anywhere south of the 50 degree mark.  Even in summer-like temperatures with an afternoon-killed bird, you’ve got a bit of time to decide how you’d like to prepare your bird.  In any scenario, keep him in a cool, shaded place, out of direct sunlight.  In most states, you’ve been required to legally tag him by now, but you also need to register that bird for your state fish and game department.  This is a crucial, and legal step, don’t forget to do it as wildlife managers rely on self-reporting of these statistics to help determine tag numbers and success rates.

If the weather is warm and you won’t have time to process the bird for a bit, at least remove the internal organs by making a small slice between the rear tip of the breast bone and the vent.  Reach in with your hands and remove the entrails, being careful to fully remove the heart, kidneys, intestines, and pesky lung matter.  Usually the lung bits nestle between the rib bones towards the front and bottom portions of the chest cavity, so it pays to run your fingers like a rake down the gaps of these ribs to pull out all the lung matter.  Especially if you’ll be cooking the bird whole, you’ll want this step done well. 

For me, the road forks at “to pluck, or not to pluck.”  An adult wild turkey sports somewhere between 5,000 – 6,000 feathers, and if you’d like to roast, smoke, or otherwise cook your bird whole, you’ll get the chance to pull out all of them.  I can tell you from hard-won experience that plucking a turkey is never as bad as you last remembered it, and goes quicker than you might expect provided you do so in the “sweet spot”; a period of time that persists one hour after kill time, and no more than 2-3 hours later.  Pluck too soon after you kill the bird and you tend to rip the warm skin when trying to pull multiple feathers.  Pluck too late, and you’ll find that more of the pin feathers stay with the turkey, making for a poor looking bird with inedible skin. 

Of course you can always scald a turkey to make plucking go more quickly.  This process involves removing the head and wing sections of the bird while you heat a large cauldron of water anywhere past 150 degrees or so.  At that temperature, you can soak the bird a good 20 or 30 seconds, but if you use boiling water, a couple seconds in the bath is all you’ll get before you start to cook your turkey.  Good kitchen gloves allow you to handle the hot bird and help with maximum feather removal.  I’m not a huge fan of scalding the bird, mostly on account of the extra materials and time it takes.  I’ll admit it probably does a better job than just my claws alone can, but I can do a reasonable job in quicker time without too much hassle overall. 

My process for plucking starts by timing it correctly, between one and three hours after the kill, and starts with removing the tail-fan, beard, and spurs for momentos.  To properly remove the tail-fan, collapse it and hold near the base above the vent.  It’s somewhat independent of the rest of the turkey’s body.  Grasp near the base, then slice between the vent and tail-fan base, then down to the backbone, being careful to leave some skin (with feathers).  It’s fine to come up the back a bit, as some of the nicest feathers for display come from there.  Pull the beard slightly, and cut just behind the waxy and fatty base, leaving just ¼ inch of that trim attached to the beard.  For the legs, straighten them, then cut the front of the knee joint and straighten firmly until you feel it dislocate.  Cut and remove the entire foot from here.

The tail-fan needs some careful attention and fat removal around the base of each feather, and there are some great online tutorials for this step alone.  Borax is the preferred preserving agent I use, and feet, beard, and fan each get a liberal dose while they sit and dry atop some cardboard in my garage for a few weeks.  Take a little bit of extra time here and you’ll always have options, but do it poorly, quickly, or both and you’ll find that bugs will get the best of your bird.

Remove feathers by the neck of the bird working back towards the breast and back.  I like plucking up to the wing joint before removing it.  Straighten the wing, then cut the webbed skin toward the open part of the joint before breaking it by hand.  From here, the knife does the rest of the work to fully remove the wing.  Continue until all feathers have been removed, and have a goal for this thing to be as pretty as a store-bought bird.  Remove any bird shot just below the skin, and if you haven’t already removed the entrails, do so now.  Lots of clean water is now required to wash your bird, inside and out until it runs fully clean.  If you have the opportunity to put it in some salty water and refrigerate overnight, it’s a good option.  My mother always preferred this with poultry and usually the salt both drew out blood and slightly brined the meat.

Of course you’re not required to pluck a turkey.  Especially when I’m traveling to hunt, it’s simply more convenient to pull back the skin and slice out the breasts.  The innermost portions of are the “tenders” and have a long, sinewy tendon that starts up near the wing joint and continues through the length of it.  I like to leave that tendon connected to the bird and slice the tenders off of it, both sides contain some of the choicest meat on the bird.  These are prime candidates for immediate cooking.  The legs come out easily by splaying them outward to dislocate the hip joints, then cutting between and down to remove the whole leg and thigh portion. 

Whole birds I wrap in freezer paper (several layers), tape up, and label well for the deep freeze, while breast meat I like to put in two layers of freezer bags.  Remember to label well if you are freezing, as different cuts deserve different treatment.  Breast meat cooks up very well, though definitely benefits from a brine of any sort to help retain moisture in the meat and add flavor.  The leg meat works really well when braised, especially in a crockpot.  Whole birds smoke very well, and can be roasted like your Thanksgiving turkey, but again, benefit from a stint in brine and continual basting. 

If all of this sounds like a lot, it can be, but the trick is to keep grinning.  Realize you’re among the lucky few who get to tag one, and take your time as you enjoy the process.      

Early Season Turkey Hunting Tips

Open patches of ground were key to taking this turkey, as they provided the best feeding areas for this gobbler’s hens.

Open patches of ground were key to taking this turkey, as they provided the best feeding areas for this gobbler’s hens.

Early Birds

“Birds of a feather flock together” has a figurative meaning, but in regards to early spring turkey hunts, the phrase applies in a more literal sense. Across the country, if you’re hunting early, you’re more often than not hunting groups of birds rather than individual toms. That’s especially true in years where unseasonable cold and winter weather patterns stretch far into spring, pushing back the breeding season and putting more state hunts into the “early” category.

Sure, you’re hunting birds that haven’t seen a decoy or its owner since last year at the earliest, but you’re also facing the hardest competition of all, and that’s a live hen. In the event of a late spring, mother nature applies extra pressure to pack in as much breeding activity when more favorable weather does come, making it that much more difficult to go against the real thing. For those reasons or more, you need a set of strategies to deal with the 80/20 rule, being that the majority of the turkeys are bunched-up in a very small part of available habitat.

A Fresh Scout

First and foremost, you can’t kill a turkey where they ain’t, so the value of scouting is dramatically more important early in the season compared to late. In the latter portions of the season, forlorn gobblers are wandering aimlessly, looking for the last hens of spring as the majority have been bred and are sitting on nests. Striking up a conversation then with a random bird is easier as they’re looking for you, whereas early, most toms have already found what they’re looking for.

Not all scouting is created equal, and especially with changing weather patterns and a rapidly progressing breeding season, the freshest information is best. While it’s good to have a flock located, along with a “Plan B” property or two to fall back on, the few days and hours directly before your season will provide the ultimate in actionable intel. You’re not just looking to find out what fields or openings these big flocks are working, you’re getting there early and keeping your distance, scouting with optics preferably. It’s difficult to beat multiple sets of eyes, and you want a vantage of the entire operation to see how the entire organism moves, retreats, and flows from one area to the next. You want precise information, like field-edge openings, funnels, and specific fence-posts or trees that the majority of birds move past.

Blind Appeal

As you hunt birds in these fields, even old pros of the turkey woods are well served by some sort of blind to conceal movements. Big groups are notorious for enveloping your position, as hens or jakes abound within range before picking you off, while the toms stay just outside of what it takes to put them down. In a blind, you have some flexibility to move, throw your calls in differing directions, and the ability to use scratching, hat-flapping, and other high-movement type calls you’d never be able to get away with out in the open. In the north, a blind will also handily house a small propane heater, something that may be a requirement for a sit of any length during the early youth seasons.

Perhaps the best part of this type of hunting early season, is that you’re going to see birds. Setting up in a well-scouted open area, where you are likely to see birds throughout the day, offers some unique insight into a turkey’s world. So much of what I’ve learned about calling, specifically what types of calls to make, and when, comes from the lessons learned huddled inside a blind as birds work all around me. So often we focus on gobblers and how they interact with your calling, how they decoy, or ways to best hunt them overall, we miss out on how much hens really run the show during the early part of the year.

All About the Hens

A lead-hen’s stomach, and the patterns she finds most convenient or safe, will often determine the manner and location of your hunting during the early season. From there, even if you’re in the right place at the right time, calling too aggressively or during the wrong time can have you shunned as a wise-old matriarchal hen leads her group of turkeys, gobblers and all, in the opposite direction. Flock talk then is of the utmost importance. Soft contented clucks, with some check yelps and purrs mixed in are the order of the early spring, especially with birds in sight, as you’re trying to mimic a group of feeding hens to fool the live hens, not an upstart jenny looking to steal toms.    

Roost Options

Field hunts can also be frustrating, sometimes taking you so close, yet still too far. For that reason, you also want roost locations, and not just general information, but specifics down to which trees the toms will favor vs. the rest of the flock. Keep in mind, it’s a dangerous play to be anywhere too close to these locations in-person, both scouting and hunting, but if your field or strut zone play is a low percentage one, your best bet is often to get on them right from the roost.

With early being the order of the season, think about getting within 100 yds of the roost a good hour or more before first light, minimizing your chance to spook birds. Cover is sparse early, so use your own best judgment on exact distances, but keep in mind that you may be hunting this group throughout the season, so it’s often best to stay conservative. Depending on how tight the toms roost to the hens, try to get near a reasonable landing zone or just off of it while putting your back to those hens. Avoid overcalling and hanging a tom on the limb, offering him just enough to drop out of the tree and hunt you down, without keeping him up on the branch while waiting for all the hens to fly down and saunter up to his roost tree.

Whether your move is a field-edge or the deep woods right off of the roost, early birds will test your patience and require you to hunt the hens just as much as the toms. If all else fails, see what you can do to get that lead hen talking. A loudmouth lead-hen has been the downfall of many a great tom, and do your best to mimic her. As her frustration and volume grows for the home-wrecker jenny you’re imitating, step on her calls and cut her off a few times. While it can be a last ditch effort, it’s often the deal-maker on a tough-hunting flock that won’t move any way but away from you.   

Fishing Rod Selection - Power and Action

Fishing Rod Selection – Power and Action

Take a trip to any sporting goods retailer, and you’ll find arguably too many options. Design, materials, and basic function can take a backseat to outward appearance and marketing, and of course there’s always the price factor. Among the bling, heavy decoration, and in-store specials, are just a few basics to purchasing a fishing rod. Understanding the terms “power” and “action” will help you separate hype from helpful to pair you with the best tool for the job.

The art of selecting a quality fishing rod is a time-honored tradition that takes place across the country every spring.  Anglers flock to spring sales, weary of winter’s woes, dreaming of the first cast of the season.  They pull a rod from the display and perform their tests of choice.  A shake, a bend on the ground, or a dreaded “grab the tip and pull down” are what most folks use as criteria for determining their stick of choice. 

Most never give a thought to how they’ll use it or for what.  Instead, they’re motivated by feel, price, marketing materials and large numbers after the letters “I-M” that would seem to indicate sensitivity and/or quality.  Nothing could be further from the truth.  Here’s the first of a two part series on rod selection that’ll put the right tool in your hand for the job at hand, no matter what price point you’re looking to spend to.

Any good story starts at the beginning, and for fishing rods, that discussion gets off the ground with the terms “power” and “action.”  Contrary to popular belief, the terms are not interchangeable, and mean drastically different things.  Before you think we’re getting bogged down into an engineering debate, know that “power” relates to the amount of pressure it takes to impart a bend in the rod, and “action” is the part of the blank that actually deflects.  That’s a big distinction, as I’ve heard pro after pro relate to rods as a heavy or medium action, knowing full-well that they mean “power” here, as I’ve made the same mistake myself. 

While power is an easy concept to grasp, as we’re used to purchasing the appropriate power for the species we like to target, “action” is a more abstract notion.  That is, until you look at a rod chart and see that actions start at moderate, bending closer to the mid-section, and progress all the way to fast, then extra-fast actions that bend far closer to the tip of the rod.  

It’s important to realize that you’ll need to understand both terms, as two medium power rods can have completely divergent actions which will benefit drastically different styles of angling.  It’ll also help to know a bit about a few other variables as you decipher which rod to buy, namely rod length, materials, components, and a bit about the manufacturer you’re purchasing from.  Did I mention that not all rod companies mention the action, and there are few universal standards by which the entire industry grades their powers and actions?  We’ll make it simpler, I promise.

Start with the power, knowing that your ability to impart extra leverage on larger fish will hinge on it.  Powers range from Ultra-Light, to Light, Medium Light, Medium, Medium Heavy, and Heavy.  Choose wisely based both on the species you’re targeting, but also the lure weight you’ll be using to target these species.  If you’re angling for a good number of species, Medium Light and Medium powers handle the largest swath of lure designs and fish species. 

While you’re thinking of lure types, know that the fastest of all actions like Extra Fast (XF) will excel when you need to move the rod minimally to set the hook fastest.  Baits like jigs that rely on extreme sensitivity and feel find huge benefit with these XF actions, as you get to the backbone of the rod that much more quickly on a hookset.  XF actions are so often paired with the highest end carbon fiber rods at the peak of sensitivity and price.  At the opposite end of the spectrum, you’ve got moderate actions, which most of the cheaper rods already exhibit and truly excel for things such as crankbait fishing where you want some give to account for the bend that the diving crankbait’s bill will impart on the rod.  A crankbait rod without the proper “give” sees you missing far more fish on account of hooks pulling out of the mouth of the fish.

Rod length can be a function of personal preference, height of your casting platform, or any number of customized factors, so be sure to choose what you like here while observing a few generalities.  The trend has been towards longer rods in the 7 foot region and longer for a number of reasons.  Longer rods offer a number of advantages from casting distance to leverage and coverage, and as rod storage in boats gets more accommodating while rod manufacturers build increasingly lighter rods, I don’t see this reversing itself.  For that reason, I’m a big fan of shorter rods primarily for vertical jigging, and longer rods moving longer for most applications outside of this. 

Materials are harder to decipher, as all companies offer different marketing strategies to endear their version to you.  Most rods however are made in the same factories, offering the same technologies branded differently for different importers.  Very few rods are vertically manufactured, offering the customer a product that was custom made from scratch to solve a specific fishing problem.  Know that more technology, better components, and lighter materials make for more expensive rods.  It can also make them more brittle and prone to breakage as engineers push the limits of the goods at hand, making a solid warranty a necessity when purchasing a high end rod.

In the second part of this series, I’ll offer some personal suggestions for common species and techniques, as well as a few shopping pointers to make sure you get the best rod for the money.       

The Bird That Changed it All

I stand at my grandma’s place in town, with cousin Todd Heinrich and the first bird we took in 1996.

I stand at my grandma’s place in town, with cousin Todd Heinrich and the first bird we took in 1996.

My introduction to turkey hunting did not play out like the fairytales you see on so many TV hunts these days.  I didn’t luck out on my first sit, or have someone that dropped me in a blind and called in a bird for me.  I was 14, and all I knew about turkeys came from some deer stand observations the previous fall.  The results showed, with my first 3 years being completely unproductive, at least in terms of harvesting a bird.  At that time, I wasn’t always lucky enough to draw a license, and the only tagging I did was tagging along with friends and family as they struggled through the learning process as well.  I’m thankful for those failures however, because the impact of our first then left an indelible mark.  It was a defining moment for me, and more importantly, a hunt that continues to teach, as have many of the hunts I’ve journaled over the years.  Some are more memorable than others, but each one has lessons embedded deep within the story of that experience.  This article describes the first in a series of hunts that changed the way I think about turkey hunting, and shaped my strategies and tactics forever. 

I knew calling was a “big-deal” in turkey hunting, as the few resources that were out there in the early 1990’s made heavy mention of it.  That, and most calls you purchased at the time came with an instructional cassette tape.  I couldn’t blow a mouth call well, but a slate was easy enough to get both good sound, and a number of different turkey vocalizations out of.  Still, against my ear, and that of the turkeys, I continued to beller and blast ridges and valleys with the poor sounds of a diaphragm.  I remember the sound being more similar to an upset goose than any self-respecting hen turkey, but I persisted nonetheless.  Faint and far off gobbles was all I’d ever hear while hunting multiple days that first season.  I never saw a bird, and what hearing of them I did could’ve been shock gobbles more than an interested tom anyway. 

Year 2 was far different.  I cut my teeth, and found a way to blow no less than 10 separate chances at toms.  It was an embarrassment of riches, at least from the perspective of the sheer number of birds I contacted.  They were everywhere, and I was terrible.  I had one bird come from the top of a ravine all the way to the stream and valley floor below, many hundreds of yards straight to my calling, only to hang up on downed brush throughout the pasture I was sitting in.  I had another bird literally rush me as I was setting up along an open field edge.  Still another I hung in the tree 40 yards from me as it gobbled at every noise I made, before making me, and flying down the opposite direction.  If there was a way to mess up a bird, I became good at it.  Yet I was seeing birds, and even attracting them to my position, getting better and better with that mouth call as I heard hens wake up around me and go about their daily business. 

By the latter part of my third season, I’d seen a few tricks that birds can play, but never had that magical moment where a bird strutted across a wide open space, lured to the call as if entranced.  That is, until a fine April morning in a steep-sided pasture of grass and cattle.  The birds roosted in a ravine through which we had to sneak, early enough so as not to wake them.  That left us in fine position at the upper end and head of the pasture, as birds sailed down and out of trees to the bottom corner of it.  They had no interest in us, and proceeded to work in circles throughout the lower end for nearly an hour.  They chased each other, strutted, gobbled, fought, and ate.  Truly it was an incredible sight as cardinals boomed, and the sun eventually cut back the haze hanging throughout the valley. 

Every few minutes or so I offered a couple yelps, to no avail, as birds eventually worked further down the valley and away from us.  At least until I broke out an old slate.  Cheap plastic in construction, with a soft but hollow sound, it certainly didn’t sound good to my ears.  To a young tom that day in 1996, it was the best thing he’d ever heard.  Eager to put on a show, his first move was to reveal himself, 150 yards below us, emerging just from the timber to dance and gobble without approaching.  This kept on for long minutes, though by now I was learning to shut up as much as call.  Patience came harder to me then, but over the course of the next 30 minutes, I’d watch him continue his processional in a two-steps-forward, one-step-back type of march.  Up the hill he came, quite silently save the intense “pffffffffffffffft, vvvvvvvvrooooooom” sound I’d later come to know as spitting and drumming.  It took an eternity for him to reach the 30 yard mark, and the Winchester pump that poked between the top two strands of barbed wire rang throughout the valley.  It was this bird’s end, and my beginning. 

It was an “aha” moment for me as a hunter, and a student.  When something clicks like that spring morning did for me, it sinks into your grey matter and leaves you wanting more, making you anxious to learn more in the process.  That bird hated the “better” sounding call, favored the “poor” sounding one, and even then approached in a cautious, measured manner.  The more I’d call, the harder he’d strut.  Luckily for me, I believed that call sounded bad, so I used it far more sparingly than the one I was more confident in.  As long as he was coming my way, I wasn’t talking, and it made all the difference.  So did our early approach.  Hanging a bird in the tree on that same ravine roost the year previous reminded me of that. 

It was the first in a number of landmark hunts that I’d like to share with readers, as each was a complete breakthrough for me and the way I approached the sport.  I’m guessing that many of you who’ve hunted them a few years have had similar experiences.  It’s these hunts that continue to mold our hunting future, often for better but sometimes for worse.  The amazing part is that no matter how many states I’ve hunted, weapons I’ve used, or turkeys I’ve taken, I still have these hunts from time to time.  Most recently, a Wisconsin hunt last season, again forever changed the way I’ll look at field birds.  More on that story to come, and until then, break out your turkey gear and think of warmer days and gobbling turkeys.