The Weedbed Connection for Late-Ice Gills

Photo Credit - Ben Larson - In-depth Media Productions

Photo Credit - Ben Larson - In-depth Media Productions

I write this with excitement for the oncoming late-ice period, where cold nights and warm days make fishing outside a true treat.  We’ve gotten some warmer weather of late, which fuels the drive to be on a remote lake catching gills with no one else in sight.  Of course, these bites can happen in plain sight on any local lake you call home, provided there’s some good gills to be had and great weeds to target them in.

Mid-winter sees some challenging fishing for all species, and with the way a bluegill can study a bait better than just about anything else, you’ve probably seen some tough bites with many fish marked and few caught.  Moreover, you’ve also likely been finding your gills suspended or off of structural elements in water relatively deeper than you found them early ice.  Loosely scattered mid-winter bluegills can be a really tough-go as they relate more to substrate that yields bugs than structure or cover we can more easily locate. 

Everything changes however, as the sun angle grows steeper in mid-March.  Melting snow and more light penetration into the shallows gets life going again.  So does the meltwater from shore areas, cracks in the ice, and old holes.  The lake goes from a previously sealed environment to something that becomes increasingly porous, letting in snacks along the way. 

Throughout this process, you also have increased bug activity at depth.  Perch and Tullibee anglers on the bigger waters will tell you that March is really good to them too, but in the waters you’re likely targeting quality gills, eventually the fish move away from those midwinter locations and focus their efforts shallow.

While I don’t know the exact reason, I suspect it has as much to do with the fact that weeds provide both cover AND food during this time of year.  Anecdotal evidence for that has come in the form of some incredibly large predator catches over the years while targeting large gills.  Some of the biggest and most bass I catch through the ice, and some of the most frustrating days donating mouth-jewelry to pike, come while targeting these shallow weedbeds. 

Pike prowl and so do bass, and by doing so they can actually wreck a good thing in certain scenarios.  Most often, you’ll catch gills on the edges, pockets, or inside turns of weedbeds until the commotion of your fish-catching attracts larger onlookers.  They prowl, move through, disrupt the game for 10-15 minutes, and eventually you settle in to catching gills again.  This process repeats indefinitely until you’ve sore-mouthed the predators enough or you move. 

Typically I’m looking for the best weedbeds adjacent to deep-water chutes, inside turns, or steep breaks.  A strong individual weedbed is far better than acres of the stuff, as the smaller the bed (within reason), the easier your job of targeting gills will be.  In the shallows, if you’re facing a large bed, you’ll need lots of holes and will invariably spook panfish in the process.  You’ll need time to let them settle down, hunt them by foot, and let the situation play out.  This can be a time consuming process, so isolating humps or other rises with weeds near the deeper areas they previously suspended in front of can be a real key.     

Of course not all weeds are created equal.  You’re looking for cabbage, coontail, or a mix of the two in that order.  At least from my experience, the good broadleaf stuff (cabbage) tends to be the main attraction, can form the smaller singular beds you’re hunting for, and will be easy to spot on electronics and underwater cameras.

Speaking of, this is where a good quality, portable underwater camera becomes more of a tool than a toy.  Often with predators cruising and fish burying, the camera will determine your level of success for the day.  Small differences in location, holes even 2 feet apart can be the difference in consistently getting bit and consistently not marking a target.  I’ve seen gills hold tight to the weeds on camera too many times to consider it a coincidence.  Learn what distance it takes to break that forcefield, and you’ll know the rest of the day how close you’ll really need to be to get them to commit. 

Often, your flasher is rendered somewhat less useful here in terms of specific siting of your holes, as all of them will return weeds in water deeper than 8-10 feet or so.  Still, once you’re dialed in, it’s the preferred method as camera cables, weeds, and predator fish means all kinds of untangling once a toothy critter or hungry bass eats your bait. 

Keep in mind too that this progression from suspended or near-bottom deeper fish to the shallows happens differently in each lake.  Some may have a great shallows bite for weeks, while others only give up those gems when the main-lake ice sheet has separated from shore and later.  Knowing another place to hunt for them, and that it’s the place they’ll eventually end up has helped me do well on enough occasions to make it something I look forward to year after year.      

How To Jig

How To Jig

"The charm of fishing is that it is the pursuit of what is elusive but attainable, a perpetual series of occasions for hope." - John Buchan

My favorite quote about fishing sums up nicely how we approach a day on the ice or open water.  Anglers are usually an agreeable crowd, and I find them to be a “glass half-full” group mostly out of necessity.  Not all fish bite, and especially mid-winter, you need to focus on the next one more than the last one.  Still, the question remains, how to attract the next one and actually seal the deal? 

Your jigging stroke has the power to attract fish from distance and entrap them in a trance-like state, as they hang on your every movement until they have no choice but to commit.  Your cadence, unfortunately, also has the tendency to draw them in close, only to get a strong snub upon a very close and tense inspection. 

You want to know the secret to unlocking the bite, the absolute undisclosed truth about what it takes to convert those “lookers” to “biters?”  The secret is that I don’t know.  Really, I can’t predict what it is that an individual fish will like, on a specific weather pattern, on lakes with differing structure, predator/prey relationships, and oxygenation.  Not knowing, IS the secret, which means that each and every trip is a different occasion for hope and ultimately, testing. 

While I can’t offer a simple strategy for always knocking them dead, I can tell you my approach and process of elimination that has served me well throughout the years.  I can also share some common issues with the way most people jig, hopefully helping you to eventually crack the code of the day, each and every time you hit the ice.  For the sake of ease, I’ll generalize into two groups, perch/walleye, and panfish. I’ll also focus on what you should be seeing on your flasher to get the job done.

Walleyes

The first thing to remember with ‘eyes especially is that they’re predators, so I start aggressive.  “Take their temperature” by starting with larger, and quicker jigging motions.  Most importantly, jig 2-5 feet off of bottom to give them room to appear under your bait.  Jig too close to the floor, and bottom hugging fish can only approach from the sides, giving you precious little real-estate on your flasher to observe them.  After the first few fish, you should have a good idea of how aggressive they are.  Are they spooking when you drop the bait in their face, or do they chase it to bottom, hovering over it while it lays in the mud?  Similarly, will they follow the bait upwards, several feet off the bottom where they originated?  Aggressive approaches for fish that are willing will yield the most efficient results, but we know that mid-winter fish are famously stingy.  This is where you really break down the bite.

Sharp jigging motions now should only be used to draw fish underneath your bait and into the cone of your sonar.  Once detected, every fish needs far more subtle motions.  Focus on naturally wiggling the bait, first with small continuous spring-like jigging motions, as if you were drawing a small oval with your rod tip the size of a marble.  Most fish are over-jigged at this stage, so that marble-sized stroke should be a good indicator if you’re waving the wand a bit too heavily.  From there, experiment with changing a few variables.  First, the size of your jigging stroke; go from drawing a marble, to maybe something the size of a golf-ball or bigger, then maybe back to something even smaller yet, that you can only achieve not by jigging, but by simply squeezing the cork on your rod handle.  Next, experiment with working that entire motion upwards in the water column.  Will the fish chase?  Do they only react when the bait is moving, or do they like it when you occasionally “kill” the bait? 

Tough customers sometimes require the above and more, as you tease them off of bottom, watch them retreat, then approach all over again several times.  This is where it’s best to keep doing what you’re doing on a per-fish basis.  In other words, don’t experiment with too many different jigging strokes for a single fish.  Instead, let the fish leave, re-set your approach, then feed a new fish a new look.  Study an underwater camera and learn what small taps on a rod-blank with your fore-finger can mean for the bait and how it jumps.  Recreate what is successful, reject what is not, treating each fish like the individual it is, while looking for clues and general patterns for all of the fish you work.  Of course, a target-rich environment is best for learning, and experience is usually the best teacher, especially when fish are not abundant.

Perch

Perch are aggressive school feeders that eat in a flurry.  Commotion is what they thrive upon, often even when they’re in an incredibly neutral mood.  Active schools move about constantly, requiring as much drilling as they do dropping of jigs, but keeping their attention is of paramount importance.  This is often best-done with some friends, with one person continually jigging aggressively while marking fish, and another experimenting with different baits and jigging styles around the edges.  Once the sonar marks dry up, it’s on the drill again to hunt them down. 

I break down the bite according to what they’re eating, free-ranging invertebrates about the water column, or bottom-focused meals that emerge from the substrate.  Bloodworm or bottom hugging invertebrate bites are all about being near the lake-bottom, putting the bait in the mud as much as above it, and potentially even using underwater cameras for bite detection.  I remember several extremely tough Devil’s Lake bites where fresh minnows and jigs layed on bottom were the only way to get bit.  The struggling minnow was slurped up from bottom, but never while hanging anywhere in the water column.  Jig-down into the mud, with a tight-line, stirring up mud and debris until you’ve created a visible cloud on your underwater camera.  Study how fish react, learning how much to stir it up, and how much to wait it out.

Other bites above bottom, like that of an underwater insect hatch from mayflies or caddis, will often see caught perch spitting up these invertebrates around the hole as you pull them out.  These bites call for aggressive jigging upward in the water column, as you work fish higher and higher to get them revved up.  Playing keep away here can be vitally important, as I believe the school gets more active with more fish feeding about different depth ranges.  Fire them up, and only then focus on catching them. 

There’s no one-way to skin a walleye or a perch, but these starting points are a good way to launch the every-trip experiment, while honing observational skills on your way to cracking the day’s bite. 

The previous segment focused heavily on the thought that each fish has its own mood, persona, and likes/dis-likes.  Bluegills especially take this idea to a new level, often being among the most challenging species to tackle during an off-bite.  I’ve sat on schools of giant gills for upwards of 3-days, re-visiting them from time to time until weather stabilized and their outlook on eating improved.  In high-front situations, with bluebird skies and spiked barometers, sometimes there’s very little you can do.  While it happens, those lock-jaw moments are rare, and more often you’re left with a challenging, yet possible bite scenario tied to a specific color, jigging stroke, or low-light feeding window. 

Bluegill

Trophy mid-winter panfish are legendarily difficult to coax.  Over the years of photo and film-shoots, we would focus efforts early and late specifically to avoid a closed-mouth session of bad-water bluegills.  If you’re learning how to jig them into submission then, your best bet is to focus on the 3rd or 4th day of consistent weather, and a stable or falling barometer.  Pair this with at least a half day on the ice to aid in your cumulative learning, either preceding or into and then out of a low-light period. 

Big gills hang in the water column nicely, as relatively stationary and solid targets on your flasher.  Your first opportunity to impress is on the drop, so resist a hasty drop into a brand new school until you have your wits about you.  Some baits simply drop better than others, so watch your bait for the first few feet to see what it looks like.  Hopefully there’s no spin and the fall looks natural.  Spinning reels and finicky gills have single-handedly brought upon the heavy selection of in-line or straight-line reels these days that allow line to evenly be placed on a spool without twist.  Focus on slowly dropping your bait into a school of fish on a slack line.  Are they rising to meet, or spooking in a refusal to eat? 

The next drop, try an artificial introduction to the fish on a tight line as you steadily control the bait’s fall until just above them.  Sneak it in.  Then start jigging.  Again, focus on initial reactions from your flasher.  Does an aggressive lift draw them closer, or does a more subtle jigging stroke tickle their fancy?  

Technical gill bites are cause for a 2-step process that I like to call “lock-down” and “lift.”  I palm the reel, placing the rig on my thigh or hip while kneeling on the ice.  This settles and steadies my hand, allowing for some more fine motor-skill movements.  From here, I tap the rod blank with a fore-finger to attract, then squeeze the rod-handle in quick-but-subtle bursts to get the fish to commit.  As reluctant fish close, or as they retreat, I start a slow-but-steady lift to hit the re-set button.  I will drop on a slack line or slow and tight line depending on what my early research has shown to be most effective, only to start the process all over again.  Of course, each jig fishes differently based on design.  These are general starting points from which to form your own opinions and best-practices, but keep them in mind next time you tackle a tough gill bite for which there seems no remedy.      
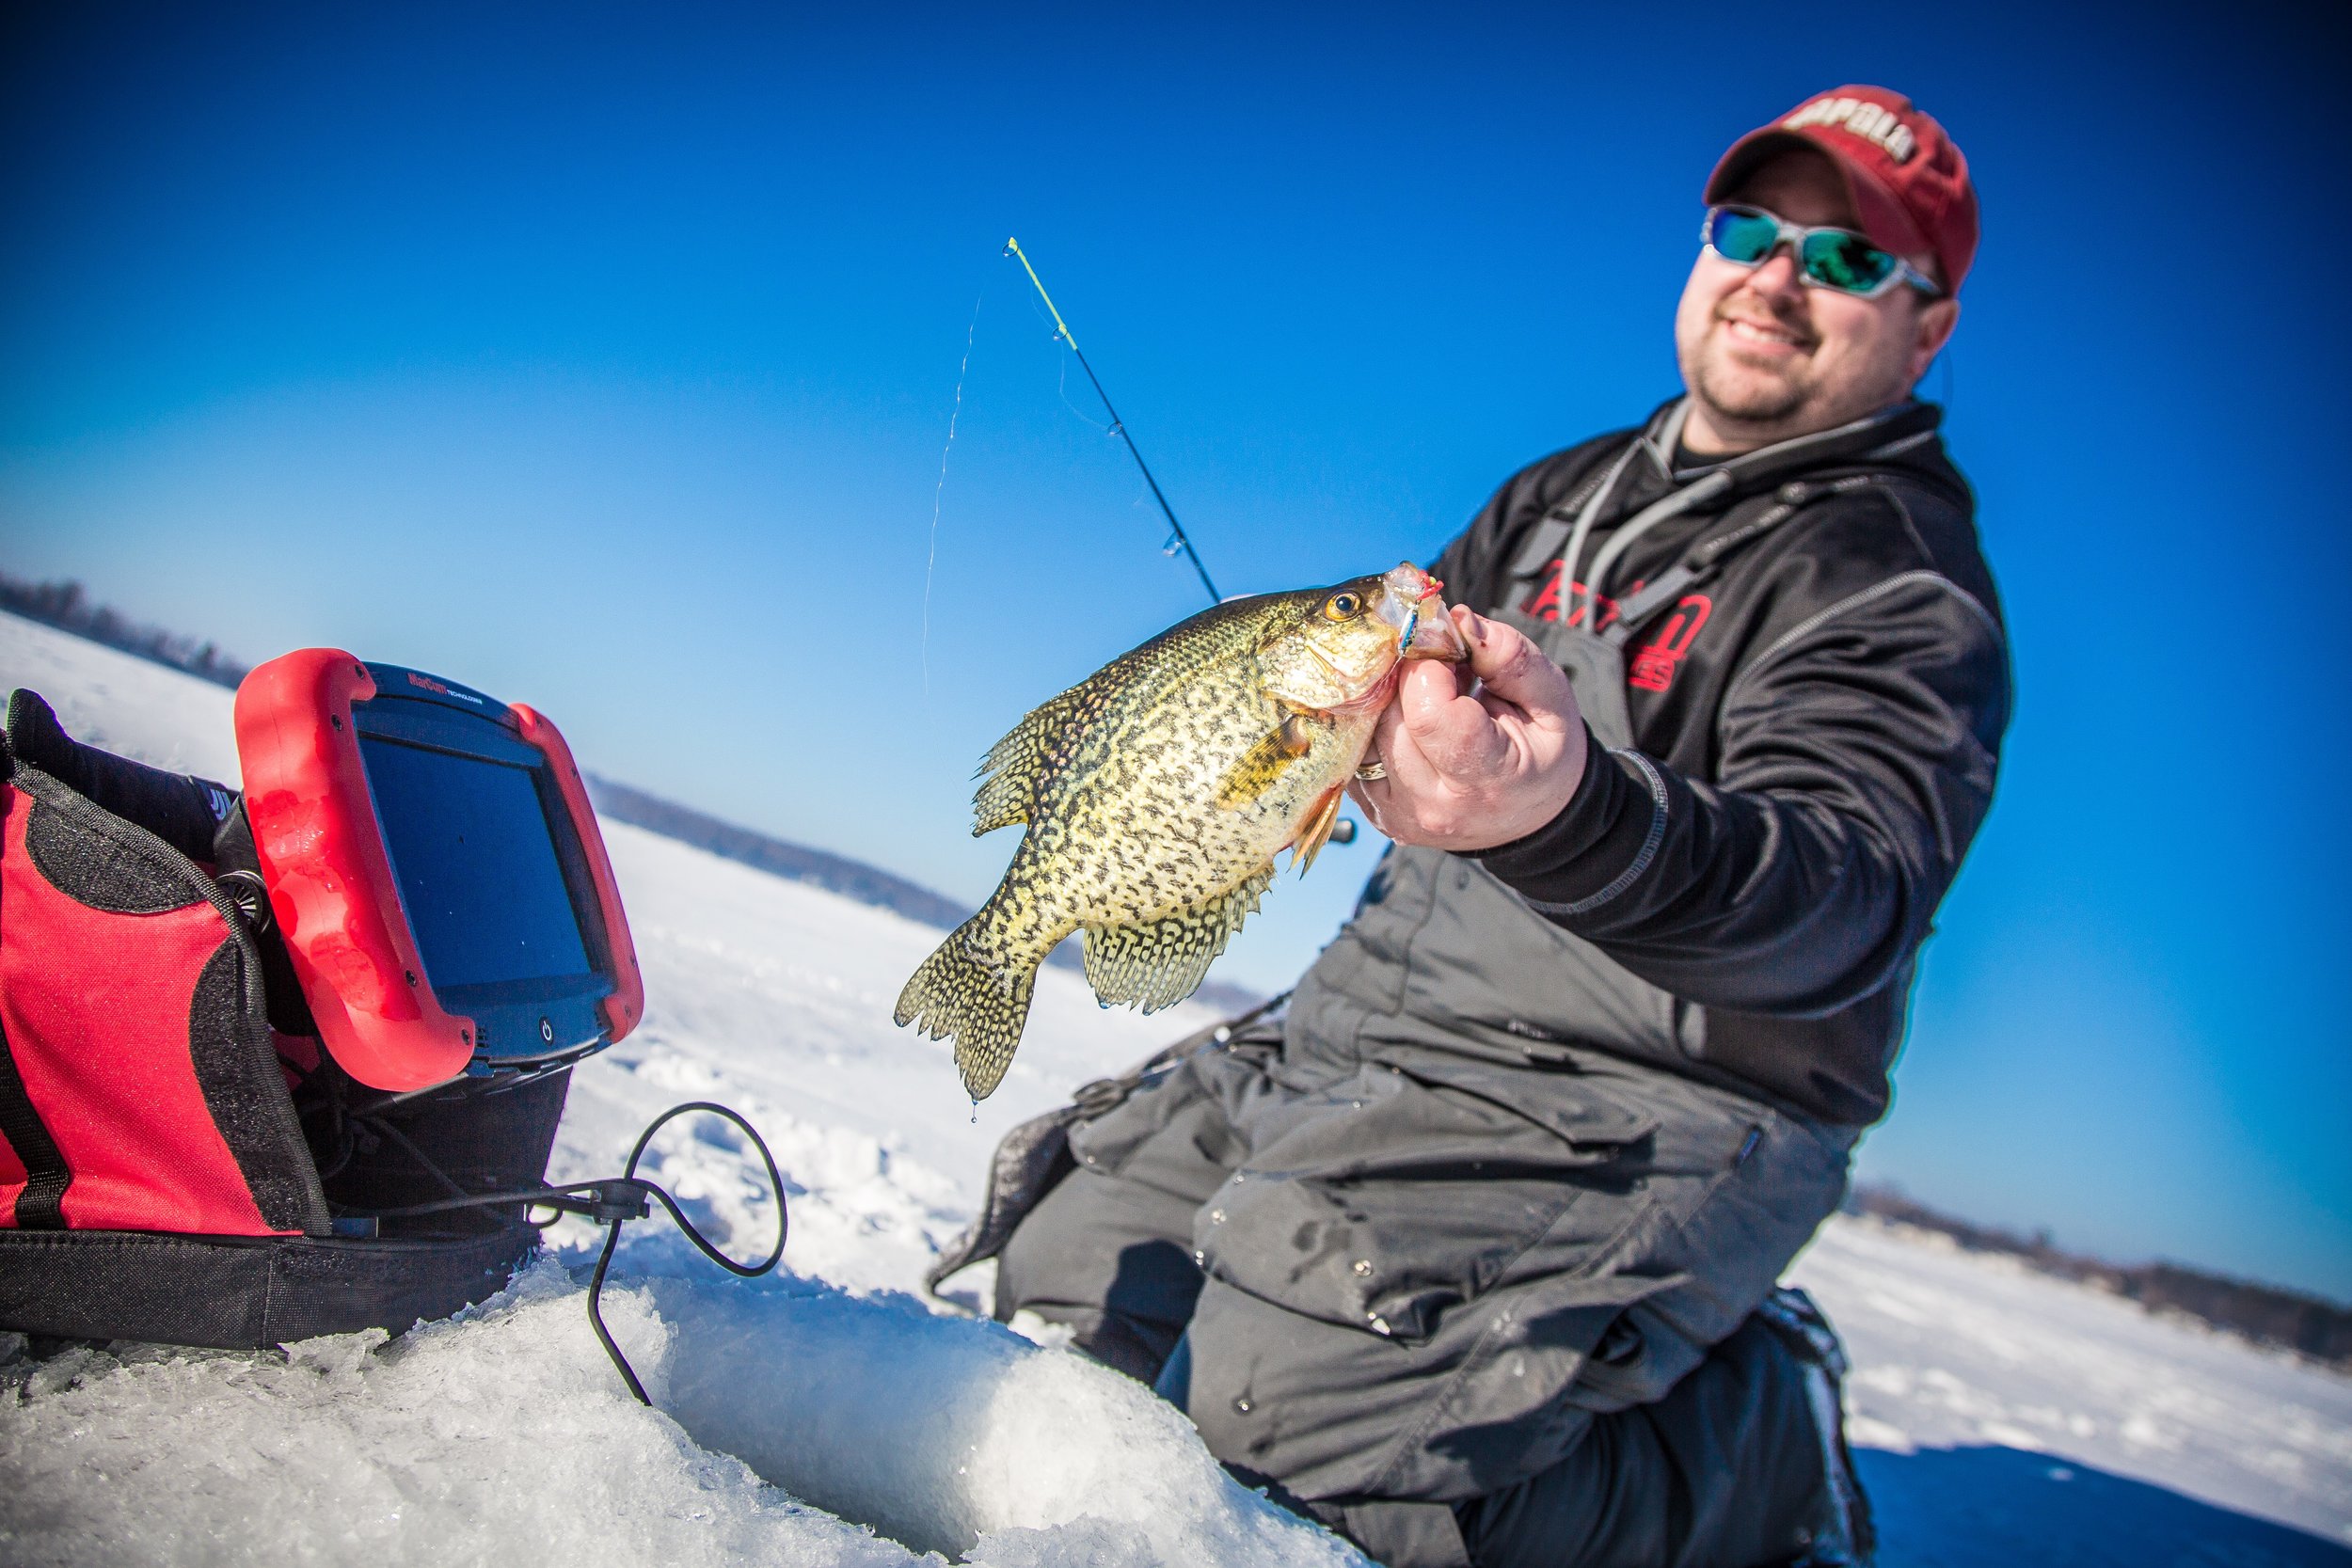
Crappies

Crappies during much of the ice season are easy pickings by comparison, mostly because they suspend over deeper water, giving our sonar cones a chance to grow in diameter and scan a larger underwater area.  Bigger crappies however are often found in weeds or roaming edges instead of basins, such that they’ll often jig up like a less-eager walleye.  For finicky ‘pies, your challenge to jigging is often two-fold.  Control of the jig is of great importance, but it’s made difficult by deep water and small sizes.  On light bites, I’ll err towards the side of bite-detection with a stiffer-than-normal noodle style rod, and when fish are a bit more willing to chew I’ll use a stronger power and faster action rod than normal for better control.

Crappies will often stratify according to size on your graph, with the better fish in the school either feeding high, or more often, sitting lower in the water column and protected by more enthusiastic biters above them.  In such situations, fish fast with heavier tungsten or spoons to blow past the little-guys, but still stay above the better fish.  Crappies seem more unwilling to follow a bait down, with bluegills, and then especially perch being more willing to chase down. 

For that reason, your crappie jigging cadence should be upward-centric.  The up-down keep away game seems to work only with the very most aggressive crappies, and you’ll need to keep the bait quiet more often for really tough customers.  The “lock-down” method works great as a fish really studies your bait, with crappies being notoriously light biters.  What you may mis-interpret as a simple shake from your hand, may actually be a crappie sucking the bait in, before quickly pushing it back out. 

I like to focus on being still or at least very subtly controlled when jigging as a crappie approaches, knowing that my ability to detect his strike is as difficult often as simply getting him to commit.  Whether crappies or gills, the right sequence and strategy can change throughout the day as fish’s activity levels grow and fade.  Interpretation:  What worked yesterday or even an hour ago may not be the order of the minute, so keep experimenting, and keep pushing as you learn while you lift your rod in observationally-patterned motions.   

Sonar Basics - Marking More Fish

MilleLacs150-5161b.jpg

Sonar Basics – Marking More Fish on Your Hardwater Finder

From the day you get your first flasher, the ice-fishing universe is forever changed.  I was 10 years old, the year was 1989, and for 25 bucks I got my grandpa’s old Lowrance 2330 which he had since given up on “figuring out.”  It was fairly simple to operate, and even conceptually, didn’t seem a technological marvel for its time, but what it did for your fishing was borderline magical.  I screwed together some one-inch pine strips in the shape of a “T,” used electrical tape to secure the open-water transducer to the bottom of the wood, and set about dropping that ‘ducer into as many ice-holes as I could hand-auger.  Not only could I use it to catch fish and track how they responded to my bait, I could use it to find active fish before I even wet a line.  At the time, it was considered somewhat odd; almost a novelty.  Now, ice-fishing electronics are a multi-million dollar category, and the thought of fishing without one seems pointless.

Today, we have many options at our disposal.  Digital or mechanical, circular or flat-screened and square, there are a number of shapes, sizes, manufacturers, specs, and statistics to consume.  Instead of focusing on how they’re different, I’d like to highlight similarities to help everyone, regardless of brand, simply mark and catch more fish.

Undoubtedly, there’s an on/off switch, frequently connected to a setting which adjusts the depth of the display you’re fishing.  This is important, as you always want to be using the depth display that barely contains the depth you’re fishing.  If you’re in 32 feet of water, you want to be using the 40 foot scale, not the 80 or beyond.  Next, you’ll want to set your gain or sensitivity appropriately.  This is the other main adjustment on your flasher, and is of critical importance as it determines how “open” the receiver in your transducer is to gathering return sonar signals.  Your goal here is to set the gain as low as possible while still seeing your jig as a clearly defined mark.  Turn it too high, and you’re receiving a fair amount of noise in the form of double signals, and are also making the marks on your graph abnormally large.  This hinders your ability to see what’s going on by covering up valuable real estate on your sonar screen.    

Interference rejection (IR) is another topic to discuss.  Do you notice intermittent marks that show up, racing in a circular pattern, thus blocking your ability to see fish or your bait?  Work with nearby electronics users by adjusting your IR one unit at a time, partnering to remove interference for everyone.  Make sure gain settings are as low as possible to reduce the effect of this problem.  In deep water with hard bottom, expect this to be something you’ll need to address as sonar bounces off hard objects quite well, and over large distances has the opportunity to bounce off other signals that are produced by itself or other units.

All of these more basic tasks should become part of a routine that’s simply habitual every time you step onto a sheet of ice.  While they may seem rudimentary in their practice, you’d be surprised how many ice veterans run with high gain settings, no interference rejection, or the improper depth scale reading. 

Now, you need to focus on putting more fish on your screen, which of course comes down to where and how you’re fishing.  Without going into those topics entirely, make sure you’re fishing in a location where you’re likely to see some activity.  Choose a target-rich environment.  A pond or local lake where panfish are plentiful, such that you get a chance to study your ice electronics and learn them better.  If you have an underwater camera, even borrowed from a friend, try your hand at comparing and contrasting what you’re seeing on both your sonar and camera when fish are present.  That tip alone will fine-tune your skills with the sonar without ever having to drop a camera.

Another trick is to run with the widest cone angle setting you have.  That allows you to take in more lake-bottom real estate, and ultimately mark more fish.  Narrow beams can be run on steep drop offs or with other friends in close proximity to remove IR, but at first, run wide open.  Hole-hop and cover some ice-estate as well, as I’m a firm believer that when it’s possible to roam the open-ice, you’ll simply mark more fish to work that hopefully end up hitting the ice.  Feel free to swing the ducer in deep water, in an attempt to mark fish off to the sides of your hole.  This can work well for suspended crappies especially. 

For most sonar, observe how a fish at the edge of the cone angle starts at the weakest color or hue, then progressively moves to dark red or simply darker hues as the fish nears the center of the cone.  These are big cues on not just what you’re looking at, but how to best jig and offer your presentation to get bit.  Jigging too aggressively, especially when the signal is dark or red, is probably the number one deterrent to a fish biting, so learn to become more subtle as fish approach and colors change.

Drop your sonar over weeds too, such that you know the difference when you’re hole-hopping.  Typically, they offer a weaker signal in return, rather than the dark or red target of a fish.  Experiment in rocks and wood too, noting that while they produce a distinct and substantial return, they don’t move!

Marking more fish on your sonar simply equates to more fish caught, so spend ample time learning your electronics of choice, then make sure to present to as many fish as possible until your sonar becomes your underwater eyes.

You Bought a Wheelhouse - Now What?

A good generator, and 30-amp electrical hookup with a 15-amp converter aren't the first thing you think of after buying a wheelhouse, but you need power to fish!Photo Credit - Matt Addington Photography

A good generator, and 30-amp electrical hookup with a 15-amp converter aren't the first thing you think of after buying a wheelhouse, but you need power to fish!

Photo Credit - Matt Addington Photography

You Bought a Wheelhouse – Now What?

I’m an over-planner.  I simply have to “over-do” it to be confident in performing about any outdoor task, but even I was surprised at how much preparation can go into equipping your wheelhouse.  I know from experience that just as a properly rigged boat catches more fish, any time on the hard water is best served with a healthy dose of preparedness.  That said, with a wheelhouse, the fishing portion of the planning is just the beginning.  You’ll sleep out on the ice with this unit, making it as much a Recreational Vehicle (RV) as it is a fish-house.  Yet, with the fact that this house will sit on a sheet of frozen ice, camper kits or RV-lists  won’t fully equip you either.  Here are some sure-fire ways to be ready for everything, along with a list of what you might not have thought of.

Exterior

First think about all of the operating mechanicals that go on regarding the exterior of your wheelhouse.  Start from the hitch and go to the tail, thinking about both trailering and dropping the house.  You may need a drop hitch to properly balance your load.  Consider a fully adjustable one with multiple ball sizes such that you’ve always got it attached to your tow vehicle and you’ll never need to find a specific one for just your wheelhouse.    You’ll need everything from bolts, wire, and a full set of tools with which to help wield those extras.  You’ll also need a trailering kit, which is a simple plastic tub filled with a grease gun, shop towels, a 4-way tire wrench to change a flat, and a hub kit.  Pass on the bearing kits themselves and instead elect to replace the entire hub should you smoke a bearing in sub-zero temps. 

Don’t forget extra pins, especially the trailering ones, as these love to get lost in the snow.  Bring a chisel and jack to help out in the event of a freeze-down, wood blocks to prevent freeze-down, and a shovel to help bank snow around the exterior.  Consider a small propane torch should your door be prone to freeze-up with all the hot-to-cold created condensation.  Last but not least, throw in a head lamp or two should you have to fix anything in the dark.     

Heat and power are a requirement on the open ice, so make sure your propane tanks are full (and fully operational), and that you throw a portable generator into the truck as well.  There are lots of generator options out there, but keep in mind that sub-zero running may require a cold-weather kit.  A few gallons of gas may be needed to keep that generator running too, depending on your power needs.   

Fishing

Most modern houses come equipped with Catch-Covers, but you’ll need to purchase the hole-sleeves that form the connection between that open area in the floor and the ice-sheet itself.  Dedicated rattle reels for every hole are nice, but so are rod holders.  These days, you don’t have to choose as there are several aftermarket options that allow you to mount a simple receiver disk to a wall, then slip in and out a rattle reel or rod holder of your choice.

Of course you’ll need tackle, rod and reel combinations, and ice electronics.  Remember that electronics need a power source, so bring chargers, and also RCA or HDMI cable(s) to connect your underwater camera to the TV.  Many houses these days come with pre-wired in-wall connections for this.  Along those same lines, think about aeration of your bait cooler, and how you will both store and use bait for your stay. 


The Best of the Rest

Depending on your wheelhouse, the rest of the list is not meant to be exhaustive or full of “must-haves.”  It’s simply some ideas to get your mind headed in the right direction as you plan. 

·         Cooking – Dedicated pots, pans, dishes, silverware, seasonings, pizza pan, tinfoil, coffee pot, toaster, fillet knife, and cutting boards

·         Safety – Carbon-monoxide/smoke-detector, first aid kid, indoor/outdoor thermometer, and a ladder for bunks

·         Organization – storage baskets that fit in specific drawers and shelves, key ring hanger by the door, coat hooks for hanging items everywhere, and stackable totes for the bathroom area

·         Clean-up – Paper towel-holder, towel bar, toilet paper holder, area rugs, and a broom/dust pan with door clamp or holder for storage

·         Fun – Playing cards, board games, and movies

·         “Hacks” – Squeegee for cleaning floors after drilling holes, non-glazed ceramic tiles to line the inside bottom of the oven to prevent burning, 2” memory foam sleeping pads for extra comfort, corner shelves to make use of nooks and crannies especially near sleeping areas, and ceiling storage helpers to hold anything flat or low-profile like rulers, rods, etc.

Of course, with necessity being the mother of all invention, you could always just head out fishing with a notepad and pen to document what you’d want and when you’d want it.  Hopefully, this is a great head-start and you can refine to your own personal tastes from here.

The Right Ice Auger for the Job

The Right Ice Auger for the Job – Part 1

Electric Augers like the Strikemaster 40V Lithium have come a long way.Photo Credit - Ben Larson - In-Depth Media Productions

Electric Augers like the Strikemaster 40V Lithium have come a long way.

Photo Credit - Ben Larson - In-Depth Media Productions

Head to any outdoors retailer in search of an ice auger, and you’re likely to be confused.  Colors of red, black, yellow, and green, each with several powerheads to drive a spinning bit, of which there are also several variations.  All of it just to cut a simple hole in the ice from which to fish.  For those that think this is overkill, I would agree, but also should point out that each of these features may directly impact the way you fish.  As part of a two-part series, I’ll deconstruct the powerhead, auger, and blade portions of your ice-cutter, then reassemble them in Part 2 to help you find an auger perfectly matched to your style of fishing.

Electric Powerhead – Electric is the rage, and for good reason.  No gas or exhaust fumes, and no carburetors to fuss with.  That said, be honest with yourself and how many holes you cut.  If the answer is more than 50 in thick ice, you’ll be needing either the latest and greatest Lithium-powered auger offered, or end up going straight to Gas and Propane models.  If you live in the northern portion of the ice belt, consider ultra-thick late-season ice should you fish during those times of the year and again, go right to the other powerhead option.

Photo Credit - Ben Larson - In-Depth Media Productions

Photo Credit - Ben Larson - In-Depth Media Productions

Gas/Propane Powerhead – Gas powerheads are still the most common and longest running product lines out there, because they work well.  Longevity here is due to plenty of engine tinkering over the years, as well as the fact that gasoline does a great job of providing the appropriate compression to power a transmission that spins a large metal bit.  Propane offers many of the same attributes on the cutting end, with the benefit of low or no exhaust, yet is a less efficient means of achieving that same combustion.  That simply means you’ll use more propane to achieve the same results, though it may be worthwhile if you’re looking for gas-like power through thick ice with low exhaust. 

Auger – Nearly all auger bits are metal, mostly because it has proven difficult over the years to mount metal blades on a flexible surface while still maintaining their ability to cut ice.  This can work for blades that don’t require a specific pitch or angle of attack to cut efficiently, but most of the quick-cutting options out there these days are metal.  Of course metal is much heavier, so there’s a tradeoff between weight and speed that you’ll have to choose between.  Sizes can range from 4”es to 10”, but spinning more auger bit, moves more ice, and thus requires more horsepower.  

Blades – I’m of the opinion that blade styles should drive the largest portion of your purchasing decisions, and here’s why; of the 3 main blade styles out there, each does something far better than the other. 

The chipper style blade is a serrated, angled blade that’s been around for quite some time.  It actively crushes and breaks the ice as the ice auger rotates downward.  This design has a number of advantages because of that pulverizing action, first and foremost being that it re-drills old holes with ease.  There’s no bouncing or jarring break-through when going back into a permanent that’s had frozen-over holes for two weeks, but because of the torque and crushing force required for this blade to auger ice, they tend to have gas powerheads atop them.  Still, they have a dedicated following, as the blades can be easily filed for sharpening, and are nearly bullet-proof, even when hitting sand or other debris on the ice.

Flat-style blades have also been around for some time, though almost primarily on hand-augers.  While they are curved along the length of their cutting edge, they sit almost flat against the ice, hence their name.  As a general rule, they cut rather inefficiently, which is a real problem with thick ice when human-powered.  That said, when spun fast enough on a power auger, either electric or gas, they provide a medium cutting speed and can also redrill old holes, though not as well as a chipper style blade system.  This hybrid style of blade systems has come back and gained in popularity when paired with electric augers.

Photo Credit - Ben Larson - In-Depth Media Productions

Photo Credit - Ben Larson - In-Depth Media Productions

The last cutting system is a shaver-style blade.  It is curved, both along the long edge, and short edge of the blade, as if someone grabbed both ends of the blade and twisted in opposite directions.  They’re often serrated, and lazer-sharp, relying on cutting angle and a precise pitch to shave and slice in a true corkscrew fashion.  They are by far the fastest cutting system, whether as a single-piece end bit, or with replaceable blades that typically require professional sharpening.  Those blades are precision cutting instruments that shave the ice, but do so aggressively, allowing the auger to drive deeper with each successive turn.  That said, the edges carved out make re-drilling old-holes a bit trickier than with the other systems.  To re-drill old holes with a shaver-style blade, you need to only proceed until water appears.  At that point, stop turning the bit, and simply lift up.  Continuing down and under the ice makes the edges of the auger flighting catch on the way up, and can create difficulty in pulling it above ice.  They’re also a little bit touchy when it comes to hitting debris or sand on the ice, so carrying replacements is a good idea.

In part two, I’ll describe a handful of anglers and what pairings match best to specific situations on ice.  While no one auger can do it all, the goal is to best suit the majority of icescapes you encounter.          

The Right Ice Auger for the Job – Part 2

Photo Credit - Ben Larson - In-Depth Media Productions

Photo Credit - Ben Larson - In-Depth Media Productions

Now that you know not all augers are created equal, it’s time to provide some common ice fishing situations, and prescribe the right ice auger for the job.  Of course, there will always be variations to your fishing, in terms of everything from location and species, to ice thickness and the shelter you fish in.  If you’re going to settle on a single auger, you’ll likely need to put up with some of the inconveniences which certain powerhead, auger bit, and blade combinations create.  All of which we’ve been doing for years without even really knowing it.  That said, just as with different fishing rods, specialized tools can make any job more enjoyable.

Panfish-Only Anglers – It’s surprising to most anglers, but there’s few panfish, even exceptional trophy panfish that won’t fit through a 6” hole.  Most will fit through a 5” hole.  Why go so small?  Because it’s simply easier to drill more holes, faster, and with less effort than with larger auger bits.  For finicky gills and crappies, more holes can really make all the difference, such that have a large, heavy auger can not only require more time to drill the same amount of holes, it can prevent you from drilling more and finding more fish.  To me, the perfect panfish rig is a 6” shaver style blade and auger bit system, with a trusty electric power source of your choice on top of it. 

Southern Style – If you live in the southern portions of ice territory, consider a hand auger, but make sure it has the shaver or lazer-style blades.  You’d be amazed at how fast they’ll cut 4-8”es of ice, and chances are if you’re living here, you might not cut much ice in a season anyway.  This is a cheap way to make short work of ice, and step light while doing it.

Photo Credit - Ben Brettingen

Photo Credit - Ben Brettingen

Predator Chasers – If you chase big pike and lake trout, you’re somewhat committed to a 10” bit.  Also, because of the locations of these fish, you’re probably looking at thicker ice than usual, and a gas or propane powerhead will be required to turn those larger bits.  Some of the beefier electric units out there will spin such bits, but depending on how much ice and how many holes you’re cutting, you might be wishing you had more reserve run-time.  As far as blade-styles, you’re probably cutting a new hole each time, so the shaver styles will cut them faster and with less effort.

Wheelhouse Crowd – For anglers in a wheelhouse, fumeless is the way to go, as you’ll be occupying that same airspace for some-time after the holes have been drilled.  While there is the potential to re-drill old holes in the most extreme of circumstances, Wheelhouse anglers are typically pulling their house off the lake after each trip and relocating to a different lake or area each time.  In that respect, the advantage goes to a shaver-style system with a heavy-duty electric powerhead on top.  This allows you to move a few times per day even, as well as drill tip-up or extra scouting holes outside of your shelter without running out of battery power.  Consider the flat-style or hybrid blades should you keep coming back to the same wheelhouse day after day, weekend after weekend.  As for auger size, 8” or 10” is standard, with some anglers preferring a 10” hole because it freezes out slower, and other anglers preferring an 8” hole because fish have a harder time turning around inside of it and swimming down. 

Permanent Dwelling – If you re-located only a handful of times per year, your number one consideration should be re-drilling old holes.  While a chipper blade system will perform best here, few chipper systems exist on any platform but gas augers.  If the fumes bother you, go with an electric powerhead and flat-style blades.  If you’re split on the matter, utilize a propane powerhead with the chipper systems available for the easiest hole re-opening and relatively few fumes. 

Portable Patroller – For the angler that roams the open ice sheet, drilling to the ends of the horizon, the ultimate ice auger is gas-powered with shaver-style blades.  Nothing cuts easier, faster, or longer than this combination in a standard 8” size.  That covers almost all bases, and will serve you for about any ice situation without feeling like performance is a problem.  As I’ve written previously however, the new electric systems are seriously pushing the limits of what your mobile angler of today needs.  New Lithium powered models that punch hundreds of holes in a foot of ice will serve the vast majority of even the most auger-happy angler.  For the northern portion of the market however, you’ll be wanting gas from February forward, especially if you’ll be needing an auger extension as is common in that part of the ice belt. 

If you don’t fit any of these categories, I’m positive that by now you know enough about each feature and its attributes to build your own perfect machine.  What’s more likely is that you fit several of these categories at once.  At which point you’ll have to choose either what’s the most common type of fishing you do, or purchase another auger to serve the other end of your needs.  Yet another option is to buy additional auger bits that feature a different size or cutting system, such that one powerhead can turn both.  This is a great way to address a few situations at once, such that you’ll never be left needing more from your ice cutter.

Of course, the entire conversations demands the question, “Why does all this matter?”  The answer is that to any one individual, it may not.  To me however, each hole is a cast.  To the open water angler, recreating the exact same cast is only an option when it continues to produce.  Naturally, when that cast’s magic wears out, it’s time to cast elsewhere.  The same can be said for fishing on ice.  When I’m not catching where I’ve drilled, I drill more, and any impediment to me drilling more holes is a limit to the amount of fish I’ll catch.  Naturally, we make concessions for comfort, and employ a host of methods to make up for our unwillingness to move, yet even for the house-bound crowd, having the right auger for the job makes it far less of a “job.”