Photo Credit - Ben Larson - In-Depth Media Productions
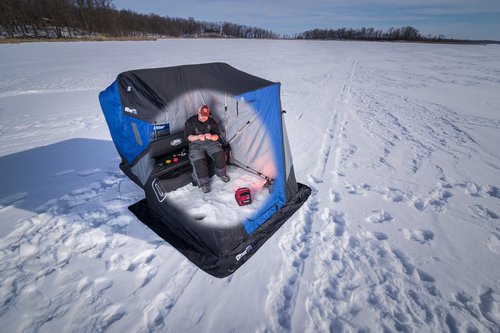
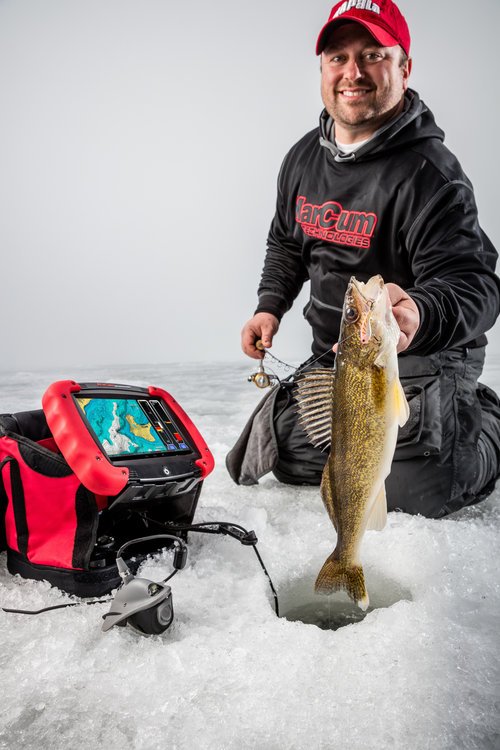
Featured - The Marcum RT-9 Sonar/GPS/Camera Combo
GPS On Ice – Uses and Abuses
“Quit fishing a memory Joel,” quipped a grinning Brad Hawthorne, who in his own right is an incredibly successful ice guide and general thorn in my bibs. That stung, because he was right. Trading jabs down the break, we both punched holes relentlessly from sand to rock near some forgotten island on Lake of the Woods. No matter how high in the air I held my GPS unit, or whether I shook it, smacked it, or pressed all the buttons, it wouldn’t seem to put me right between the two truck-sized boulders we smacked walleyes on mere weeks ago. Furthermore, when we did find the “spot on the spot,” my hand-held GPS unit wouldn’t put fish back there either.
We’ve all been guilty of letting a waypoint somehow distort our real-world thinking, causing us to ignore everything right in front of our faces in favor of some digital confidence. Obvious evidence, along with at times general courtesy, is thrown to the wayside so we can attempt to reclaim the “spot” that once was ours. Eventually, the very things that make such a location great for fishing are forgotten in the effort just to get back to that prime piece of underwater real estate.
So take it from someone who has learned the hard way, on-ice cues and clues will trump rose-colored GPS screens just about every day of the week. Your GPS unit is nearly worthless without sonar and many times an underwater camera, to verify depth, substrate, and a host of other variables that aren’t directly or otherwise visible. The valuable information you gather from each of these tools work in concert to give you more than just a spatial location, but great intel about that specific spot. Baitfish presence, weed-growth, slope direction, visibility, and other factors will cue you in on current conditions, which are far more important.
Still, there’s something to be said for areas that continually produce because of a perfect train-wreck of factors all combined to predictably draw fish year after year. Still, we need to up our GPS game, and here are a few tips to doing just that:
Collecting Waypoints – Many issues start here, and are based solely on operator error. The process sounds simple, but not so fast. GPS technology requires ample satellite coverage first and foremost. In fact, for survey-grade accuracy, many technicians that collect GPS data for a living do so during a planned part of the day with the best satellite coverage, thus having the best accuracy. While you don’t need to head to the lake at a pre-ordained time of day, you can do yourself a favor by giving your GPS unit enough time to acquire satellites and reduce the EPE (Estimated Positional Error) or PDOP (Position Dilution of Precision), both of which are often listed on your screen. A GPS unit that’s powered up, then taken to immediately drop a waypoint, tends to suffer poor or higher EPE, meaning that when you go back to find that exact spot on the lake, you’ll likely have a hard time because you were never accurate in your digital collection of it to begin with.
Finding Waypoints – Similarly, trying to navigate to a waypoint with a degraded signal only makes finding it that much more difficult. Additionally, moving, then stopping, then moving again creates issues with many GPS units’ tracking abilities. Moving at a reasonable pace, either on foot or by machine, in a constant manner allows for the best tracking and representation of where you’re actually at in relation to a waypoint of interest.
Managing Waypoints – I can’t tell you how many times I’ve had to re-learn, even recently, that poorly labeled and saved waypoints can distract and confuse you. While out on the ice, every year, fishing trip, and associated details tend to blend into one as you try to determine the difference between waypoint “328” and waypoint “rock.” Famed guide Tony Roach once told me that his dad used to save waypoints on Mille Lacs mud flats such as “Arnies8pounder” and “Tonys10pounder.” Given the success of the Roach clan, eventually even all these points start to look like noise and become difficult to assess from afar. Point being, be descriptive about the spot, maybe even indicating depth, while deleting points that turn out to be false leads.
Refining the Spot – Here’s where sonar/GPS and camera combos become incredibly useful. Use GPS to get you close, sonar to get you closer, and the underwater lens to put you right at the heart of it. How often have you been fishing where the guy in the house over is pounding them, while your sonar screen is blank? This type of precision is especially useful when parking on a significant but small piece of structure, especially for a longer period of time. I know I wouldn’t plop down a wheel-house or other permanent without being extremely confident of what I was sitting on. Of course this involves at times a serious hole drilling session, especially in stained water with its limited camera visibility. That said, of all the very best ice bites I’ve ever been a part of, this kind of digital finding then mechanical drilling and checking, has always just been a part of the game.
Our generation’s crutch has become the GPS unit, though there’s still so much great information to glean and explore, especially from a safety and navigational perspective. The generations before were ultra-concerned with depth, thinking that if they found fish in 14 feet of water on one part of the lake, then naturally they’d be at the same depth on the other end of the lake. Often, they were right, just as we are to assume that fish caught on one spot today, may be there in years to come. That said, it’s best to treat our GPS information as just another piece of the puzzle and give equal weight to our sonar and visual, in the quest to repeat the bite.