When To Fish OUTSIDE the Wheelhouse

Fishing Outside the Wheelhouse

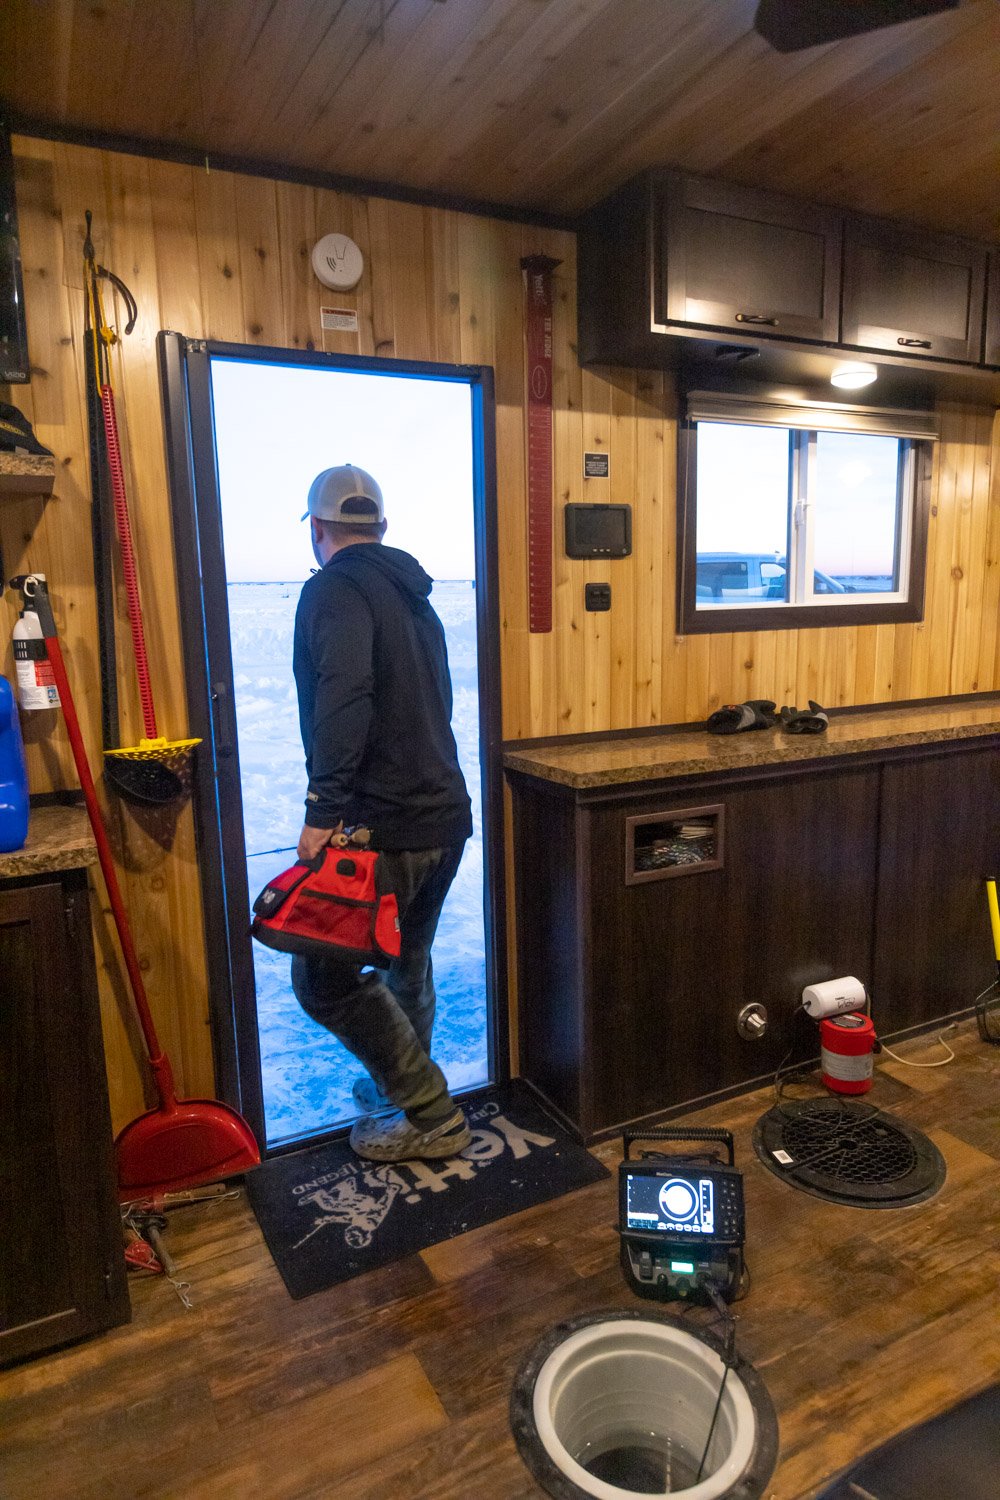
There’s much to be said for the comfort, convenience, and sheer enjoyment of fishing inside the wheelhouse.  You’ve invested a considerable sum of money, and likely the time it takes to trick it out.  Surely, it would be madness to embrace the idea of fishing outside the very shelter you worked to make comfortable inside.  That’s what I’m suggesting you should do.  From time to time anyway.  There’s a host of situations, and methods for getting the most from your wheelhouse experience, which revolves around a bit of outside time. 

Wheelhouse Setup

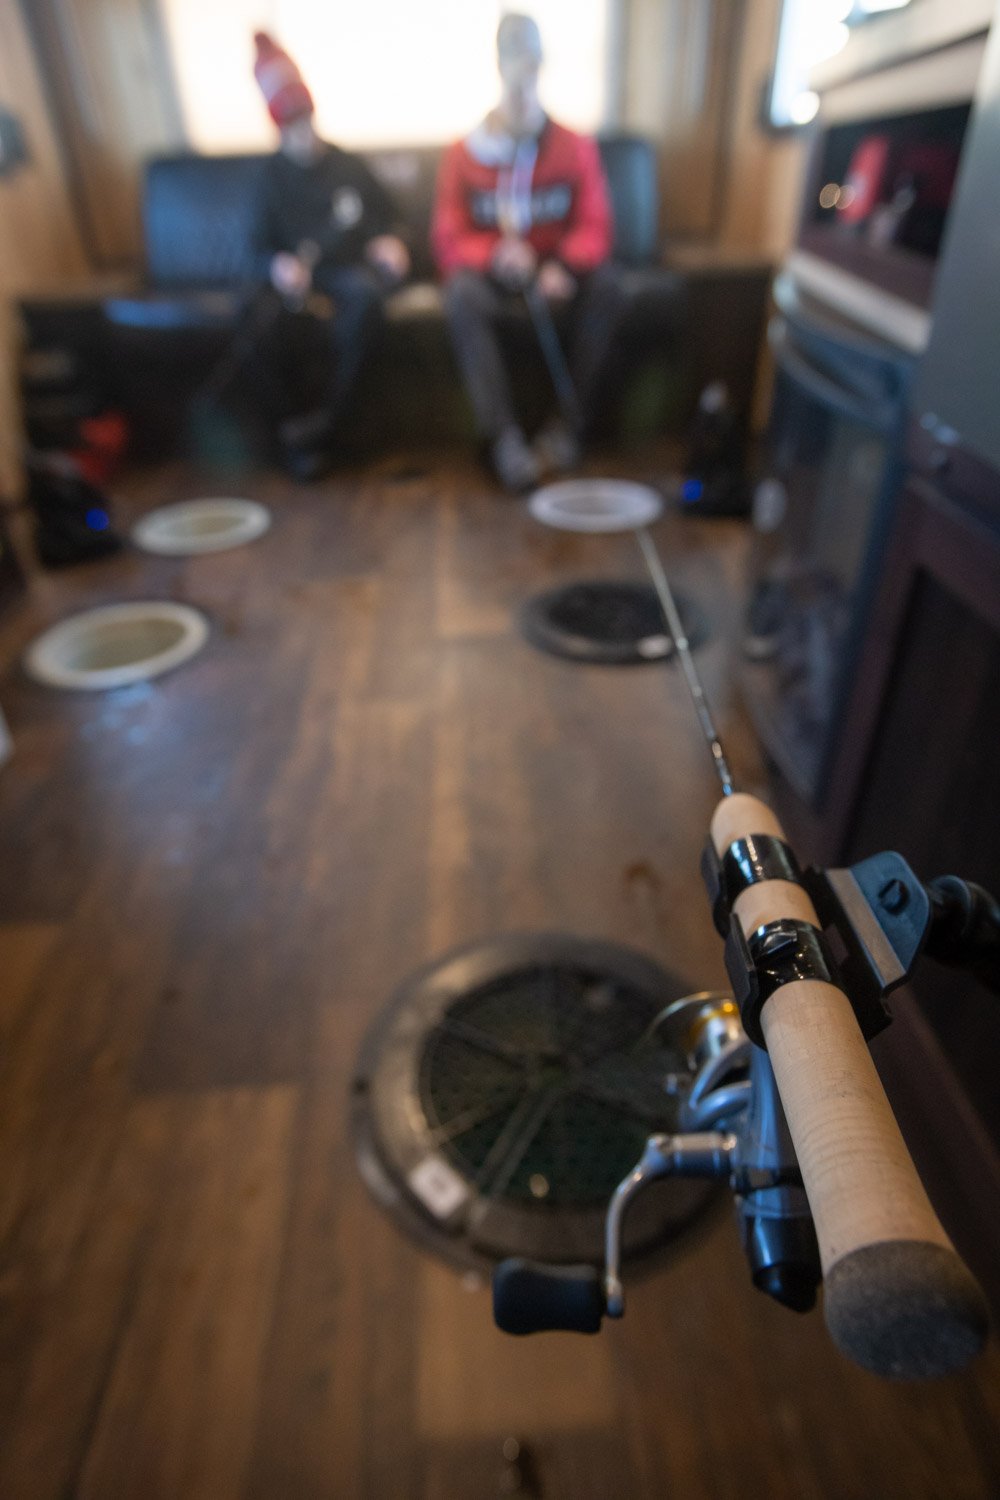
Quite often, I’m considering my options for outside fishing, as well as fishing inside the wheelhouse, before I ever lower it to the ice.  On classic structure situations, where I’m setup on top-of, or the edge of prime real estate, I’m typically expecting fish to push up and feed during low light hours.  In that scenario, I’m trying to park near a host of interesting structural features to cover a variety of ways.

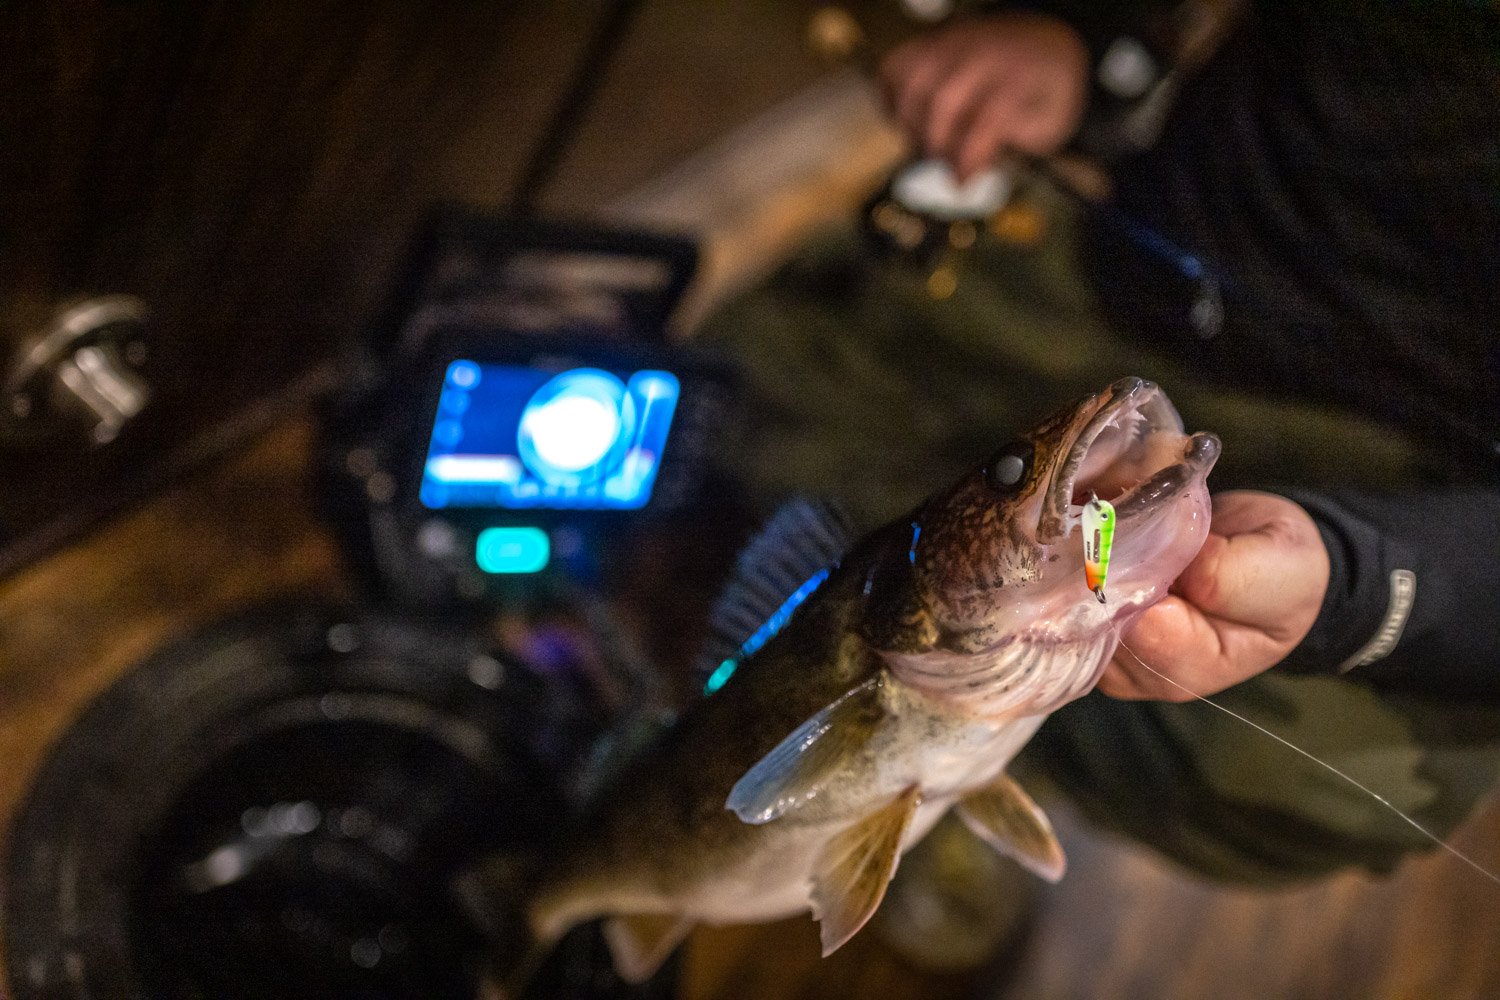
Tip-ups, Finicky Foolers, or I-Fish Pro setups are great to monitor the tops of reefs, or nearby depths at the base of the break, provided you can set them within legal distance of your shelter and still cover the piece of structure you’re on.  As a deer hunting analogy, consider them a trail camera that gives you visual confirmation that the fish have arrived.  Use the extra lines available to you with additional anglers to cover shallower and deeper, then let the fish and their patterns dictate how you proceed.  There have been times where I’ve found an incredible all day bite and actually moved the Yetti because of all the fish I’m getting on tip-ups in a certain area.  Other times, I’ve been able to determine key time periods to hole-hop versus sticking it out in the shelter.

If I’m with a group of like minded anglers who wish to carve up some ice, I’ll often setup the wheelhouse on a small point, indentation, or other piece of structure along a breakline.  The idea is that I’m going to retreat back to the shelter again during low-light, but spend many of the waking hours in two groups.  One group works up the breakline, drilling holes and dunking baits, while the other group does the same in the other direction.  There are times when we find some pretty cool bites, simply by deploying two teams in both directions.  The wheelhouse then is more a base camp than it is a shelter, but should we locate a piece of unmapped structure, a pod of baitfish, or huge school, we’ve always got the option to move the wheelhouse. 

Portable Options

While it may sound crazy to let a perfectly good wheelhouse sit empty, at times, I’m employing a portable shelter option along with the wheelhouse to enjoy fishing in different ways.  It’s always nice to have a pop-up shelter along no matter where you’re fishing.  For the money, they present a great deal of fishable space, but also the opportunity to stow an insulated shelter with little space requirements.  They pack up quickly into a small bag, store well in the back of the truck, and serve as an outside outhouse should nature call and you don’t want to use the inside shelter. 

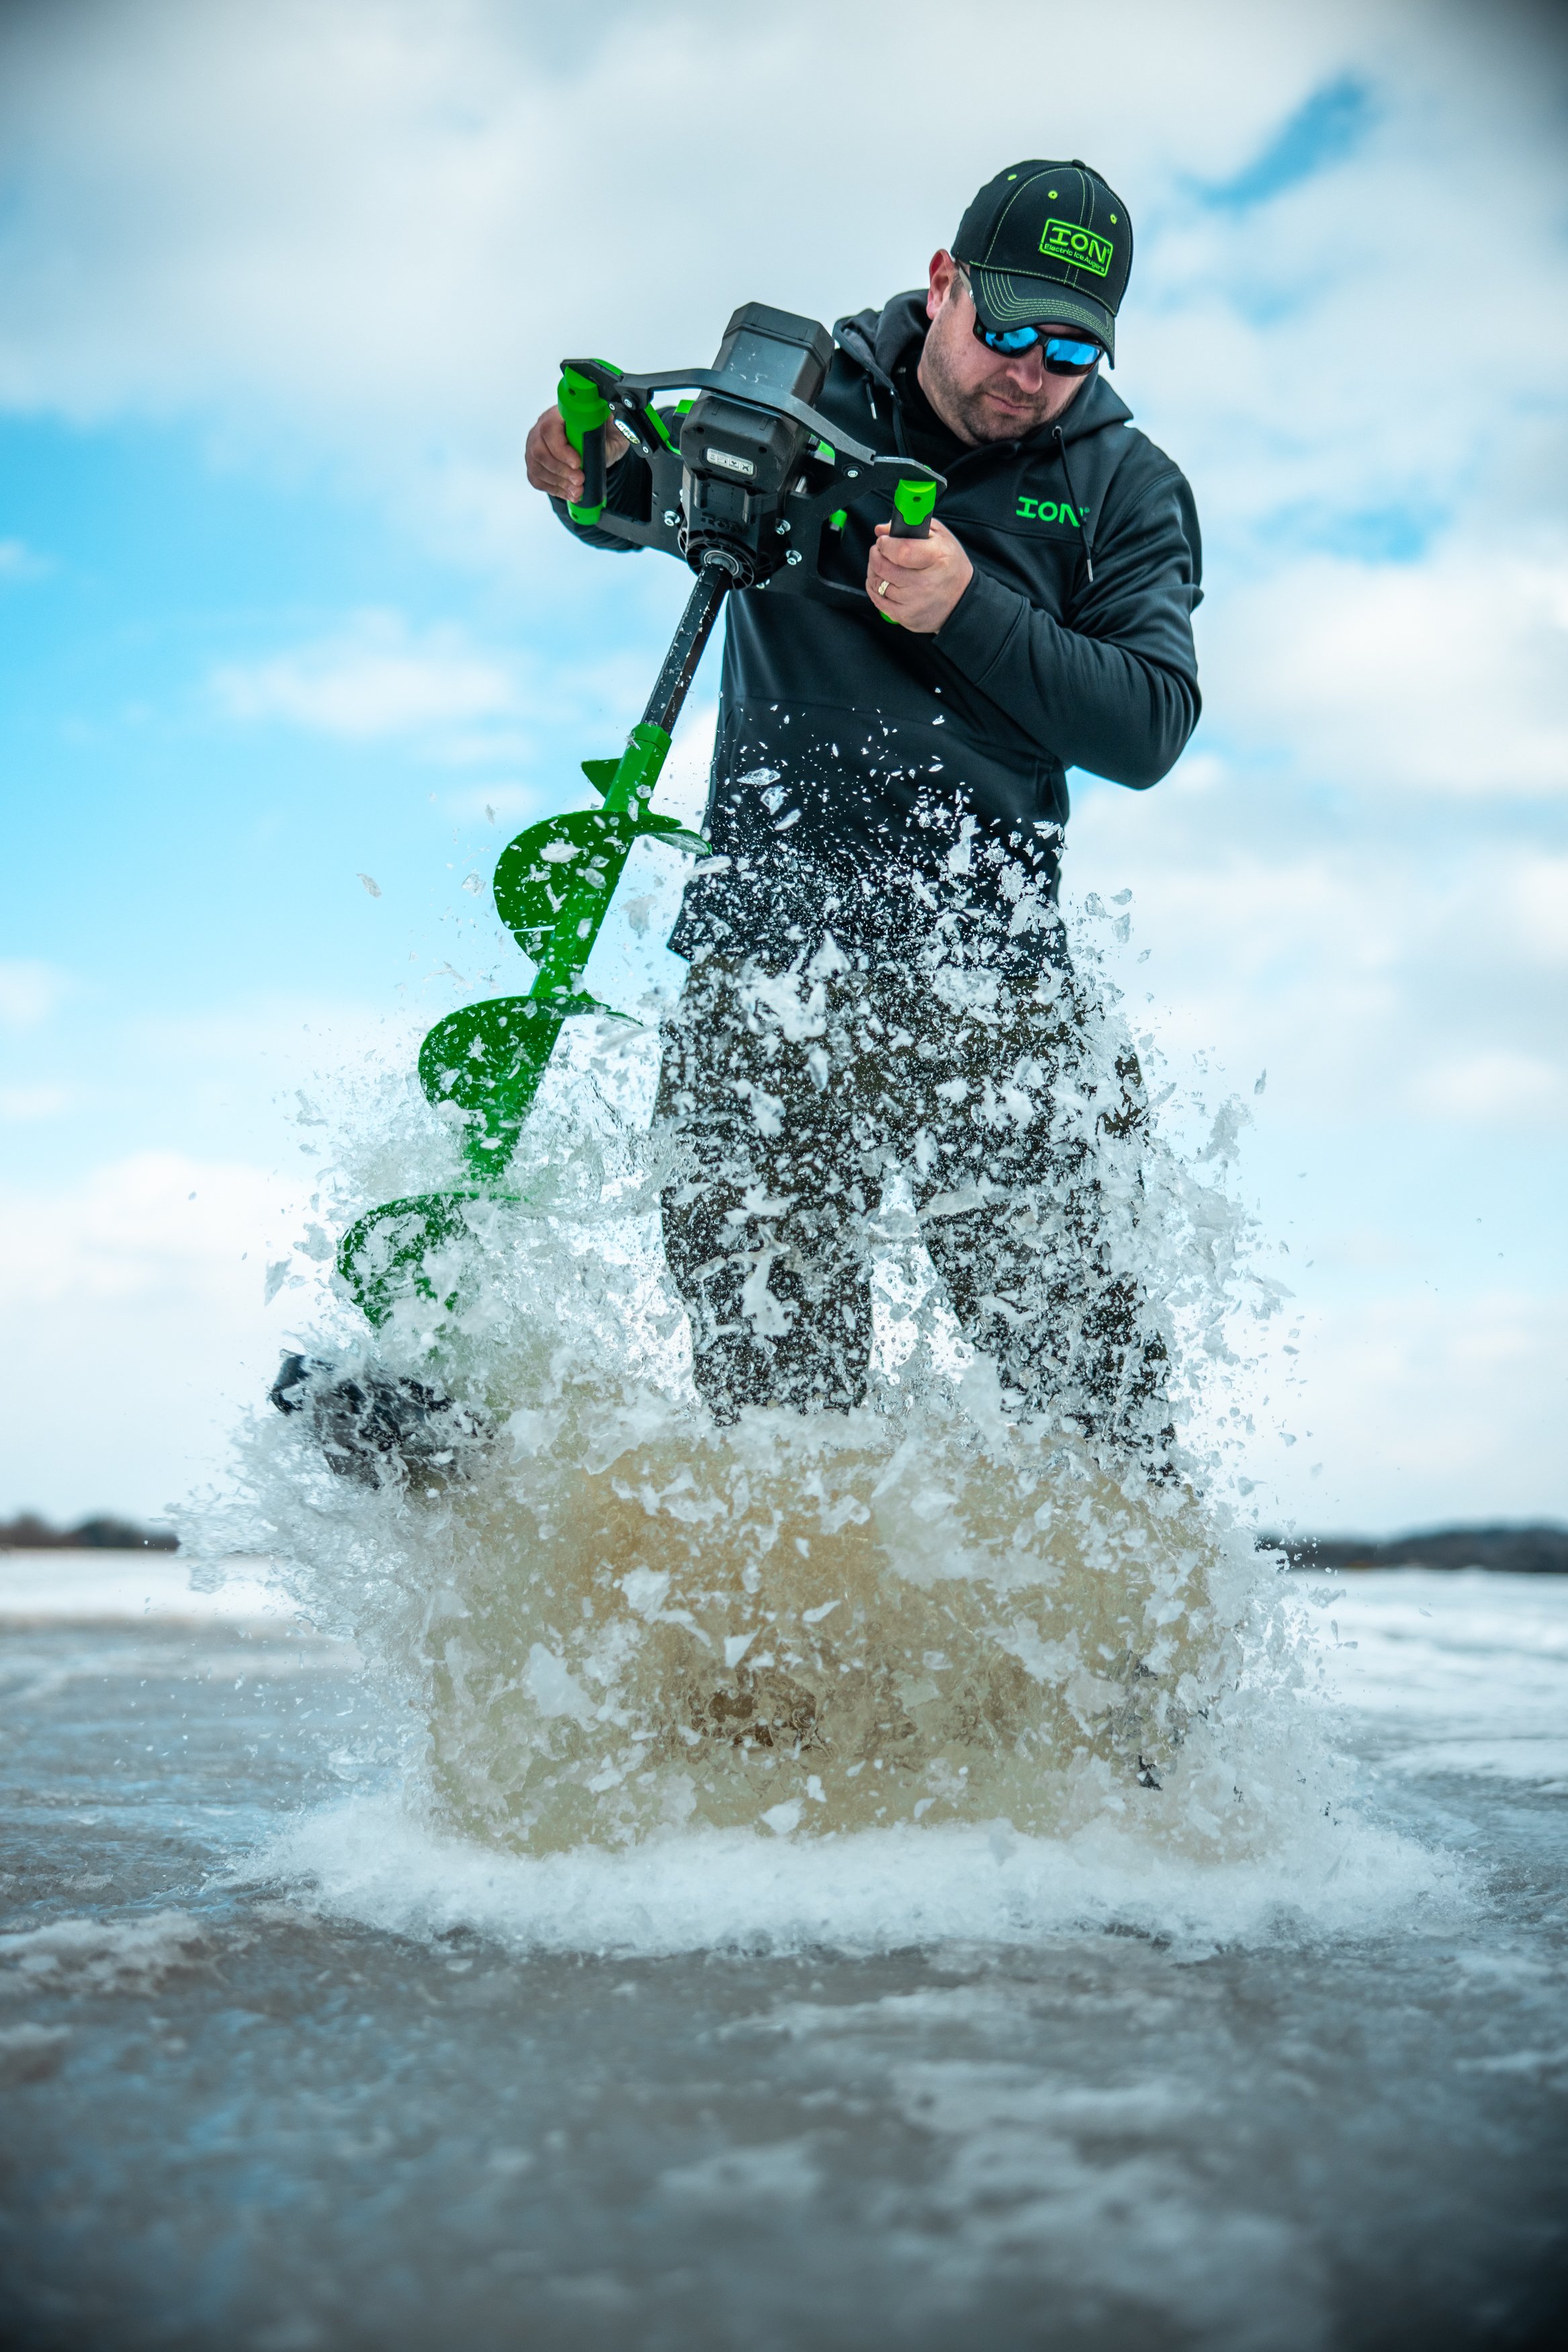
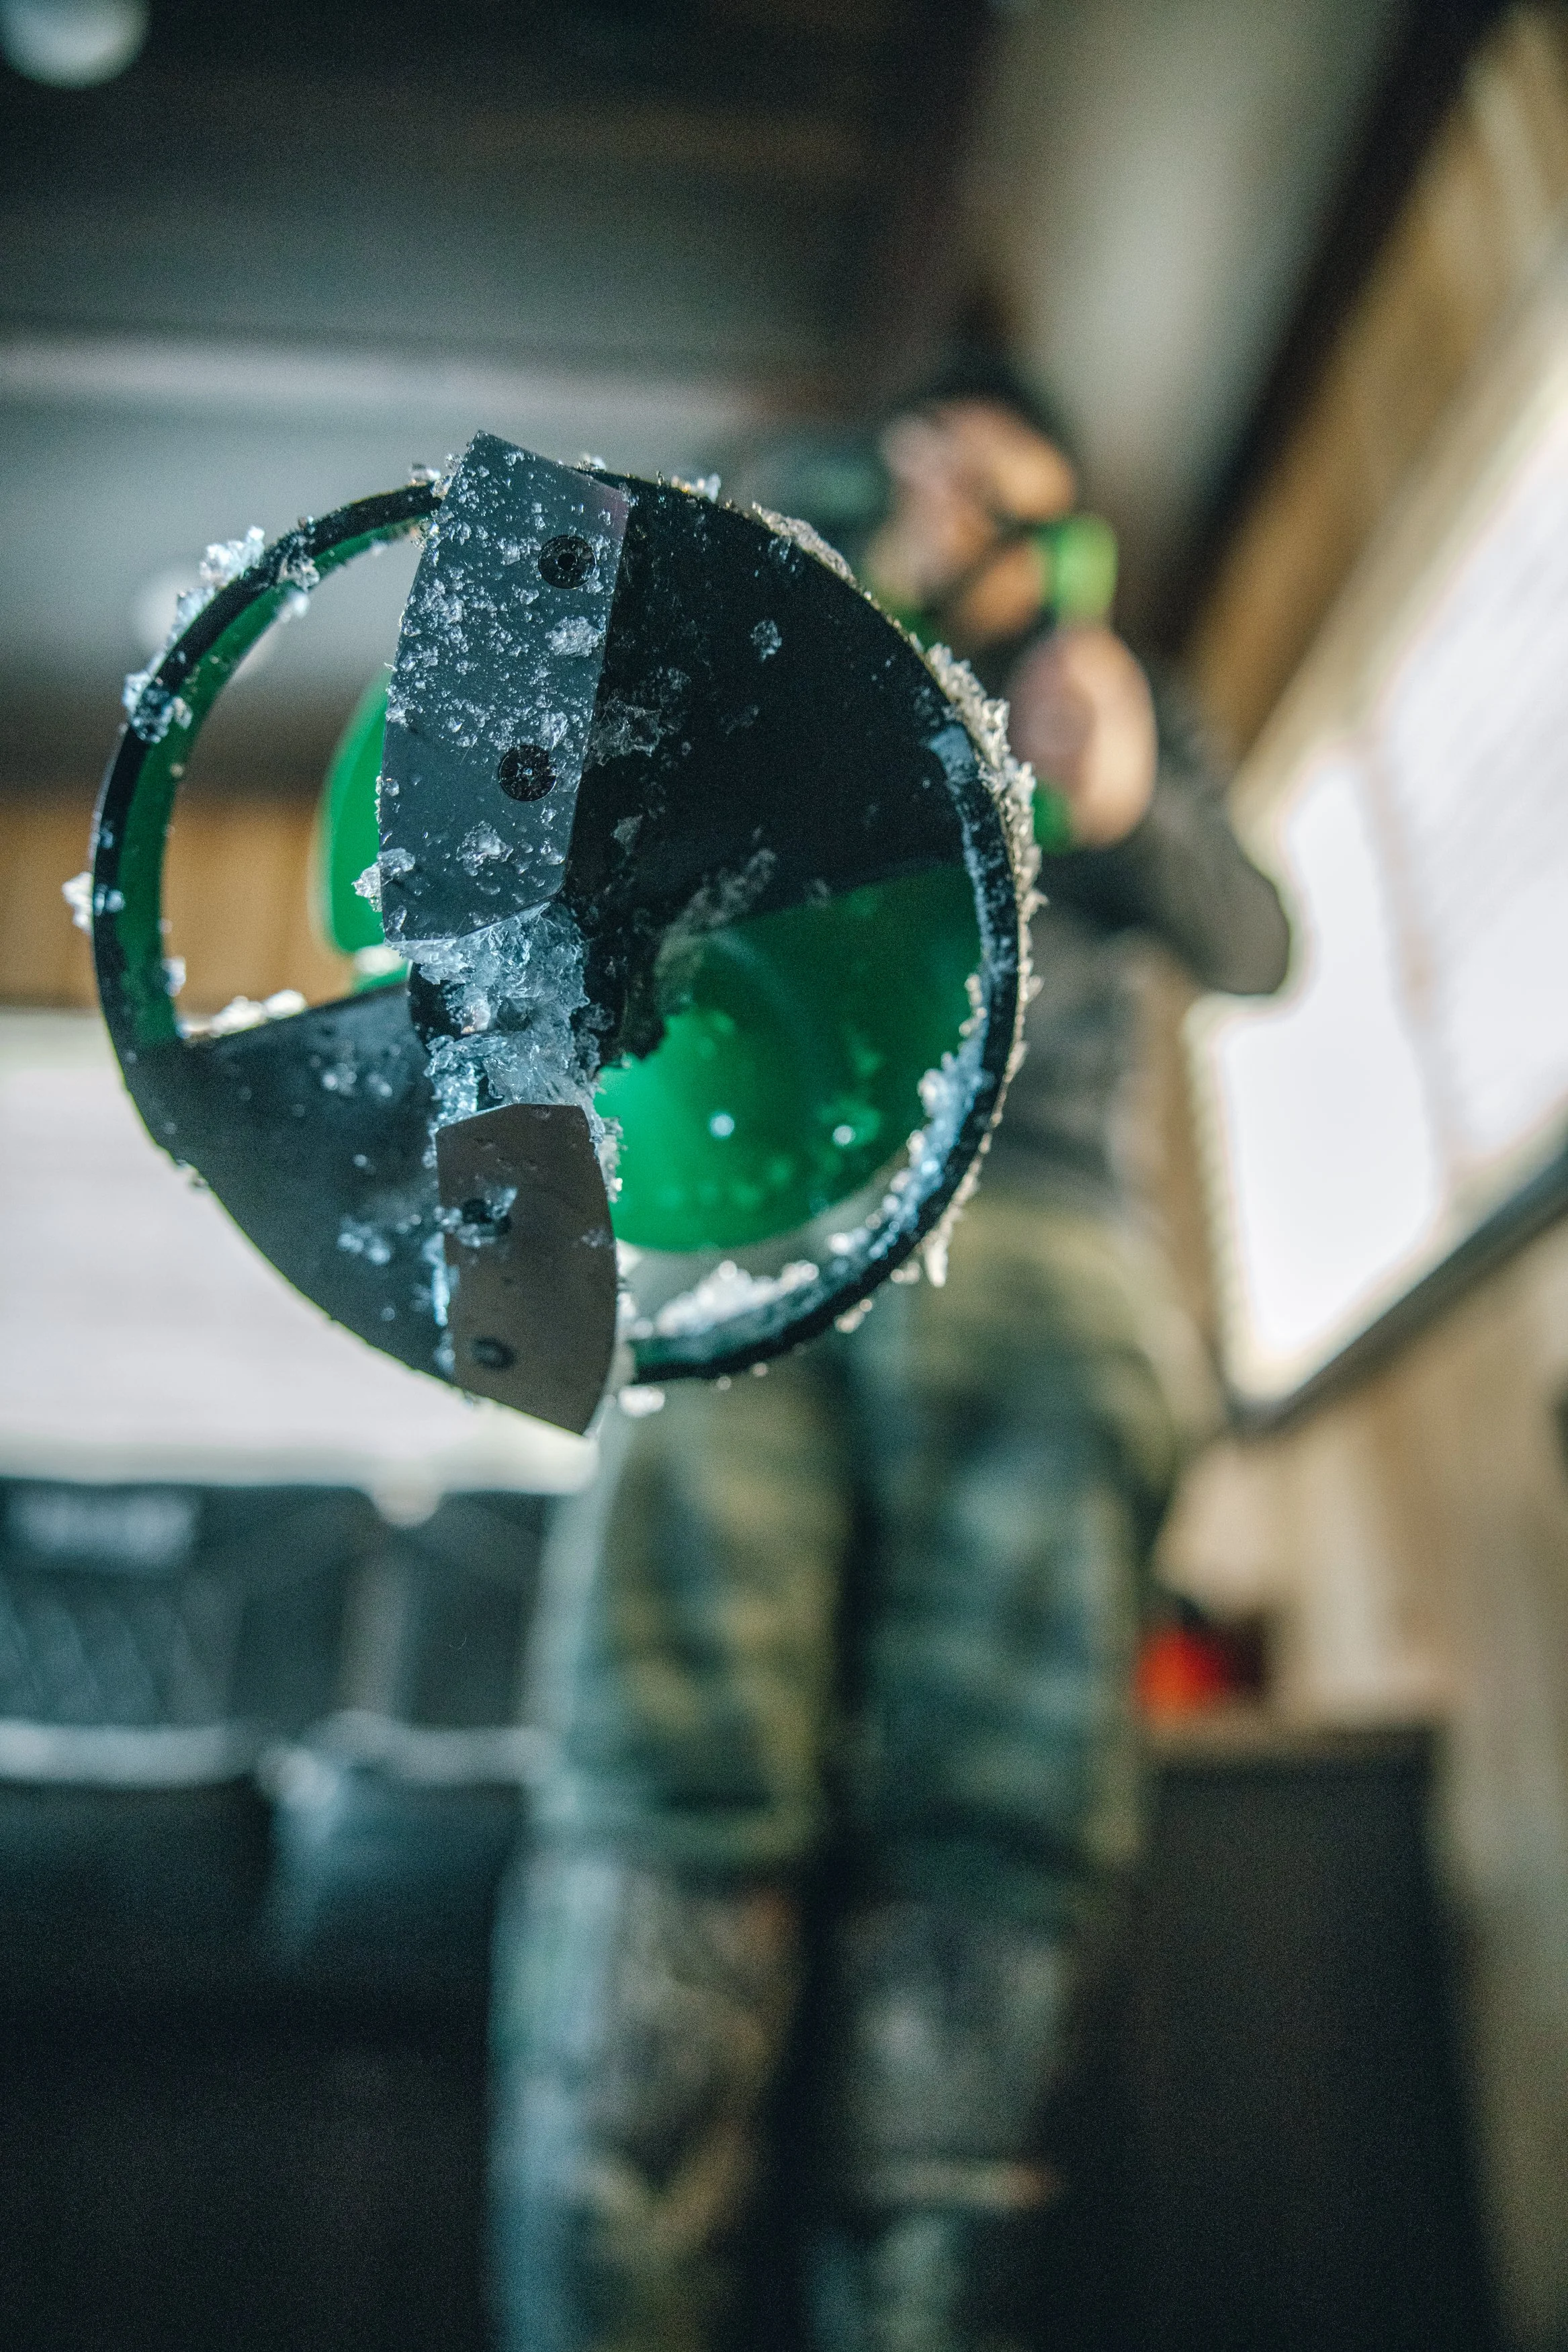
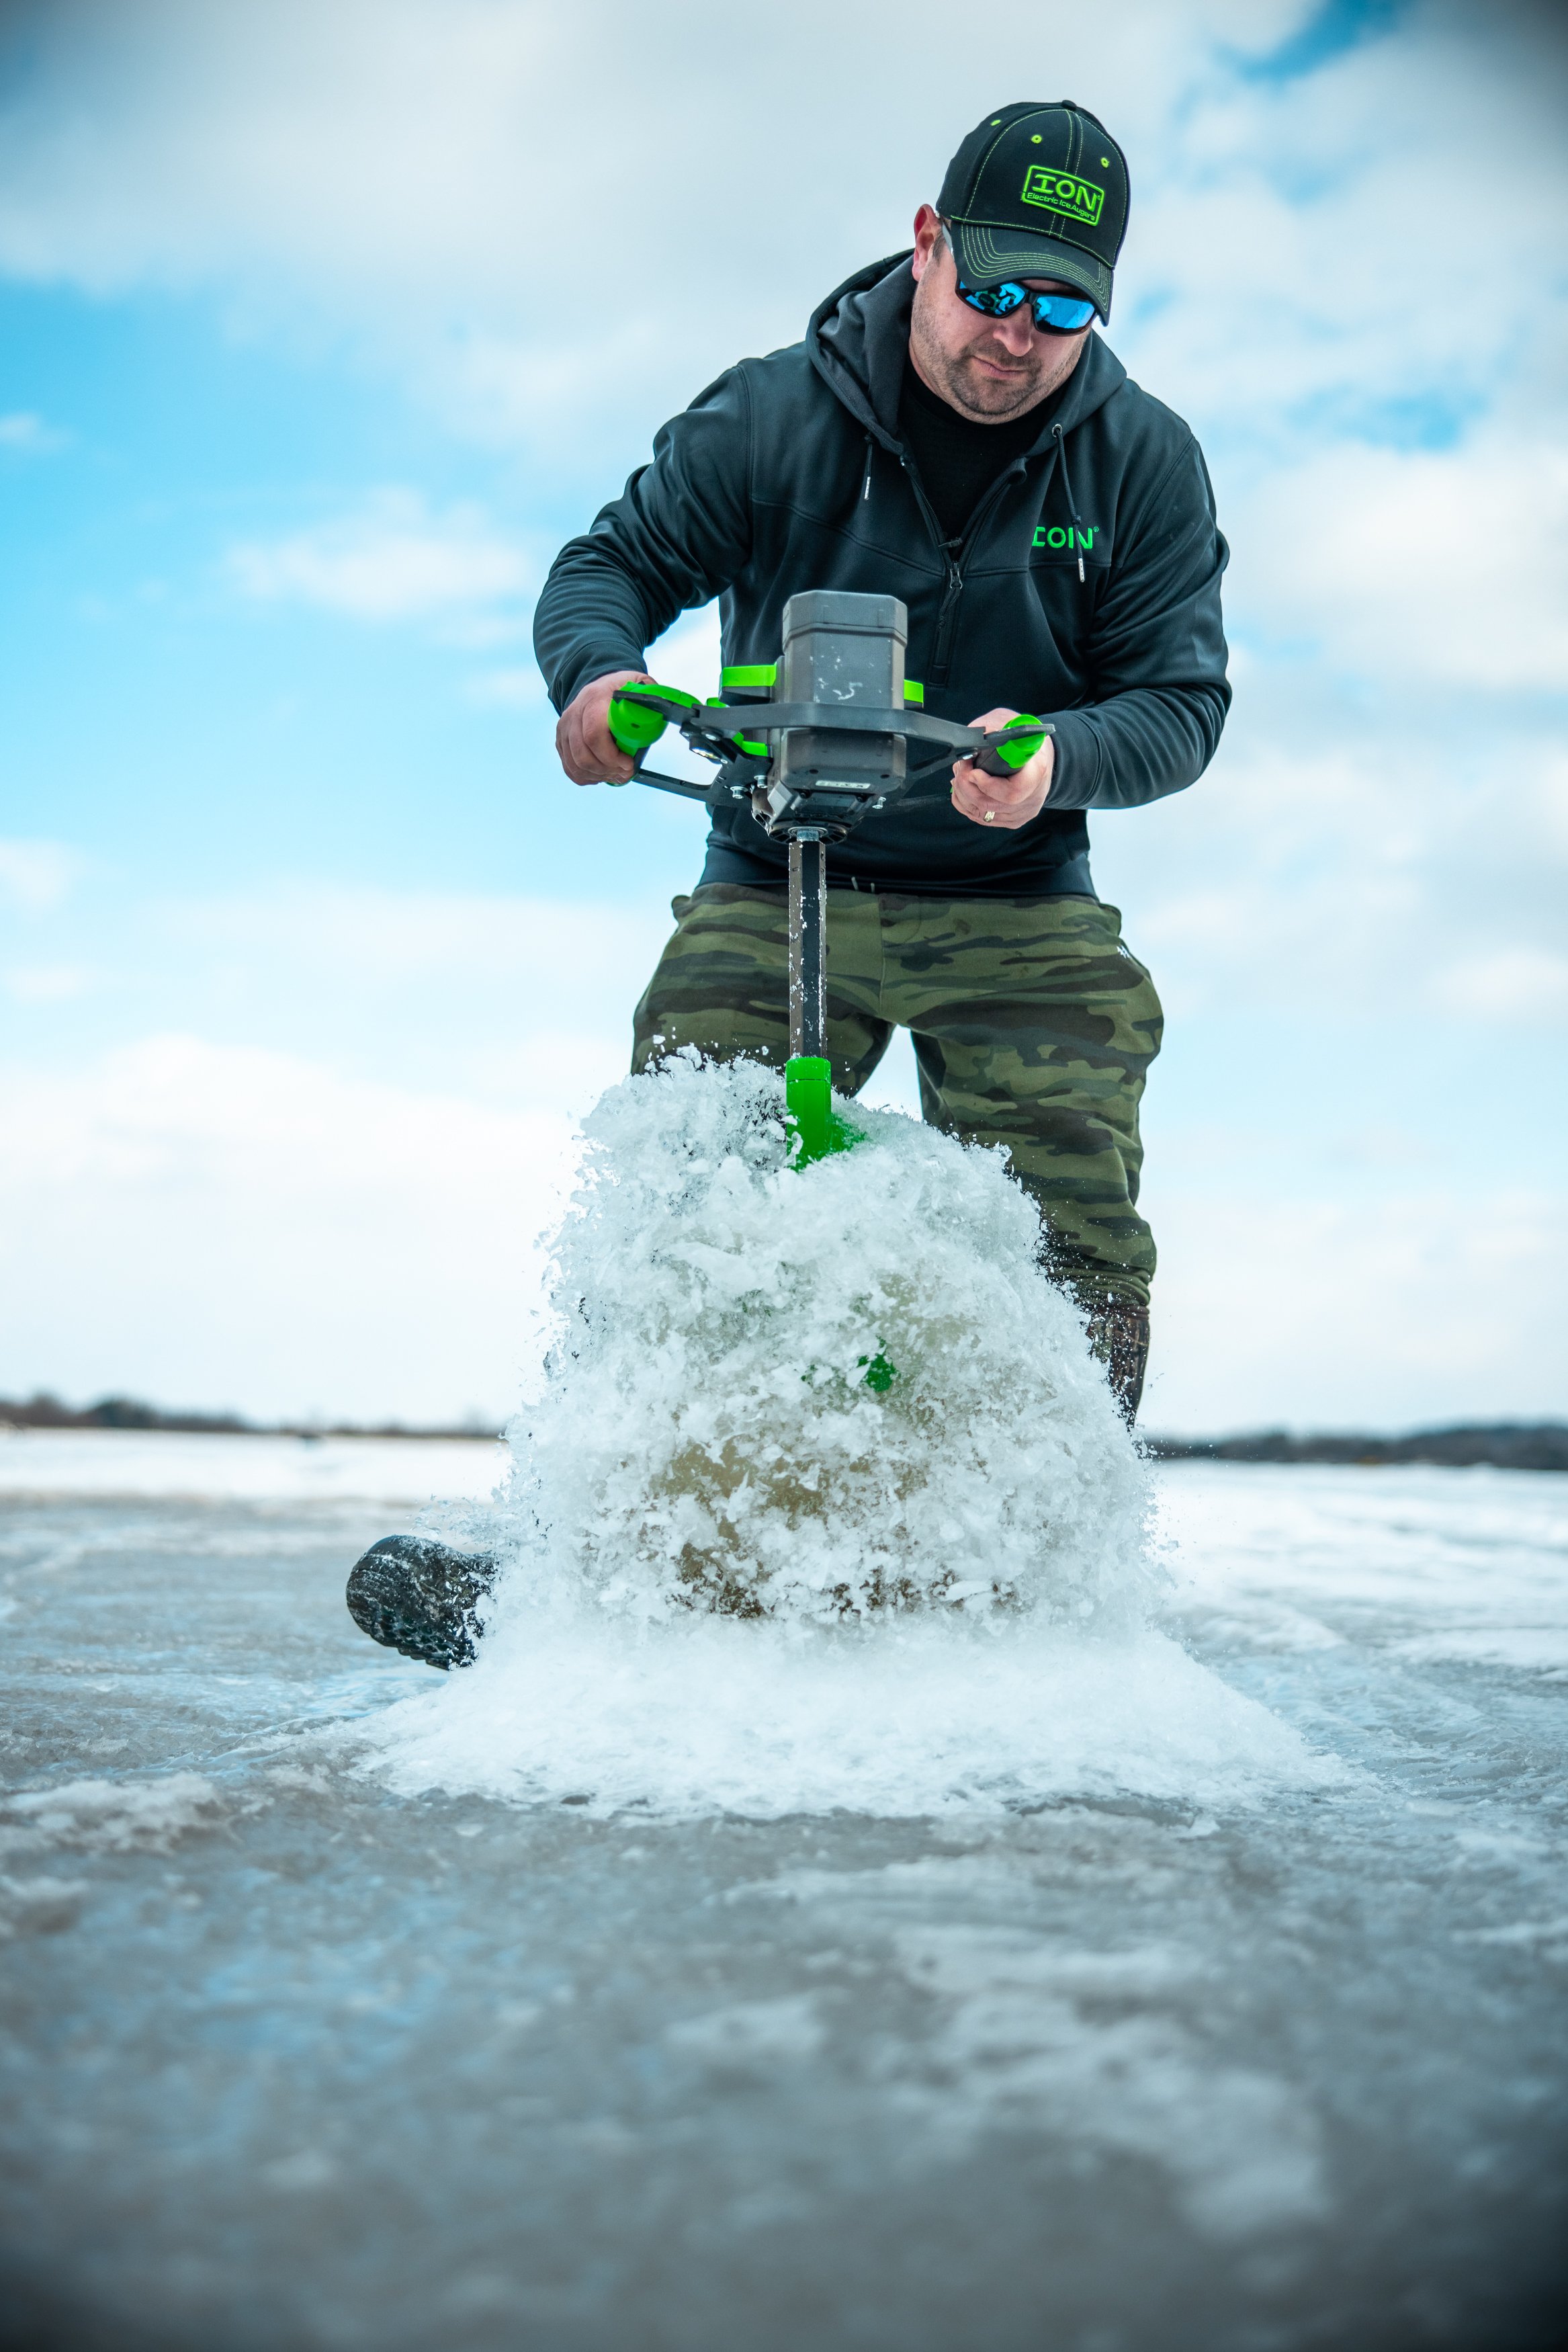
Quite often I’ll setup near a pair of rockpiles with the wheelhouse on one, and my boys in a portable nearby.  We keep tabs of fish location and spend time debating over who should move where.  It’s a fun process, and also keeps stir-crazy types out there and active.  The pop-ups are a bit simpler to move than even the hydraulic wheelhouses, so for small moves or fish that like to travel like perch, they can make a real difference when it’s extremely cold too. 

One option that’s really fun is to spend some time shallow in the small portable popups during the day, if fishing on a lake with reasonable clarity.  Finicky mid-day fish can be found on weed flats, but often it takes some visual confirmation to tease them properly.  That’s where it’s nice to close all the windows in the pop-up and look straight down the hole to see fish inhaling your bait.  It’s an addictive experience, and can again, break up the monotony of a multi-day trip with too many people in too small an area.  Again, the wheelhouse is the perfect base-camp to launch these adventures from, even if you don’t fish exclusively out of it. 

When to Fish Inside and Out

On the surface, it’s easy to say that you should fish low-light on the structure inside the wheelhouse, and hole hop around during the day.  Often, it’s a bit trickier than that depending on your setup.  I’m a firm believer of letting the fish tell me what to do, but it helps to know a bit about the fish before you commit to either location.  Walleyes will simply travel more and be active during these low-light hunting periods, so it’s best to be stationary in general.  Use the “lost in the wilderness” principle, where rather than searching for the search party, you stay hunkered down in a “findable” location instead of potentially wandering aimlessly away from fish that are also drifting away from you. 

Similarly speaking, it’s best to go find fish during less active periods and put more baits in front of more sets of eyes.  That’s easier said than done, and there are exceptions to that rule as well.  During low light scenarios, if you’re fishing a big piece of structure, fish might be coming up to feed all along and around it.  In the case of a lack of a clear spot from which they’ll approach, you can put more baits in front of more fish by doing some hole-hopping in an organized way.  Often that comes in the form of depth ranges and pre-drilled holes.  So often, early in the afternoon, fish start feeding near the base of a deep mud flat or reef, then work their way up incrementally over the last 30 minutes to two hours depending on the species.  In that case, you’re not trying to hole hop from deep to shallow, you’re trying to ride the wave of fish feeding up the break.  Careful observation of depths that held fish will keep you in the game here, and likely make fishing outside the house more productive.  That is, at least until fish are really flying around and in the depth range that the wheelhouse is setup on.

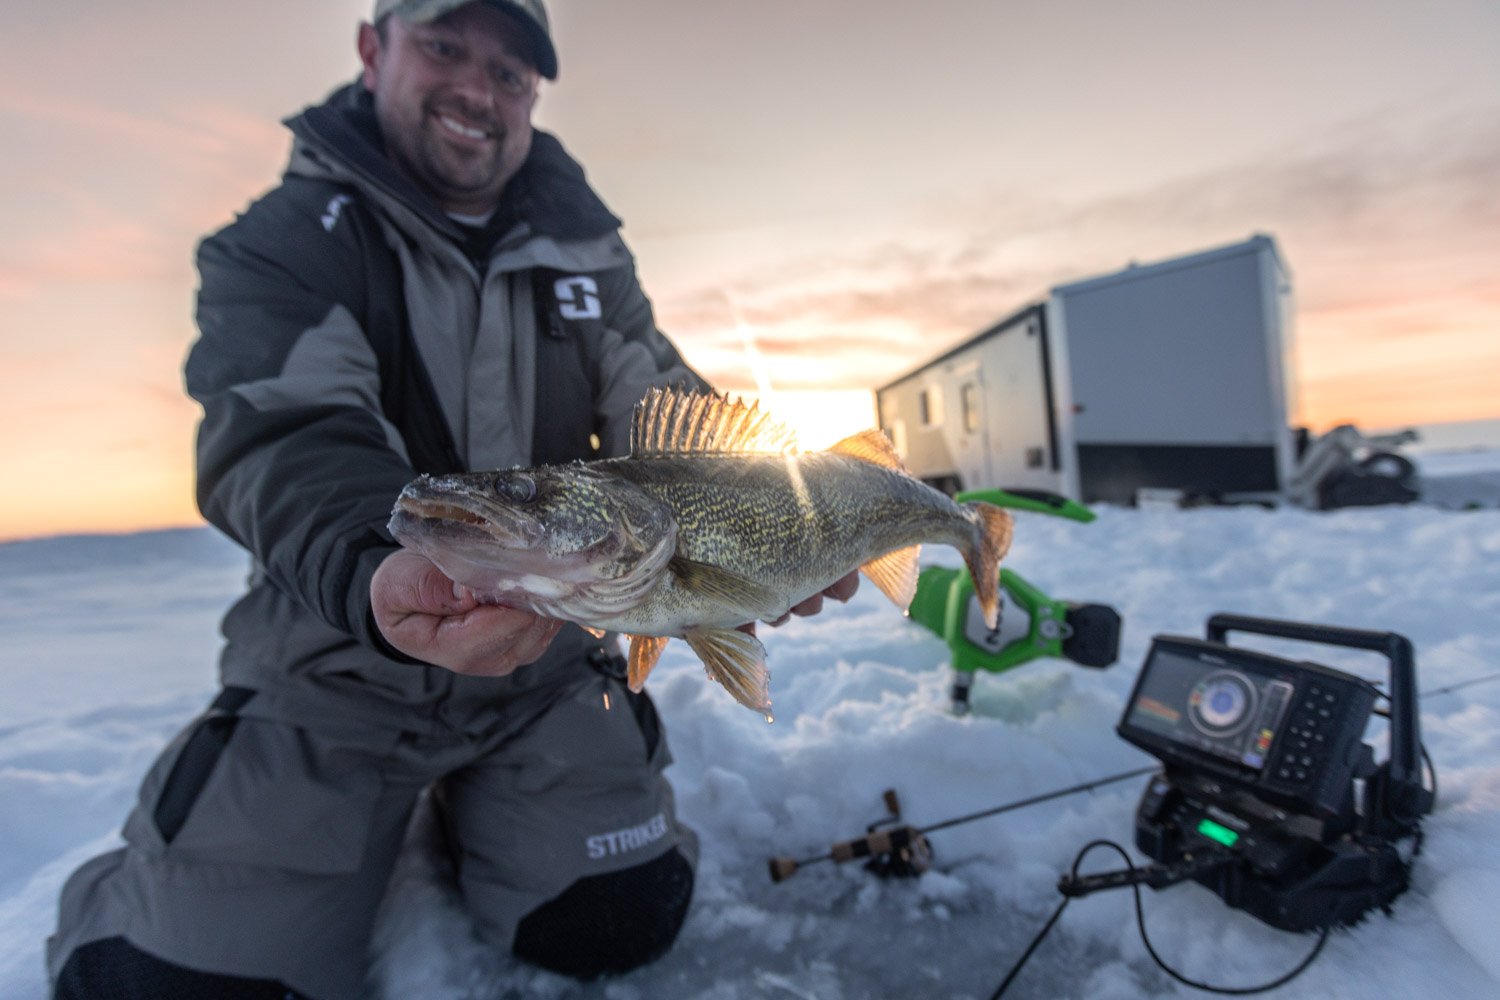
On cold and blustery days, it’s often to your benefit to stay in the wheelhouse, and not just for comfort.  I can think of many panfish bites, and quite a few walleye ones, where being able to precision place a bait in front of finicky fish, makes all the difference.  Dealing with elements like wind-blown line, frozen line, and snowed-in holes makes it difficult to detect a bite, let alone seal the deal and bring it topside.  Mid-winter begs for a rock-solid setup, where you can progress through lure types in a scientific kind of way.  Park on the fish and offer them a smorgasbord, but be ready to really entice and study for bites in a way that simply can’t be done as well in nasty weather. 

Too many anglers own a wheelhouse but don’t utilize it for the basecamp that it is, or consider what’s going on just a short distance around them.  Utilize additional tools like tip-ups, pop up hub shelters, and lightweight augers with electronics to hole hop when needed.  This swiss army knife approach to covering your bases makes you a more well-rounded angler, as well as a successful one.   

Ten Items to Make Any Wheelhouse More Fishable

You know the house, you’ve been in it.  The kind where there’s quite a few creature comforts, and the food/beverage game is on point, but the fishing part of the scenario is underwhelming.  Often, that has little to do with the house itself, and more a function of what’s in it to help assist with the general process.  Far be it from me to tell anyone what to include, especially if the focus is some simple family fun and “camping on ice” more-so than fishing on it.  Yet, there are a number of items that make for a “fishier” time in general.  Here’s a look at my top-ten list:

1.       The Right Rod Holders – The best rod holders are flexible, interchangeable, and handle a variety of rod types, lengths, and configurations.  I’m a fan of the Catch-Cover rod-holders for a few reasons.  I love the disks I can locate throughout the house, such that a single hole can have multiple disks and options for where that rod can be held.  I also like the ability of these holders to “give” in the sense that their rotating handle bows back to the fish so they feel little to no resistance.  Lastly, you’ve got to be able to simply pull the rods out with little effort or problems.  Full cork handles help in these scenarios, so it’s a function of rod design as well.

2.       Bump Board – Fish will be caught, at least that’s the theory.  Increasingly, we’re fishing waters that have special regulations and a good ruler is a key player here.  Stickers on the wall are “OK” but don’t give you as precise of a legal definition of the fish’s length.  Pinch the tail, bump the fish’s nose up against the right angle at front, and take note of their size.  Without it, or up against the wall, you’re looking at various renditions of an educated guess.

3.       On-Wall Storage – I’ve got two different systems for tackle management where it’s quickly and easily accessible.  One is a wall-mounted magnetic tackle storage system which is surprisingly helpful for a host of lures that I’m constantly changing through.  The other is simply screw-in hooks where they’re needed.  Those screw in hooks frequently hold rattle reel plain hooks, packages of bobbers, and sinker packs.  Anything I’m dropping frequently, I like to have handy at all times without digging through drawers or going into tackle boxes.  It makes me more efficient and saves time when re-rigging. 

4.       Good Rattle Reels – I’m a fan of the Rattlesnake Rattle Reels here, for the same reason I like their rod holders; they’re interchangeable.  Quickly and easily I can swap out a deadstick for a rattle reel and vice versa, then take that whole setup and apply it to the other end of the wheelhouse.  While I feel there are better true rattle reels on the market, this one wins because it works congruently with the rod holders to form the perfect whole-house solution.

5.       Dedicated Bait Cooler – When I say “dedicated” I mean either one that’s built-in to the fish house as they so often are these days, or, a separate cooler like this Engel that’s plugged into the wall and stored in a consistent location.  The more obsessed you are with keeping it in the same place, the easier it is to know where to get minnows each and every time you need one.  Usually, that’s where the live-bait is being fished, but there are times where it’s easier to store it on the other side of the house where you can stroll up, grab what you need, and get back to fishing.  You find the spot, just make sure you don’t have to hunt for your minnows.

6.       Wall-mounted Tool Holders – Again, fish, and even big fish will happen.  For those you wish, or are required to release, it’s best to get the hook out, snap a quick picture, and send them on their way.  I like this toolset because it can hold pliers, hemostat, hook cutters, and a scissors.  That’s pretty much the full set for almost all species I target in my Yetti. 

7.       Rod Storage – Buy a boat lately?  If you have, you’ll know that rod storage is a key mitigating factor to model selection, and even brand consideration.  I’m a huge fan of my LUND ProV’s 15-rod center rod-storage, and feel similarly about this rod rack in the fish-house.  I’m constantly switching setups to work lures properly, target specific species, and overall just get the most from the experience, so having rods where I need them is paramount to going through progressions of lures.  For me, the obvious place is the ceiling, because the rods aren’t in the way, and you can’t brush up against them no matter how hard you try. 

8.       Proper Hole Configurations – While you can’t change the hole layout of your wheelhouse now, you can learn to fish the ones you have better.  Two holes nearby each other in close proximity to good seating is a spot for an active jigging presentation next to a deadstick.  A hole off on its own and away from good seating is a logical rattle reel location, or spot for a lone deadstick.  Groupings of holes next together can be good spots to fish with company, but too close, and you’re likely to confuse your guests with all kinds of marks on each other’s sonar.  Trial and error gives you these examples to learn over time, but it’s never a bad idea to have folding chairs or other stowable seats, and try to fish your holes in different ways than you have previously.  Personally, I change the way we setup based on species, who and how many people are with, kids trip vs. serious fishing trip, etc.  The last thing you want to do is make your configuration work against you, like when you’ve got rattle reels down all around the food, and nothing but hungry kids darting in and out of there. 

9.       Outside Storage – Who knew the key to inside fishing has so much to do with outside?  Augers, hole covers, slush buckets, scoops, and the like can all go outside the shelter.  Store them in the bed of your truck if you have to, just do whatever it takes to keep them out of the shelter and making the fishing situation inside that much harder.  Anything that doesn’t damage from freezing or isn’t needed on-hand inside should be considered to be stored outside. 

10.   No – Hole – It’s pretty common for me to leave at least one hole in the shelter un-drilled.  I’ve always got the option to cut it later, but it can be really nice to mandate a hole in the center of the action for a no-fishing zone.  The reasons can be several, like when there’s too many in a cluster to begin with, or you want to store your caught fish there, or even open up freezer room but keep frozen goods more accessible.  It can be a place to dump slush without losing too much heat, or a spot to keep a hole cover on when kids need to make a midnight trip to the bathroom without falling in.  You pick the spot, but consider taking a hole or two out of commission rather than always drilling them all open. 

Ice Auger Options – Handheld or Powerhead?   

  Whether at a sport show or in a retail store aisle, I hear the lament especially from older anglers, “It’s all so complicated now.”  One step removed from “what’ll they think of next,” it’s a comment of frustration in all the options out there now, in this instance, just to drill a hole in the ice.  Yet, we really do live in a golden age of technological advancement of the sport.  When I first started to hit the ice as a kid, gas-powered ice augers were just starting to hit the scene full force.  Within a few years, they were lighter than previous models, but still entirely made of steel and quite heavy compared to today’s options.

Lithium Advantage

Today, gas augers are the rare ones, with lightweight lithium ion options being the best choice for so many anglers across the ice belt.  There’s a lot to love here, with batteries that last for many dozens of holes, even in mid-late winter scenarios.  Add one more battery to the mix, and you’ve got an auger that will drill as many holes in the ice as you could fish in any one day.  Not to mention, they’re extremely lightweight compared to their gas-powered brethren.  Hole-hopping is easier now than it ever was before due almost entirely to the lithium revolution.

Of course, lithium extends to the cordless-drill powered pistol bits or light-weight flighting attached to them.  There’s a growing cadre of anglers that like the thought of being able to build a deck one weekend, and drill a hole in the ice with that same tool the following one.  As lithium has revolutionized the power tool trade, it has made its way into our flashers, making them extremely lightweight, long-lasting, and durable.  The same could be said for ice augers, whether settling on a lithium ion powerhead, or relying on the existing lithium-powered cordless drill you may already own.

To Pistol

I must admit, my first experience with a cordless-drill powered ice auger was, less than stellar.  I experienced the negatives of a product that wasn’t quite in full-swing with the technology pushing it.  My drill batteries didn’t last that long, and the flighting was steel, offering only a nominal decrease in weight overall.  Yet the maneuverability of the entire setup, along with the value brought by not having to purchase a separate power-source revealed some promise.

Now, most of those downsides have gone out the window.  The lithium battery technology works better in cold weather, and overall gets you more holes per charge.  Updated cutting systems give anglers options, as do the polycarbonate flighting systems that are a durable plastic-like material which stand up to all the abuse I can give them.  What’s more is that they’re literally half the weight or less than the lightest full powerhead options out there.  Shrink the diameter size of the flighting for say, panfish, and you’ve got something that’s even lighter still, not to mention extremely fast.  I can’t think of a better way to prowl for perch or bluegills in shallow water, or for roaming across open ice in warm weather. 

Of course, there are a few downsides, especially when trying to power through thick ice using bigger diameters (8” and above).  Cordless drills can fail over time, especially when they see hard use both on and off the ice.  Because of the torque generated, I’ve even see people break or sprain wrists by being unprepared for the sheer snap that can happen when blades bind or they bite some serious ice.  Still, for my money, and the value these options provide, they’re a cheap add-on to my gear that always hits the ice with me when chasing panfish.

To Powerhead

There’s just something to be said for the substantial feel and control you get when drilling a hole in the ice with a dedicated powerhead and flighting system.  I feel that I can drill more precisely, when the situation calls for it.  A prime example would be inside of a wheelhouse shelter, when you’re attempting to center the hole in the sleeve or catch-cover ring.  Variable speed drilling, new this year to certain manufacturer drills, really take that precision drilling step up a notch.  Feather the switch to start slow and get good bite into the ice, then press down fully to accelerate and push through.

Especially when I’m roaming the open ice for predator species, there’s no other auger I’d rather carry than a lithium-powered, dedicated ice drill.  Walleyes, lakers, or pike, it matters not.  8” or 10” diameter holes and their associated flighting are simply harder to turn around in a circle with drills that can be underpowered for their use.  A dedicated powerhead gives you optimum opportunity to grip the drill properly, control the drilling portion of the process, and really get through thick ice.

I’ll admit that this opinion is educated both by experience and preference, and to each their own.  Though lightweight flighting and drill combinations are cheaper and lighter overall, it’s amazing how lightweight flighting on dedicated lithium drill units have made their weight shrink as well.  For a few more lbs., I’ll carry the real thing when hitting bigger fish and drilling more holes.

What to Look For

I’m of the thought that unless you’re looking for a drill unit that can withstand lots of abuse in the bed of a bouncing truck, you’re going to enjoy the weight-savings of poly, lightweight flighting systems, whether powered by a drill or powerhead.  The next think to consider is cutting system, and I’m a fan of the newer hybrid style cut.  Shaver blades can be fast, especially when compared to chipper blades that crush the ice vs. cutting it.  Yet, I like the versatility of angled blades that don’t curve, as they’re harder to knock out of tune, and when paired with an appropriate powerhead, cut even faster than the shaver blade sytems of old.  

If your aim is to find the best dedicated powerhead and drill, pay careful attention to the design.  You’re looking for something that grips easily and comfortably, without having too wide a stance such that it fits in tight places.  A variable speed trigger is a truly premium option that makes everything easier when cutting inside a hard-house or portable.  You want a powerhead that’s sold with the option of one or two batteries, as there’s typically a price discount if you know you need two, when buying them all at once.

If looking for the best flighting for a cordless drill system, you’ll want something with a hexagonal main shaft.  That allows strength to the structure that the poly flighting attaches to, including the ice-cutting portion of the head that does the dirty work.  Strive for something that’s as light as possible, and consider a 6” hole for most of your panfish needs.  It’s amazing how even trophy panfish have very little problem fitting their way topside in 6” diameter ice holes. 

In the end, there’s only a small additional cost of ownership for having both, so you may consider choosing the dedicated powerhead system if you know you’re attached to those older ways of drilling.  Add the pistol later if you feel like you want something light and more portable.  Conversely, it can be nice to save some cash at the outset and see if the cordless drill option works well for you, but I caution against it if you’re drilling lots of holes for predators across the open ice.  Truth be told, it’s hard to make a bad choice out there, and you’ll be happy to have either once it’s time to hit the ice.


Setting up a Fish House - How Close is Too Close?

It’s a popular gripe, on internet forums, facebook groups, and out on the ice too – “That person is way too close!”  Surely, if you spend enough time out on the ice, you’ve seen some interesting things.  In my time, I’ve had people use my Yetti as a windblock and back-rest, and have even had a complete stranger catch a fish on the tip-up I set.  I guess they just couldn’t resist a freshly popped flag (who can), but I was on my way out of the house as they were getting to the line.  As I arrived, a plump walleye was flopping on the ice, and the guy looked at me funny, almost as if to inquire if he could keep it without saying a word.  I unhooked the fish, released it smiling, and then said that most of the times I have guided in the past, we set the trip up in advance rather than meeting coincidentally on the lake.  He got the point.

While some errors in human judgement seem all too obvious, others still are like baseball’s unwritten rules.  If you’re part of the club, well-steeped in the history of the game, and follow its lore, well, you know.  If you’re new to the crew, then this is stuff you just learn along the way.  So it goes out on the open lake where no-size-fits-all, every situation is different, and the answer to the question of “How close is too close” is simple.  It’s all relative.

Golden Rule

I’ve seen this one referenced more than enough times to mention myself, that the golden rule itself is a really good litmus test every time you set up.  Simply ask yourself the following question – “If I were that person over there, and they came this close to me, would I be too close?”  But this rule cuts both ways.  That means, you better not raise a stink about someone setting up as close as you do to others, but I see that one broken all the time, even by friends and family.  What’s too close for them just doesn’t apply when they’re setting up right on top of others.  We’re all fishing a shared resource, but you’d be surprised what can happen on an open lake vs. other shared human experiences.  If you wouldn’t budge in line at the DMV, why would you do it on the lake?

Still, that term “relative” keeps popping up.  I was fishing some brush piles a few weeks ago that were deliberately set and well known on the lake we were fishing.  Here, anglers routinely set wheelhouses, permanents and portables within 30 feet or far closer to existing shelters.  I chose to do the same, but only midweek, where the houses I was settling near did not have people fishing in them until the weekend.  In this instance, “too close” for me was only too close if I was right on top of another angler actually fishing, but not the wheelhouse or permanent itself. 

Contrast that with a big-lake, northern ice belt experience where you’d be the only angler on a key bend of a major piece of mid-lake structure.  Let’s say that you’re the only angler on that piece of structure for hundreds of yards and another wheelhouse pulled up inside of 30 feet.  In wheelhouse’s or portable-land’s rules, you’d have every right to expect that angler to reposition further away.  All of which further underscores the main point here.  That answer to what’s too close is invariably – “It depends.”   

Don’t Be a Hindrance

One thing that I’ve always tried to do on open water or the ice, was to work with fellow anglers to not get in the way of what they’re trying to do.  No one owns a spot, and public waters offer everyone equal rights to enjoy them, but I don’t need to get so close that I affect their fishing.  Now, that doesn’t mean I have to stay so far away that I don’t affect their experience.  I’ve had anglers chew me out because they wanted a pristine view of the far shoreline, and that’s simply not a reasonable expectation.  However, I’m careful to stay far enough away, that noise from my activities on ice, don’t scare fish away or otherwise hurt the bite for them.  That includes not showing up on a shallow bite and pounding holes in the ice during primetime, as we continue to learn more about how sensitive fish can be to overhead fishing pressure. 

Some states have a legal distance set up to prevent anglers from getting too close to one another.  Often those are open water focused, citing a certain distance (like 100 feet) from an anchored vessel.  They don’t always transfer well to the ice.  That, and I’ve never seen or heard of a conservation officer discuss this with another angler, let alone ticket them.  All of which means that while there may be laws on the books, depending on your locale, we all simply have to self-police and figure it out together.  What may be too close for you, is no big deal to me, and vice versa, but you shouldn’t hesitate to chat up your fellow angler. 

Rules of Thumb

Usually, if you feel you’re too close, you probably are.  It’s tempting to see structure just below another house and creep close enough to try and fish the edge, but unless we’re talking about huge chunks of underwater real estate, it’s often best to find another spot.  That might mean catching less fish, or even changing your plans, but that’s where that Golden Rule check comes in.  If you think you may be likely to hinder another angler’s bite, yet still really would like to fish it, think about striking up a conversation with them.  See how amenable they are to having you fish nearby, but also be prepared to read their response and act appropriately. 

It's likely that if you fish long enough, you’ll encounter confrontations on ice.  Sometimes they’re warranted, often they are not.  Most anglers are kind, yet still have their boundaries, just like you probably do.  Though, bullies exist in every community, and most of them do it because it has been an effective tactic for them in the past.  They wave their arms, try to look bigger than they are, yell, swear, and generally do their best to intimidate.  If you’ve been courteous, are outside of any state legal limits for distance, and consider their bite before trying to make your own, know that you have rights too.  While I’ve never seen a Conservation Officer respond to a “too close to house” call, I’ve certainly seen people ticketed for angler harassment. 

A few years ago I was perch fishing with a good friend and well-known guide on a large, but busy lake in northern Minnesota.  We had drilled holes across a large flat, and were hole hopping, catching perch in several of them.  Lo and behold, a group of anglers followed our tracks into the area, then started fishing some of the holes we drilled, hopping closer and closer to us as we tried our best to hide the fish we were catching.  Eventually, they got right behind us, saw a hookset and flopping fish.  As we looked over our shoulders, we saw the deer-hunter-orange clad crew-leader signal to his posse, waving his arms at them to get over closer to us because they saw us catch a fish.  We shook our heads, picked up our fish, and vacated the spot we worked all day to find as the perch posse who rolled in late just crowded us until they capitalized on our effort.

Perhaps the best rule of thumb then, is to avoid becoming the guy or gal in a similar story, at some small bar or restaurant somewhere in the ice belt this season. 

Slowing Down - When Walleyes Waver

Slowing Down – What to do When Walleyes Waver

We’re at the bitter end of a winter walleye season here in MN, but whether you fish the North Star State, or any of the surround walleye waters of the ice belt, end of Feb and into March can be tough.  Deep snow and thick ice cuts down on the amount of available light at depth, and it’s kind of stagnant down there right now.  Fish are often deep, feed little, and any hindrance to the bite – i.e. full moon phase, cold front, etc. – can make a tough bite tougher.  Though fishing predictably fades in February, there are still fish to be had.  Details make all the difference now, and each bite counts for more than it did during the early season.  That’s why changing your approach and focusing on that minutia can make or break a trip. 

Spoons and Such – Aggressive jigging may still work in low light periods, or during pre-frontal conditions, but more often than not, this time of year sees fish investigating the racket without actually committing to it.  That still means it’s worthwhile, especially spoons, rattle baits, or other heavy vibration lures, to call fish more than catch them.  This is especially effective if one person “rings the dinner bell,” such that other anglers and set-lines may be rewarded with fish general being called into the area.

Color starts to matter more during this time of year, as fish get choosier.  That means you might want to experiment with different hues during different light conditions.  For example, high sun and clear skies may see favor for blue/chrome, gold, or other metallic colors, while clouds and low-light may see preference towards glow and UV brightened baits.

More important than color however is bait selection, with more deliberate lure classes, fished less aggressively catching most of your jig fish.  Lift and pause, more than twitch incessantly.  Focus on short drops and spoon baits to do most of the jigging work during this time of year.  Plain jane is more exciting than fancy and frills.  Truly, less can be more here.

Stationary Sets – Whether we’re talking rattle reels, deadsticks, bobbers, or a combination thereof, you need to be employing the use of some stationary systems with free swimming live bait.  This can constitute the majority of your spread, though some active jigging is always welcome to draw fish in.  From here, you want to fine-tune your approach.  Dacron and big bobbers was fine early in the season.  Use instead smaller marker bobbers on rattle reel setups, that displace little water, and offer little resistance to a fish eating your minnow.  Now, you should be running a long fluoro-carbon leader to the hook end, making sure that your presentation looks as natural as possible.

Speaking of hook-end, consider your dead sets like a trolling spread.  Vary your look to fish by offering a variety of hook choices and let them play favorites.  You should start with a small wire hook with no color, up to colored variations, glow resin trebles, and then actual jigs to hook your minnows.  Often, on the toughest days, the smallest hooks and most natural presentations win, which is something you’ll never know if you have 4 set lines down, each with the same jig as the rest.

Tend your set with electronics when possible.  Too often, in a hard-house I see un-monitored lines down everywhere.  Eventually, people disregard them, only to find out a large sucker swam and tangled with the next-door line, a walleye actually picked another minnow clean, and the last set has a dead minnow on it.  Careful watch with electronics, even on your dead sets, will tell you how popular your offering really is.  When something is being approached constantly, yet not eaten, it’s high time to make a change.

Minnow ID – Not all minnows are created equal in the opinion of most marble-eyes.  Fish that I’ve been on this year have shown a strong preference for smaller than normal suckers, and more importantly shiners.  They’re the minnow we love to hate.  Look at them wrong, and they’ll go dying on you, but employ them correctly and they can save a trip.  Again, consider putting your eggs in multiple baskets here.  Get a mix of fatheads to tip spoons, shiners and suckers for dead-sets, and even rainbows to mix things up where available.  The goal is to let fish in an individual system, be individuals.  Never argue with what the fish want, as they tend to win.

The Finer Points – Location can be really important at the end of the season, as fish can move less to feed, meaning you’re really on them, or really not.  Small moves on a piece of structure can mean everything, as a house that’s positioned 15-20 feet away from a transition or other hotspot means its too far away for lethargic late season eyes to head over and eat.  That also spurs a discussion on finding.  Make sure to keep looking for fish, even if you’re on a proven location.  Hub houses and other portables are invaluable scout-shacks, even if you’ve got a great permanent house to fish from.  Quite often, these scout shacks can offer valuable intel on timing of the bite, shallower vs. deeper, and what general preferences fish may have in a certain area. 

In addition, cameras are great tools for a host of fishing situations, but pull them up during this part of the year when stationary.  Especially in clear water, walleyes can shy to underwater cameras and actually affect the bite of your deadsticks and jigging presentations.  For lots of hard-house anglers, this may be difficult to do, but it may just increase your catch rate.

Lastly, pay attention.  It’s tough to catch fish as the modern conveniences and enjoyments of most portables and wheelhouses draw our interest away from the actual fishing.  I see it in new groups of anglers, kids, and avid anglers alike; the more focused a person is on catching fish, the more fish he or she will catch.  If you’re only tuned-in when someone else is catching, you’ve likely already missed your opportunity.  That can be a big deal when you may only get a 15-minute window of action morning or night.  Make the most of the experience by staying engaged, and you’ll already be doing better than most anglers on ice.