Flasher and Shelter for the Southern Half of the Ice Fishing Belt

David P. asks:

Now that my children are grown and off to college, I am thinking about getting back into ice fishing. That is if we ever get enough ice here where I live in northern Illinois. I would like to know if you have a recommendation for a flasher and a shanty. I like what I have read so far about the Marcum M series flashers. Maybe the M3. I see you use Otter shelters. I will likely be fishing alone and I like a dark or blackout shelter. Is the Otter Pro X Cottage shelter a dark or blackout shelter? It is difficult to find these items around here as there isn’t much ice for very long and very few ice fisherman. So any insight you can provide would be very helpful. Thanks, and have a great day! Dave

Hi David – thanks for the question, and I can appreciate where you’re coming from. In some years, even southern MN doesn’t get the ice that the rest of the state does. That leaves you wondering how far you really need to go in terms of an ice purchase you may only get a few weeks of use from. Still, as I think you’ve identified, it’s great to go with quality equipment that’ll best serve your needs. 

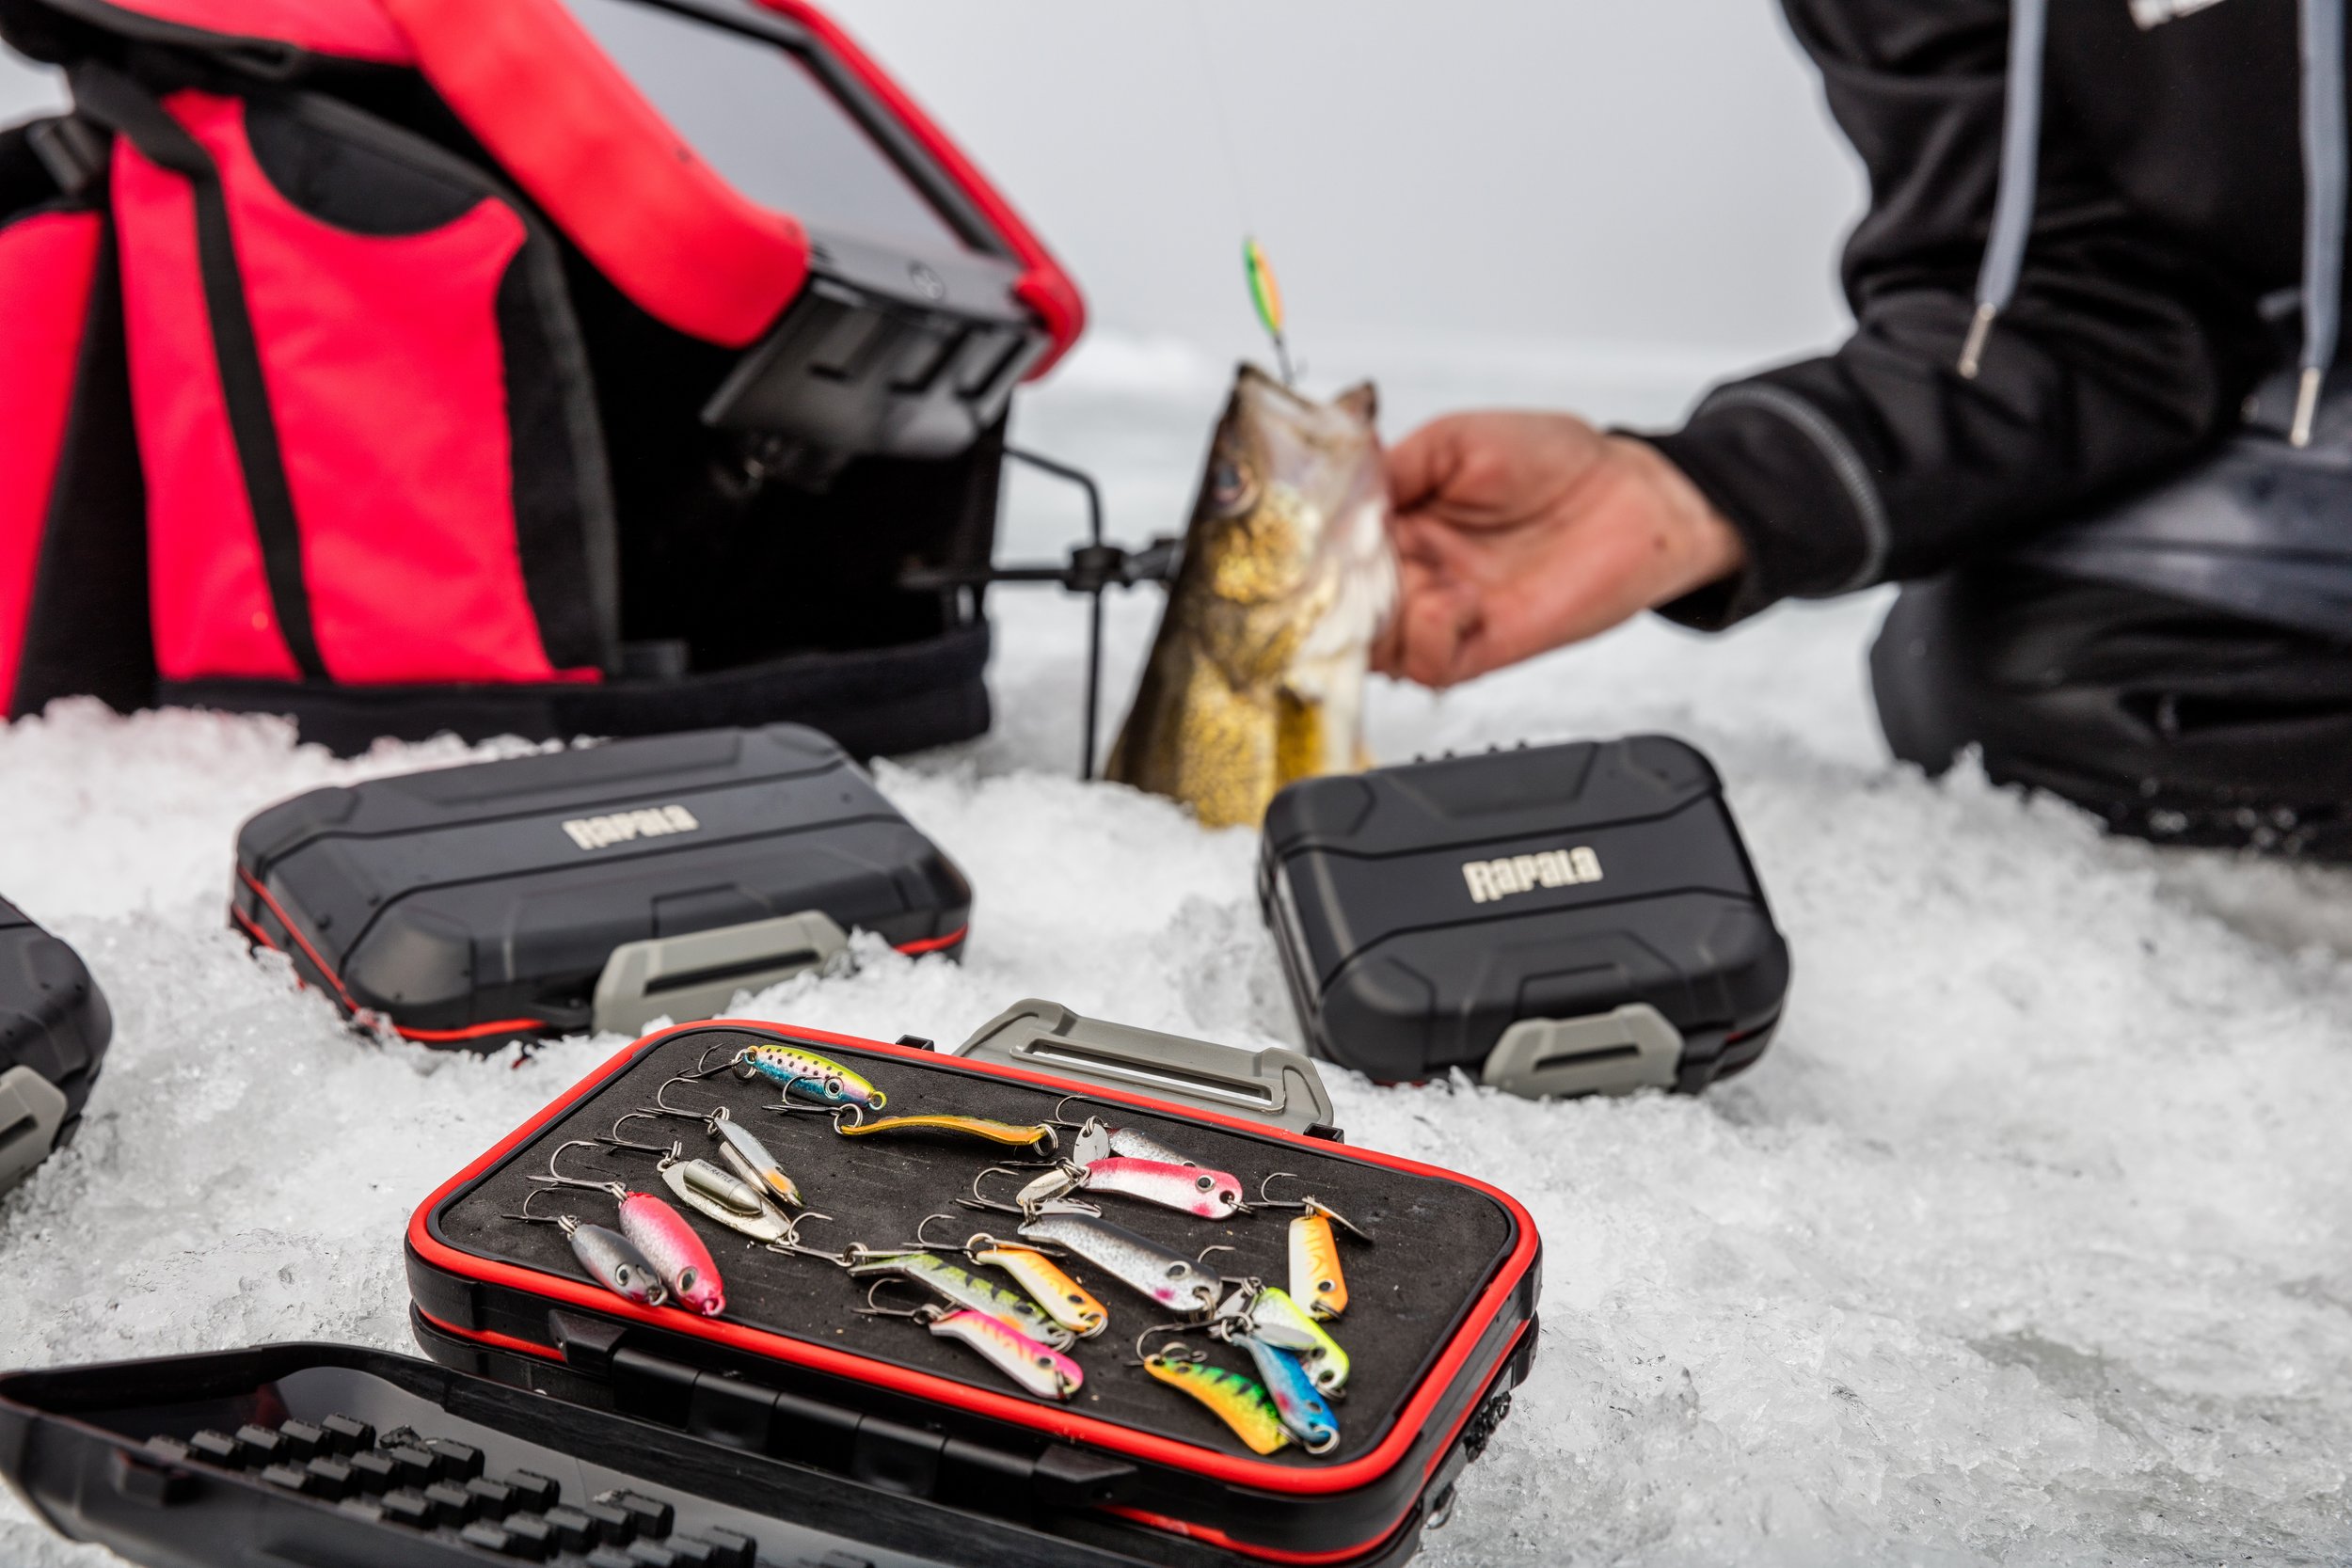
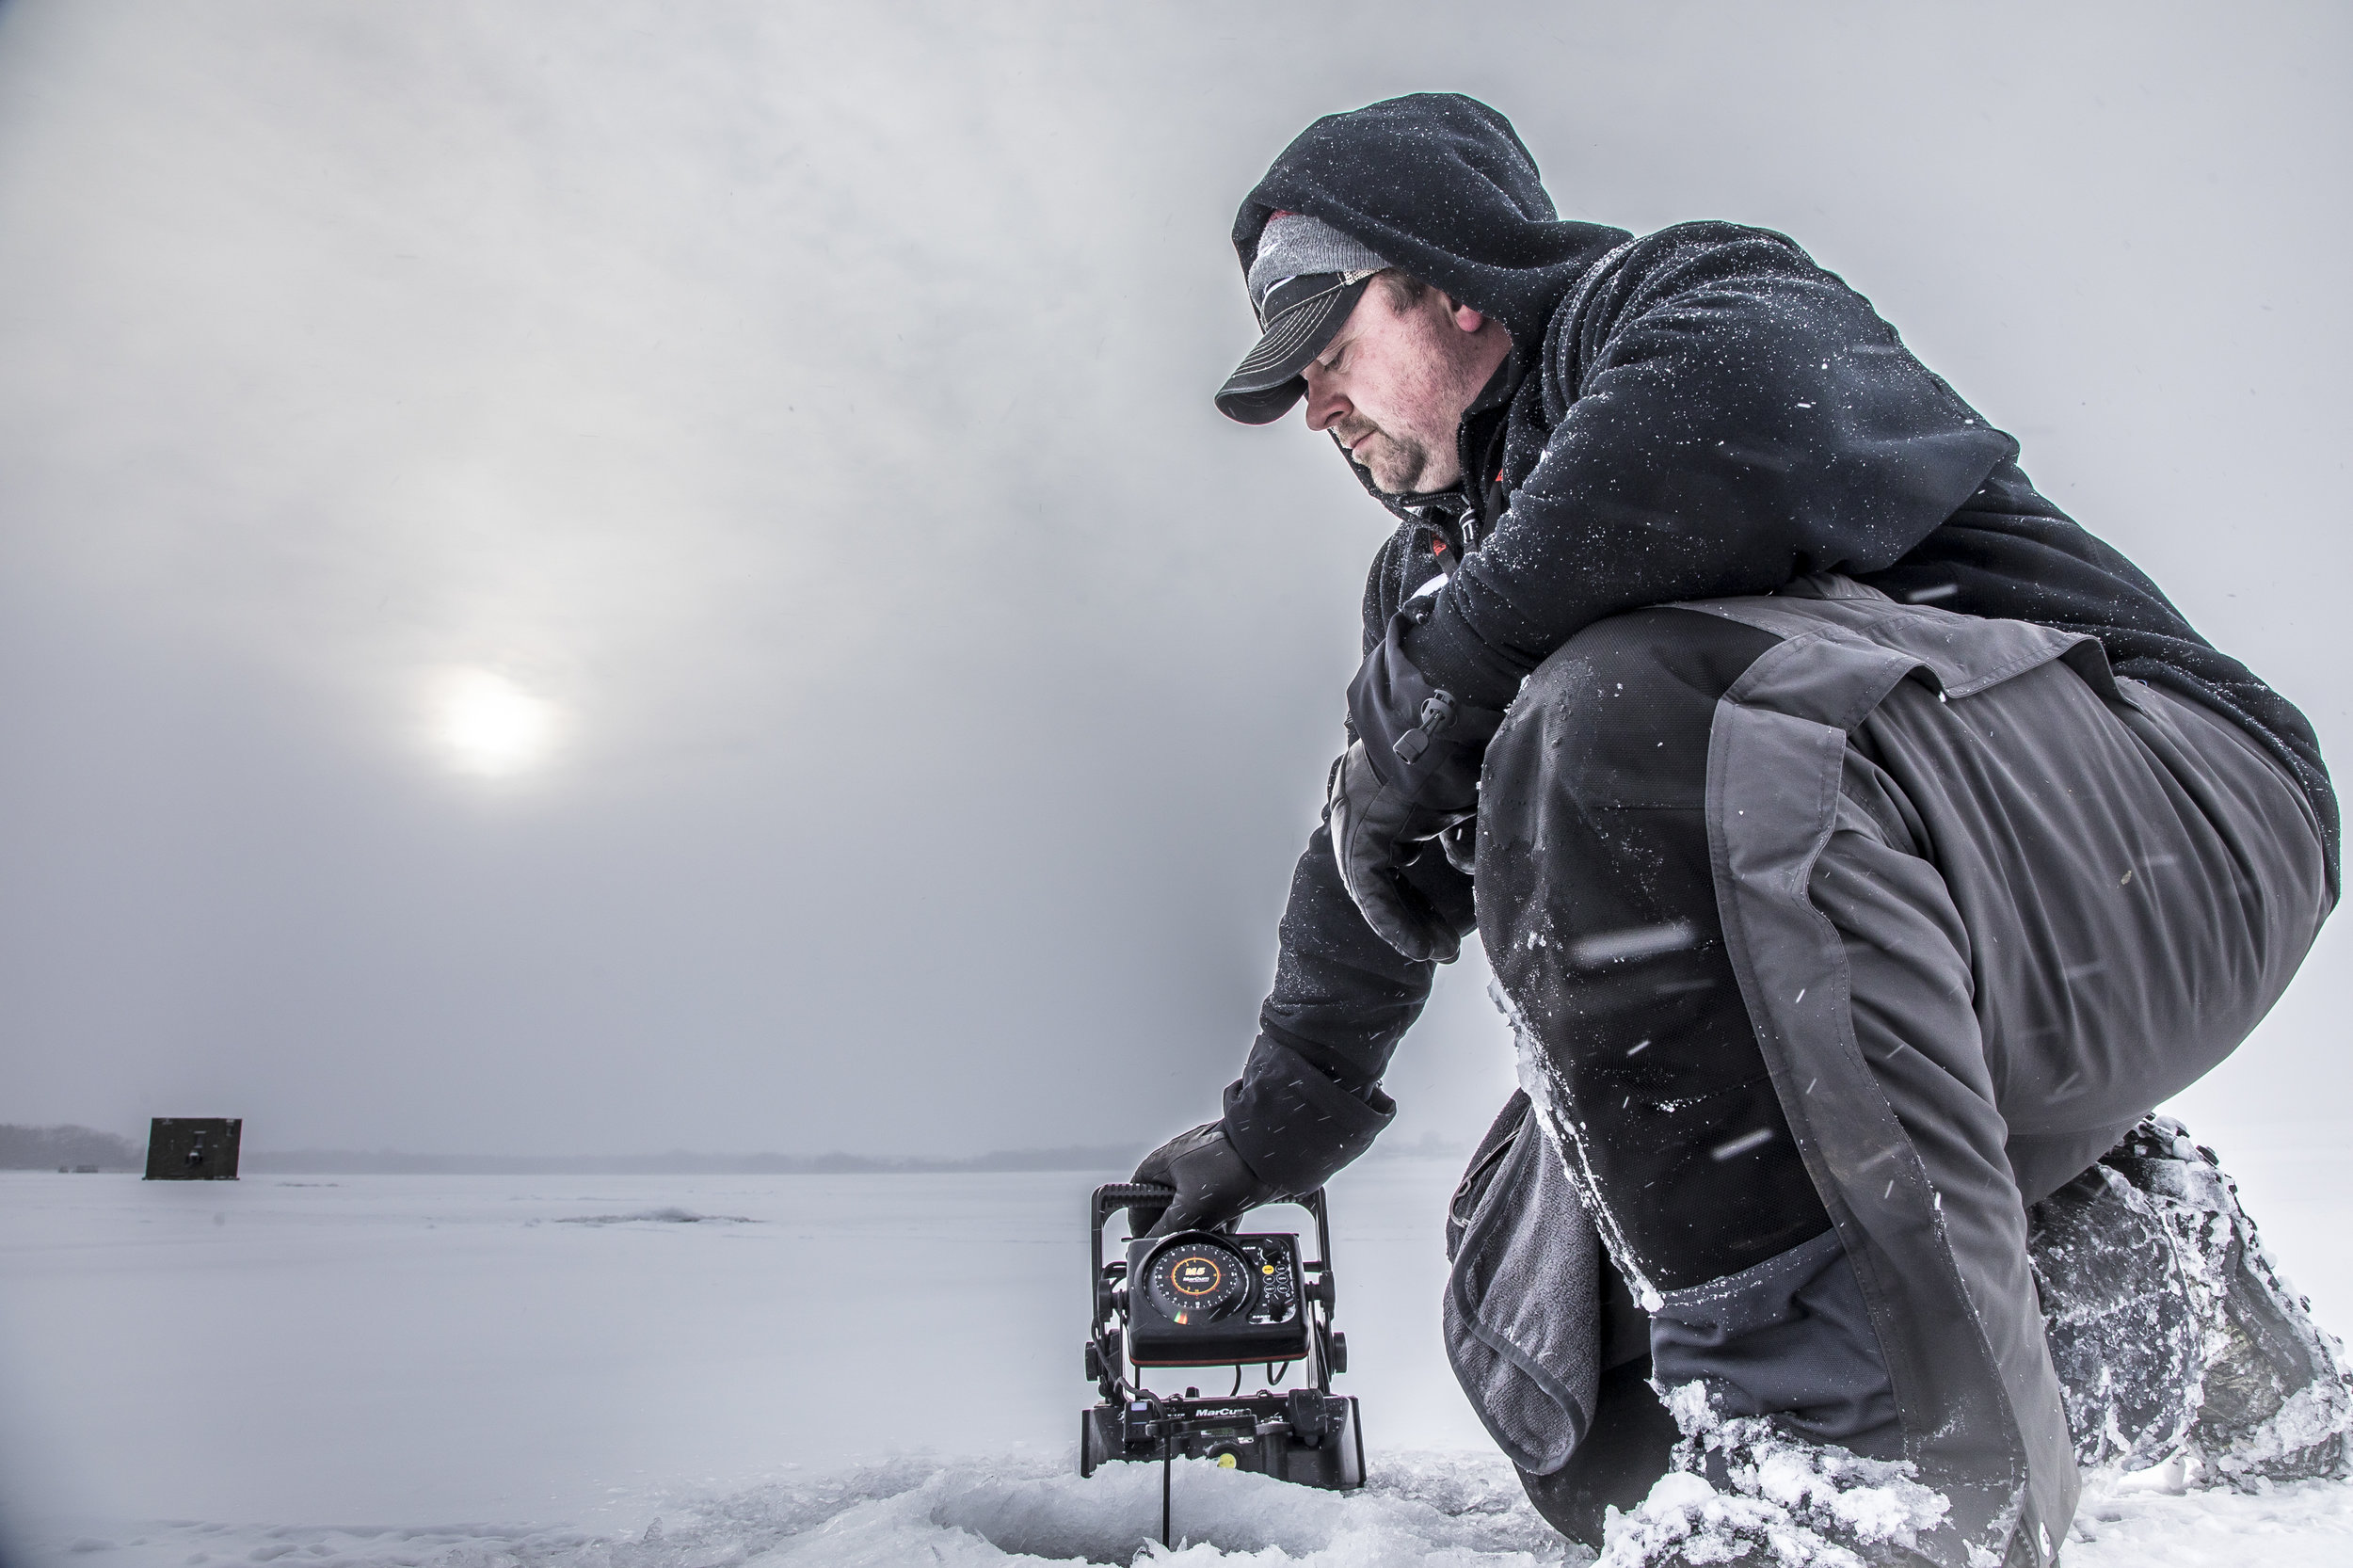
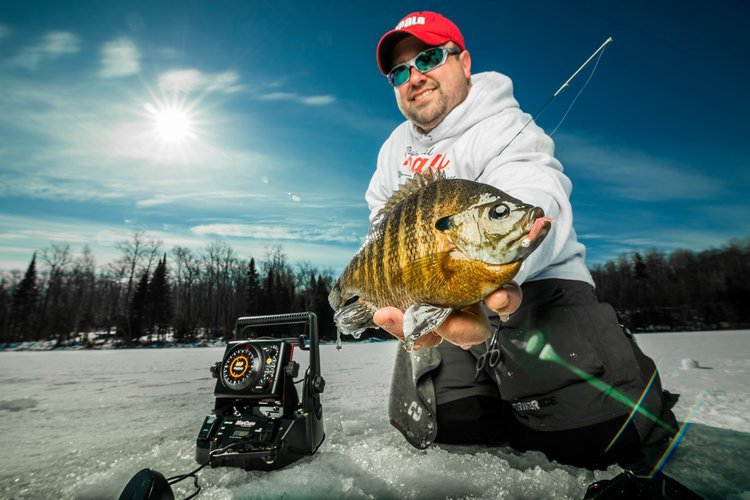
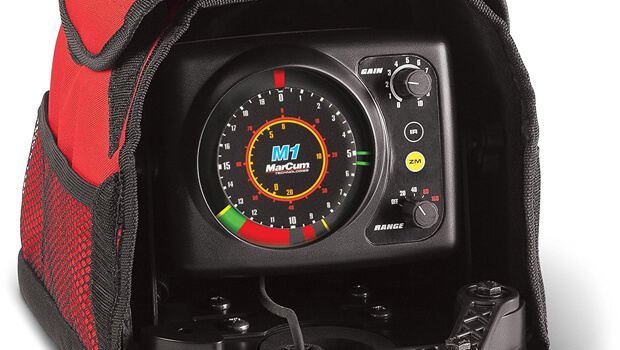
In your neck of the woods, I think you’d be very happy with either a Marcum M1 or M3.  Major differences between them being a bit more power/target-separation and adjustable zoom anywhere in the water column with the M3.  The M1 will still have bottom zoom and is a great unit that should not be overlooked! Pound for pound, it does the work of sonar that was cutting edge only a few years ago, and for a fraction of the price.  

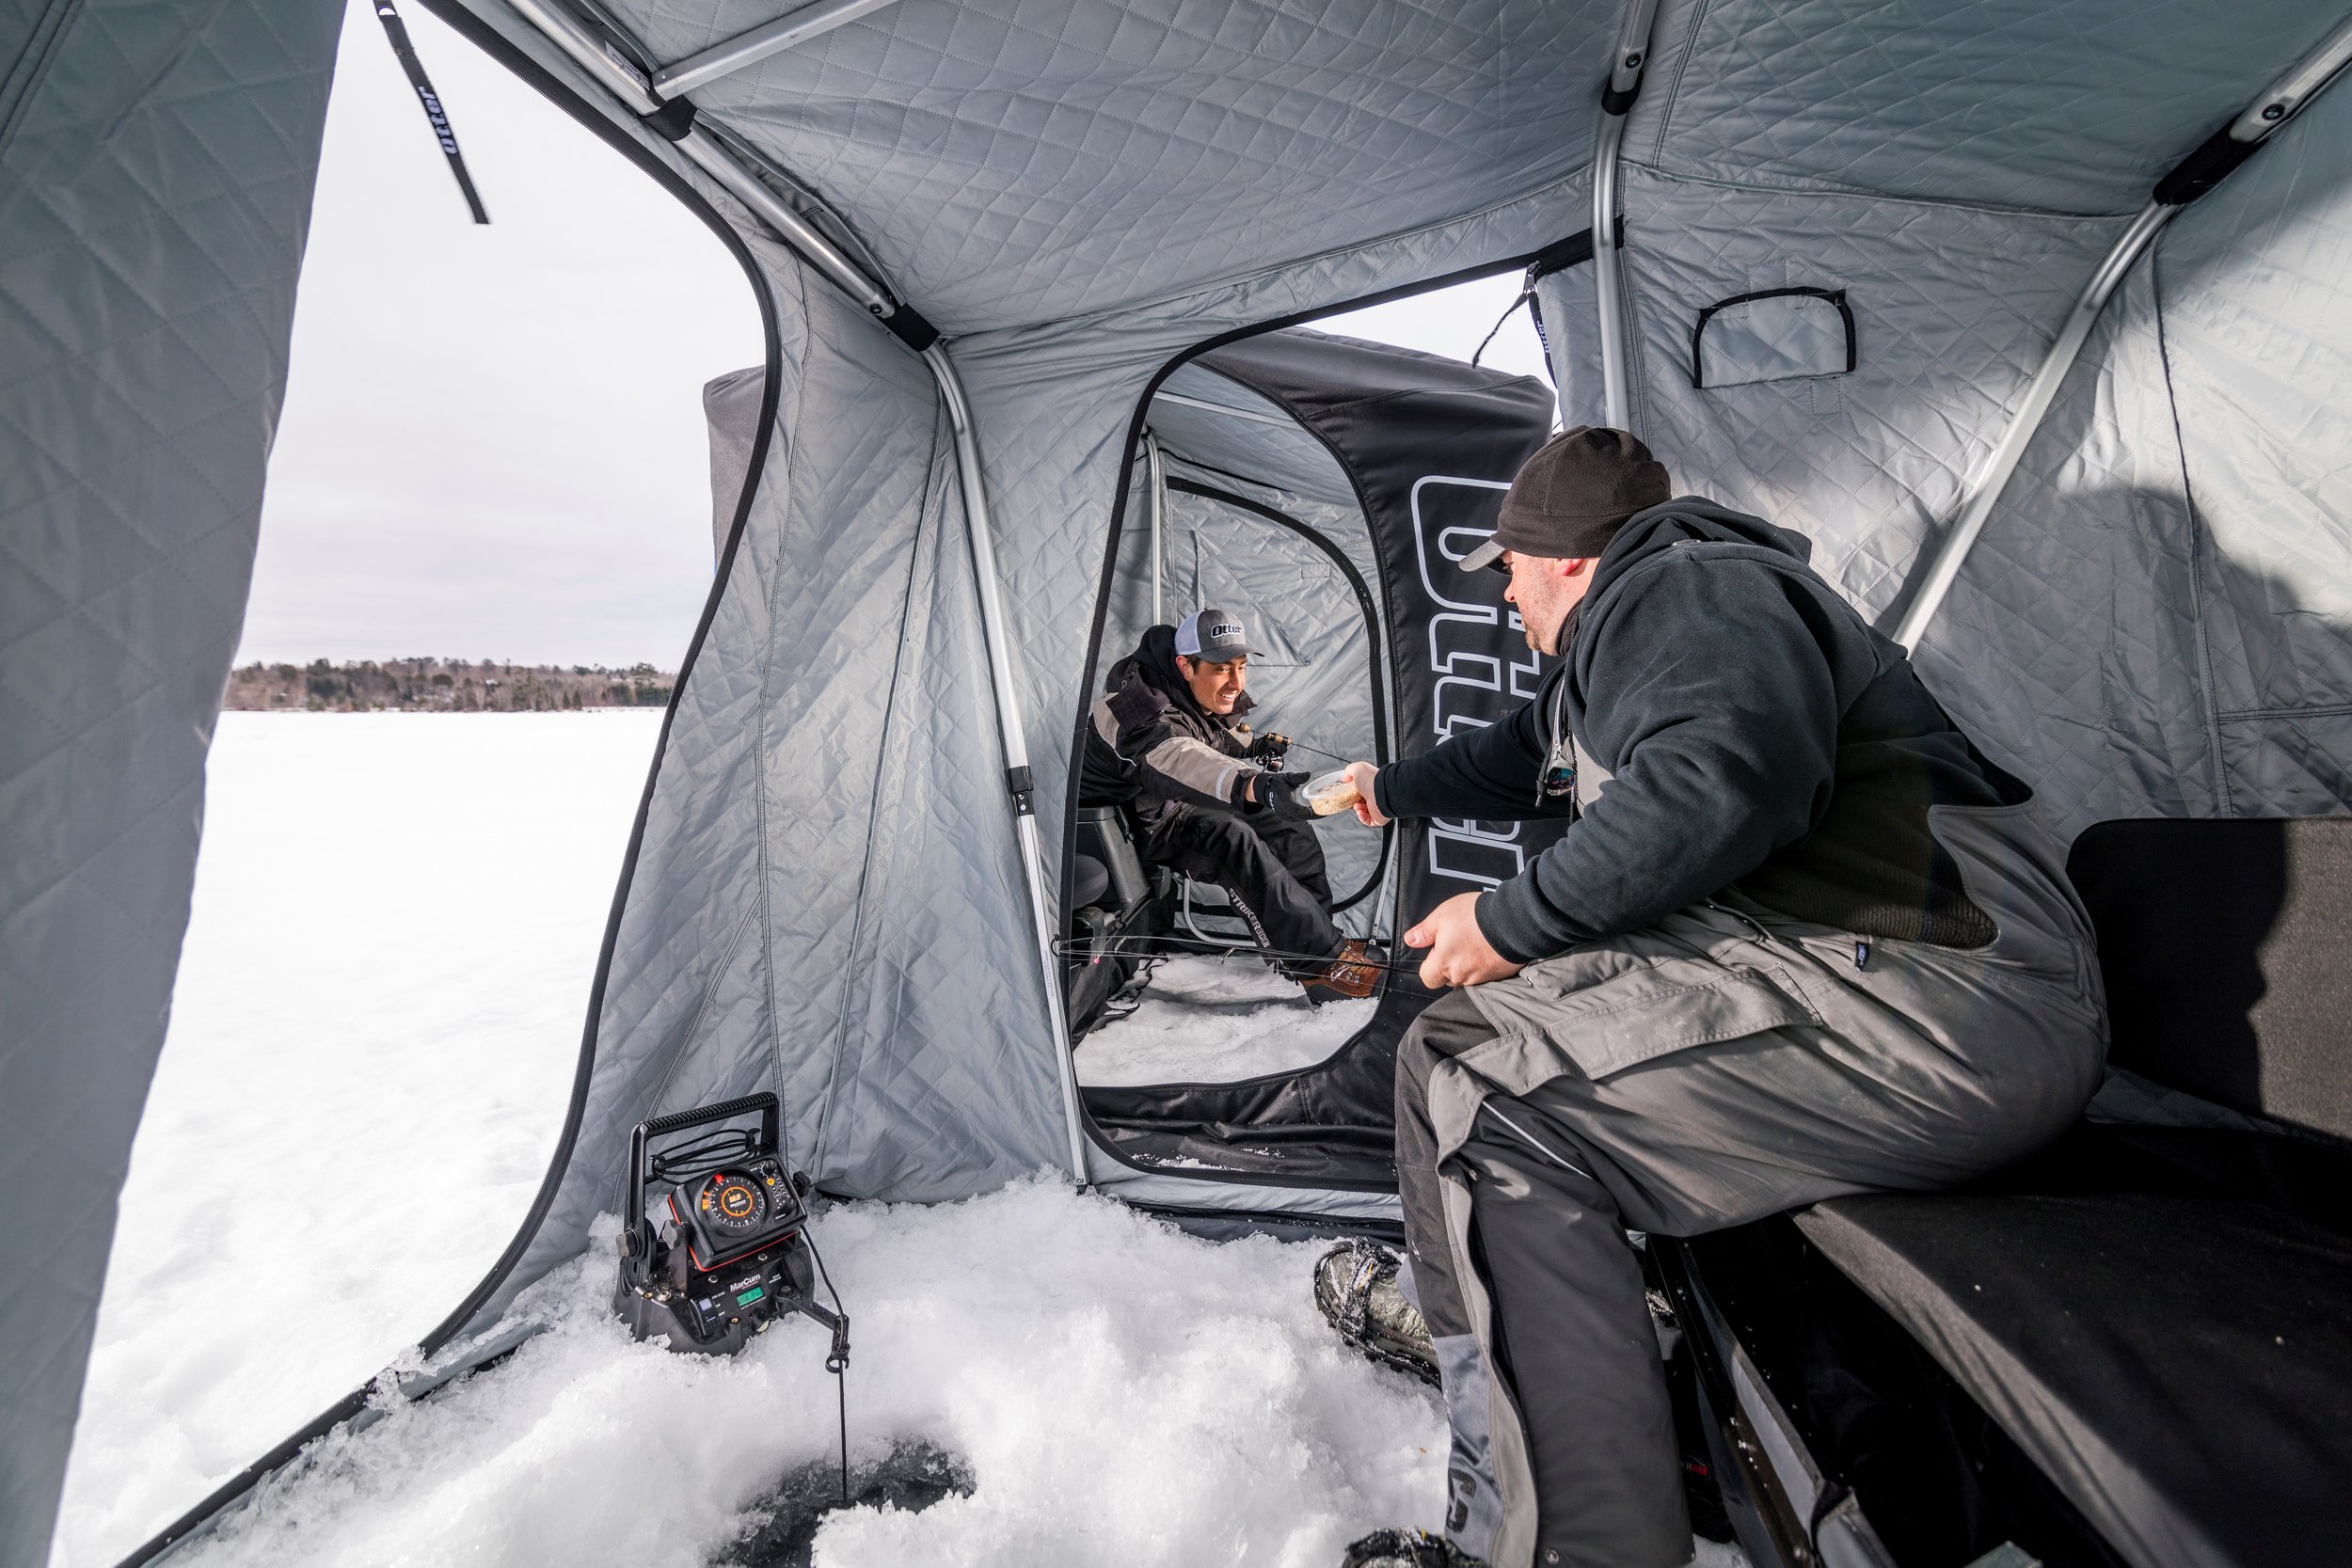
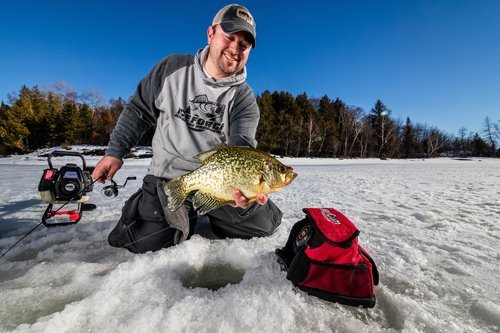
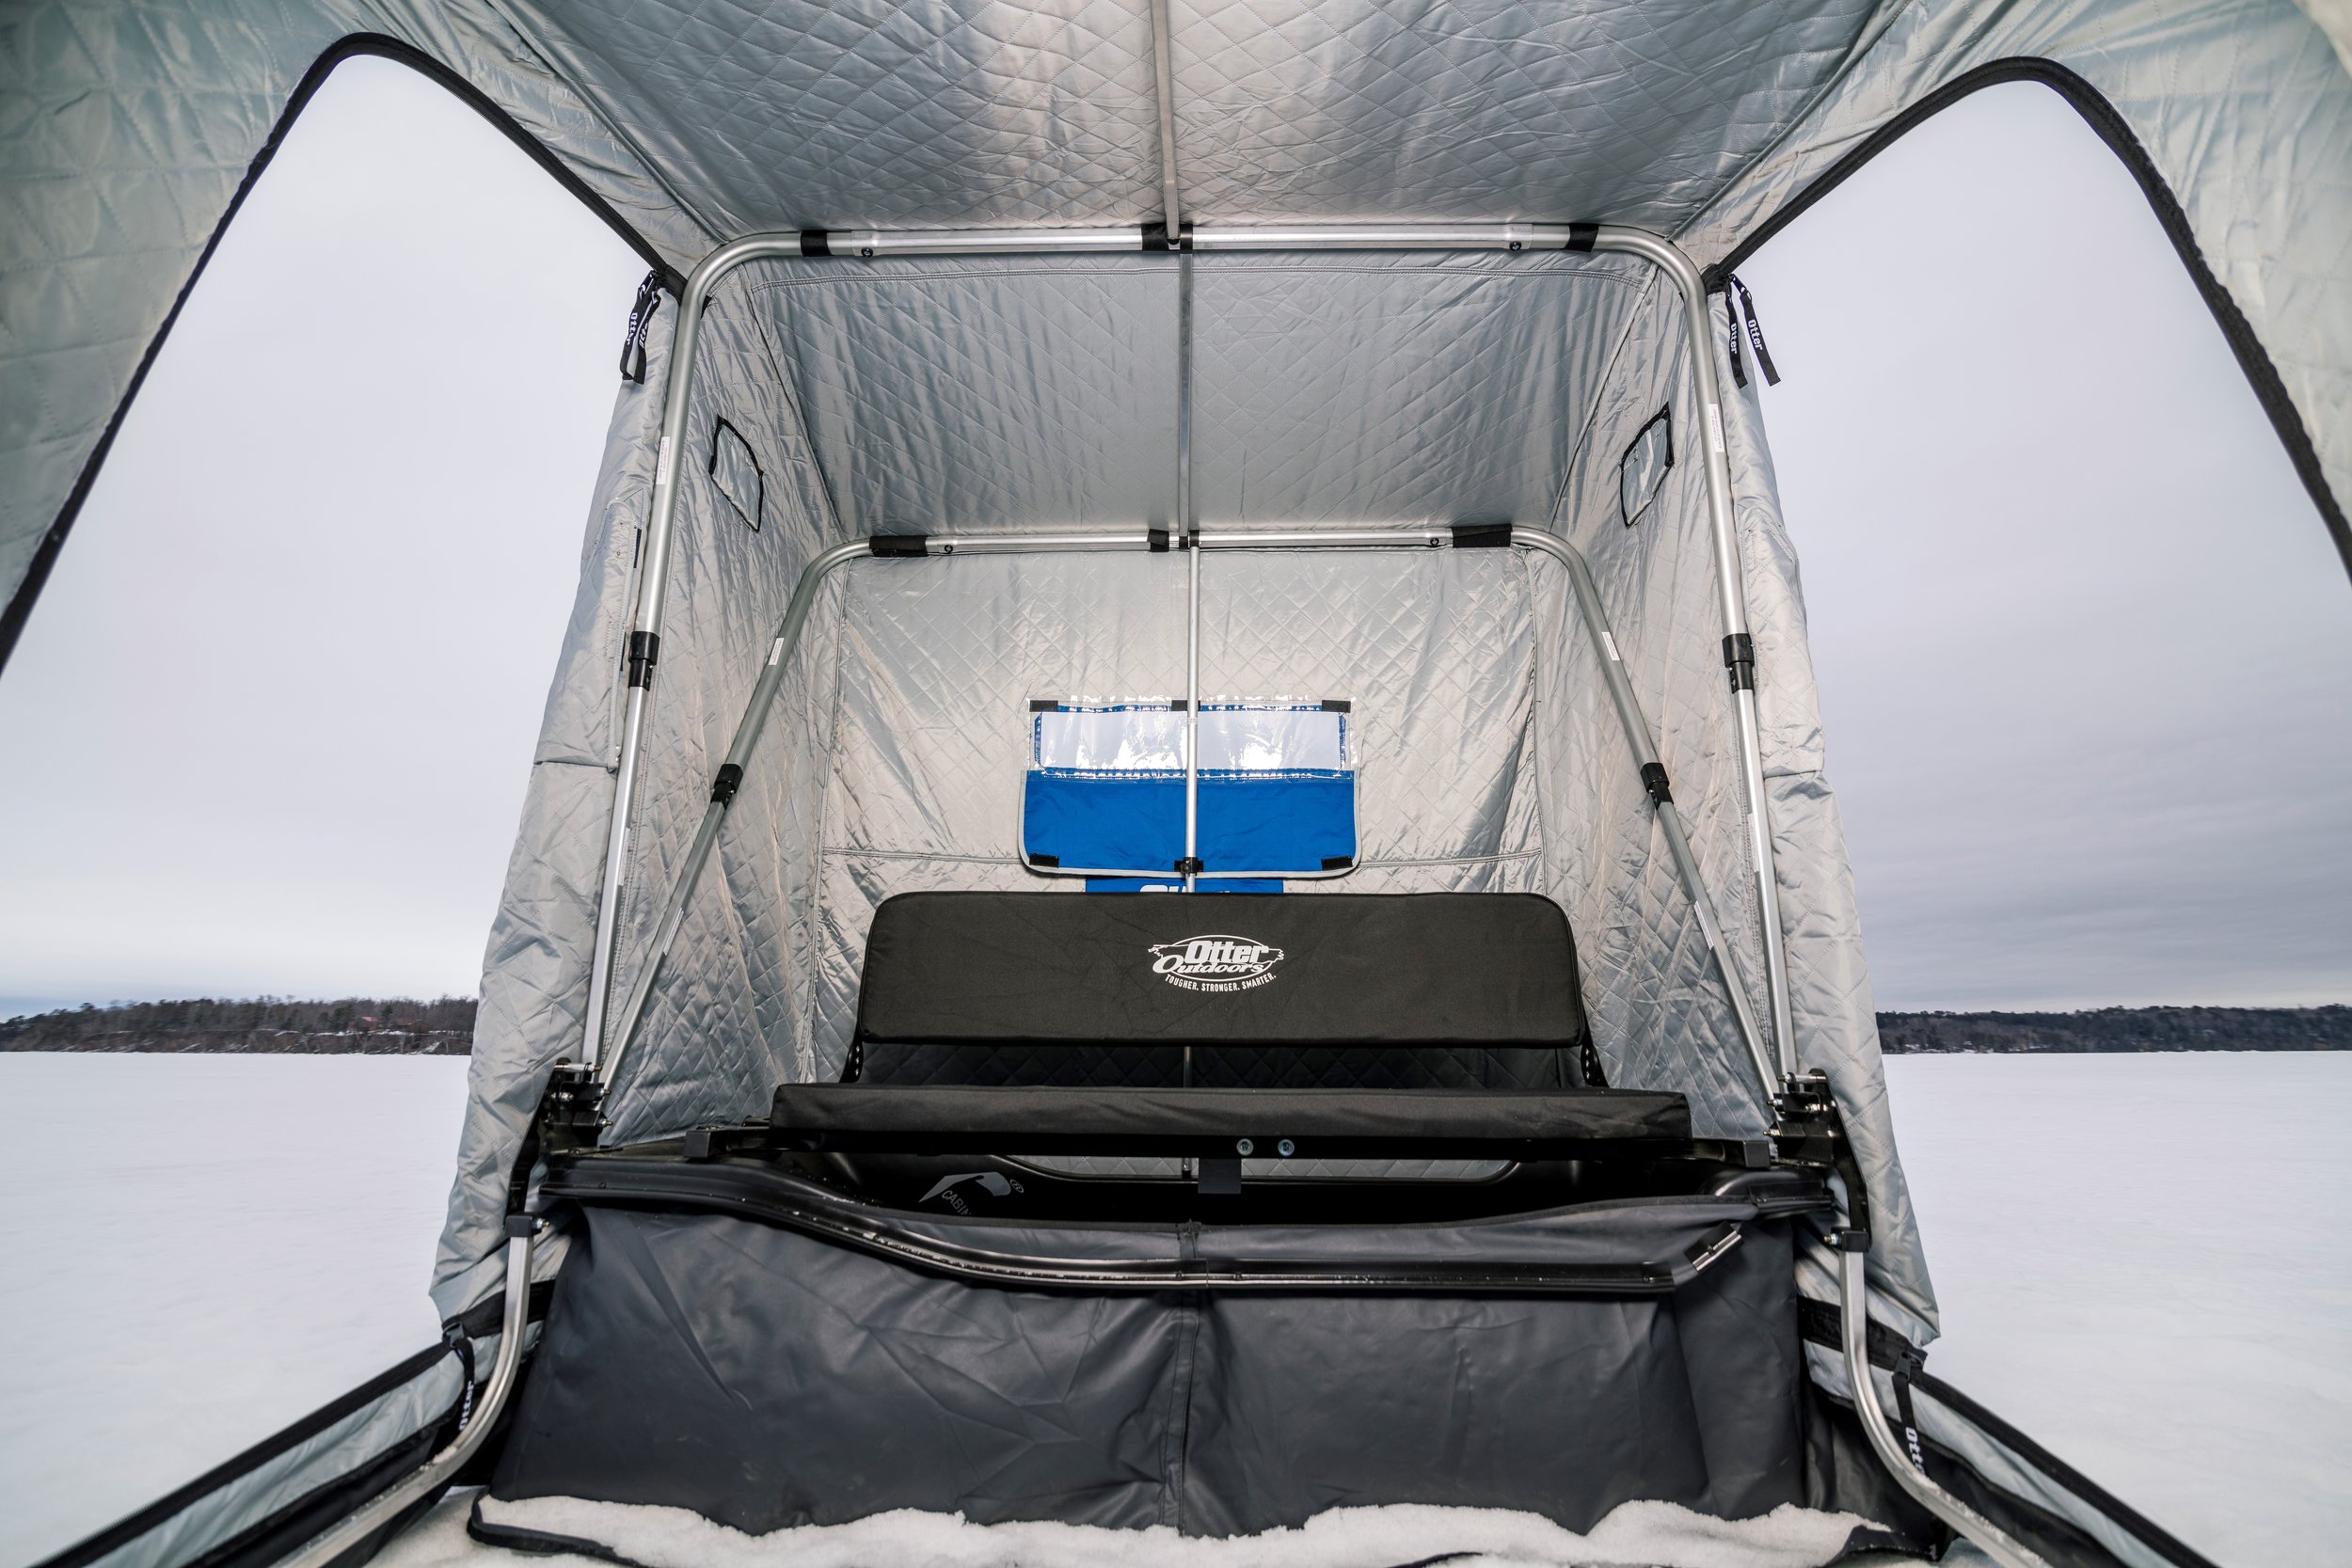
As for the Otters, I’d recommend either the Hideout or the Cottage.  The XT Hideout is a stealth option, and both will be nearly full dark with the Cottage being the darkest.  It has a complete seal all the way around to prevent light from entering the back edges.  Both do not allow light through the canvas, which is a major benefit to the Otter shelters in general. 

Hope this helps, and good luck out there!

 Joel

How Do You Organize Your Ice Tackle?

untitled-0928.jpg

Mike F. asks:

Hey Joel - I was wondering what your preferred method of ice tackle organization is when you are fishing out of a portable? Do you find a tackle bag is the way to go or some other method? I can't seem to find anything that I'm satisfied with when it comes to having what I need easily accessible and transportable.

Thanks!

Mike

Great question Mike, and it’s a doozy.  I think I’ll qualify everything first by saying that I don’t think anyone has found the “perfect” storage solution for all baits, tackle, and accessories.  There’s a lot of ways to skin that fish, and what works for some will be horrible for others.  In my situation, I’m fishing for constantly changing species in a variety of environments, so I need to have literally everything ready, then be able to pick and choose just a few items as needed to carry on my person and out onto the ice. 

For that reason, I’m about diversification and nested storage when it comes to my ice gear.  In a way, I run my program like those little Russian dolls that fit into one another.  I break my storage into 3 categories:

  1. Home/Truck/Camp

  2. On-Ice

  3. On-Person

I’ve got totes, tackle bags, small hard-boxes, line boxes, and a Ziploc bags even come into play.  The big totes never hit the ice, and I use what’s in them to stock the tackle storage solutions that make their way out there with me.  Looking at it from the surface, it would seem a hodge-podge of whatever I have laying around and thrown into the back of the truck.  That said, these solutions have evolved over time to serve all kinds of needs from fun family trips, to filming forays, and everything in between. 

I’ve also learned to keep items in their original packaging as long as possible.  While it’s a space-waster, and it sure is fun to tear open packages to fill tackle boxes, the cardboard and plastic these baits come in can be the best way to keep them looking great.  It’s the basis for my system, and also the reason I have nested storage that I keep dipping into from time to time.  My entire philosophy is about taking a good variety but low volume of what you’ll need out on the ice, then keeping backups extremely handy for re-stocking.  Here’s how I stay on top of everything: 

Home, Truck, or At Camp:

  • Basecamp Tote – This one’s big, and rarely makes it onto the ice with me.  It’s designed to be my rescue kit that lives in the back of a truck or at a lodge, but not something that I carry around full-time.  I can dip into it as needed on a long trip, and depending on the transport situation, I may take a handful of items from it and put onto the next solution.  Here’s just a few of the items it holds:

    • Hitch Pins

    • Auger kit, including replacement blades

    • Extra transducer/replacement Marcum battery

    • Extra Gloves

    • Extra Hoodies and Hats

    • Bait Pucks, pliers, and snips

    • Heater accessories and a lighter

  • Line Box – I’ve got a Plano 3700 series deep box that’s full of nothing but line.  I respool each late fall, then re-order to fill.

  • Lure Tote – This is a smaller tote that has nothing but lures in it.  Again, I keep this one at camp, and only use it to replenish lost items or hot baits I might need.  It’ll come with on a long trip, but most often it lives in my garage and is used as a buffer inventory from which to fill tackle boxes when needed.  When I use up a popular color or lure in the tote, I know it’s time to buy more.

On-Ice:

  • On-Ice Soft Goods Bag – This bag is filled with ziplocs of tackle and some odds/ends:

    • Soft Plastics – I keep these in their original baggies and keep like sizes, shapes, and colors in a quart sized Ziploc freezer bag – these are tougher and stand up for a few years.

    • Panfish Tackle – I have select baits, tungsten and lead both, separated into bait type in original packaging, stuffed into Ziploc quart bags

    • Walleye Tackle – I have select baits, one bag per size, multiple colors per bag in Ziploc quart bagsJigging Raps in the package are a big part of the selection here, as Jigging Raps are easily damaged on long transport trips.

    • Bobbers, Sinkers, bare hooks and anything else needed to rig a tip-up or dead-line have their own mini tackle box that lives in the soft goods back.

  •  On-Ice Hard Goods Bag – This can be any small tackle bag that holds the Plano 3500 or 3600 sized small boxes – as well as a few snips, pliers, and other small accessories

    • Box 1 – Rippin Raps of various shapes and colors – these hold up well to travel as they’re not as heavy.

    • Box 2 – Slab Raps and UL Rippin Raps.

    • Box 3 – Spoons of various shapes and sizes – These will get beat up, you’ll lose chips and chunks of paint, and you’ll have to be OK with it.  These are high use, constantly replenished items.

    • Box 4 – Swiss Army Box – Jigging Raps are the number one bait that gets damaged while in transport, but I do have a few out of the package and ready to rock in this box.  Oddballs also go in here, along with extra baits the didn’t fit in the first three boxes!

On-Person:

  • Small Utility Box – Panfish – I’ve got one side of this filled with vertical panfish jigs, the other side, a mix of horizontal lead and tungsten baits.

  • Medium Utility Box – Walleyes/Perch/Crappies – This box has some plastics and bare hooks in the clear plastic flip lids, along with spoons in the memory foam.  I do have a few Teardrop jigs in the clips, but this is a minimalist walleye box that has the very best of the best only inside.

Like I said, it’s far from perfect, but it works great for how I fish.  Every year I refine it and get a bit better!

Joel

Which Otter House to Buy? Cabin or Lodge? XT or XT Pro?

Featured - Otter X-Over XT LodgePhoto Credit - In-Depth Media Productions

Featured - Otter X-Over XT Lodge

Photo Credit - In-Depth Media Productions

Sam O. writes:

Hi Joel,
I'm a big fan. I always watch your Youtube videos and TV shows.
I have 2 questions. First, I live in central Minnesota, and there is a lake right by my house with huge walleyes that don't get fished much to any fishing pressure. It’s called Lake (OMITTED) near the town of (OMITTED). I try to fish this lake as often as possible because it is close to my house but do not know where to fish for them. If you could maybe give me a place to start or something that sticks out to you that would be great!
Also, I'm in the market for a new otter shelter and am unsure what to buy. Looking at the Cabin vs the Lodge. XT vs the Pro. Any advice? Maybe know of someone with one used in good condition? Thanks a ton.
Sam

Hi Sam – thanks for the question and for watching what I do!  Always appreciate hearing from people that take the time to check out what I’m up to.

As for the lake, I try to make it a point not to comment on lakes, locations, and advice regarding where to fish.  It’s been tricky in the past, and it can be negative for the resource. Not to mention, no one person could know the predator/prey dynamics and other environmental conditions enough to make such predictions.  So I’ll have to pass on that one, but I can certainly help you with an Otter.

You’ve effectively got two comparisons going on here, Cabin vs. Lodge, XT vs. XT Pro.  Here’s how I’d break it down and what I use:

Cabin vs. Lodge

  • Transport – Cabin fits inside a standard truck bed, and underneath a Tonneau cover, while a lodge may have issues fitting under the cover and does stick out onto the tailgate.  You may need additional help to load a Lodge in the back of a truck, whereas the Cabin is a bit more manageable solo.

  • Space – I’m 5’10” and can’t stand up without touching my head to the top of a Cabin.  I can standup in a Lodge.  As for floor space and seating, unsurprisingly the lodge will comfortably fish 2, and up to 3 people with gear. 

  • Weight – Depending on style (XT vs XT Pro), you’re looking at up to 103lbs on the Cabin, and up to 124lbs on the lodge.  While Otter is the lightest shelter in class, both models work better behind an ATV or snowmobile.  Hand dragging anything over 100 lbs is difficult, especially with snow on the ice, and even more so when you add auger, electronics, rods, etc.

  • Price – Lodge is larger and more expensive.

XT vs. XT Pro

  • Seating – Seat options are different in each, and the XT comes with a bench, and XT Pro comes with bucket seats independently mounted on an aluminum bar that runs the length of the sled.  The bench is comfortable for me and offers space to lay out tackle and other items when fishing by myself.  It also has a nice backrest that I like.  The bucket seats are considered the premium option, and very nice to ride out the entire day on.  For most people, it comes down to buckets vs. bench, and that’s the deciding factor right there.

  • Warmth – you’re looking ThermalTec at 600 denier (XT) vs. 1200 denier (XT Pro), and in my opinion, that’s not the lead story.  For those in extreme environments, or who are focused primarily on warmth, I’d lean XT Pro, but keep in mind that even the 600 denier and the proprietary insulation Otter has in Thermal Tec is far superior to the insulated shelters of even a few years prior.  I’m warm in both under almost all circumstances.

  • Accessories – You can add a sportsman’s caddy (great option) to the center of your XT Pro, but not the XT as it mounts on that crossbar which is not on the XT series. 

  • Ease of use – I find the XT bench, specifically in the lodge great to flip all the way up and over to the back of the sled, for one-handed access to the full length of storage for augers, rod boxes, etc.  The XT Pro version has independently lifting seats and sportsman’s caddy, making getting full length access a bit more of a process. 

  • Price – XT Pros are more $, but offer the bucket seats and more insulation

My personal choice of shelter each year is the XT Lodge.  I prefer the bench seat and like the extra room it provides for a third person, and I don’t miss personally the extra insulation in the pro series.  I spend the extra difference on pins, a hitch pivot, rear sled hitch receiver, and cargo net accessories.  That said, Otter makes different options so you can get the shelter that best fits YOU!  Pick the one that best satisfies your situation, and you’ll always be happy with it.

Joel

Which Marcum Should I Buy?

Ice134-9336.jpg

D. Meyer Asks:

Joel – I met you in Blaine at the show.  I know I want a Marcum for winter fishing, which is best?

Thanks for the question. 

While I’m guessing you didn’t mean to open a can of worms here, you did, but it’s a good thing!  I’ve been meaning to do this for some time. On Facebook groups and at all of the shows I’ve attended in person this year, “Which Marcum Should I Buy” could be the most common question I’ve seen and heard.  The answer is easy of course - it depends - on a number of factors, but we can do better than that. 

Below I’ll do my best to describe a number of fishing styles and budgets to hopefully help you narrow it down:

383A9328.jpg

The Hole HopperPersonally, this is my style of fishing, but I’m not always punching holes and running around the ice.  When I am, mobility and ease of use is key.  I want something without a ton of settings, that has a great range of features but won’t get in my way or be difficult to tune in with gloved hands.  The Marcum M5 on a Lithium Shuttle is the hole-hopper supreme.  The M5 has adjustable zoom anywhere in the water column, which I set for the depth I’m fishing, and forget.  It’s compact head and lightweight lithium ion frame make it the most sleek and quick fishing unit I own.  If popping and dropping is all you do, the Lithium M5 is your unit.  I will concede the the Lithium LX6 is another great option, especially if you’re married to the LCD display. 

_MG_4316.jpg

Inside and Outside BothSo often I’m going back and forth between a wheelhouse and/or portable, and the open ice.  I want something that serves both needs without leaving me wishing I had more features and options once I’m inside, warm, and gloveless.  That’s where the LCD display on the LX7 is really nice.  Adjustable brightness display is great for later evenings, and the screen size on a 7 is phenomenal. 

I’m able to customize my screen left to right from scrolling graph, circular dial mode, and the bottom zoom.  I watch the main dial for fish 75% of the time, occasionally glancing at the historical scrolling graph to make sure I didn’t glance away and miss them on the main dial.  Most of the rest of the time, I’m watching fish close on the vertical zoom bar on the far right.  It offers the most resolution and best odds of playing your cards right for spooky panfish or fickle ‘eyes. 

To Lithium or not, that is the question.  If you do a bunch of hole hopping and a little bit of sitting, opt for the Lithum LX7.  If you’re primarily sitting and only doing a bit of hole hopping, save some cash, get the LX-7 in the soft pack, and you can always add a lithium battery to it later.

index_34.jpg

All the Nuts and BoltsIf you want a do-everything unit, the best option is an RT-9.  While the price point may have scared folks away at first, prices are coming down and the physical feature set of these are pretty incredible.  GPS, sonar (multiple ducers if interested), and camera can be mounted to the back of these to serve as a wheelhouse command center.  Integrated GPS mapping, enhanced with an optional Navionics card, allows you to RAM mount one of these to the dash of your truck, or the wall of your wheelhouse.  Nothing else on the market will do what this unit can, and though it’s a niche product, pricing decreases have made it much more competitive a unit in the space.

index_36.jpg

Back to the BasicsIf you’re satisfied with a circular display unit in a softpack, and want to protect the budget a bit – the M5 and M3 are incredible units.  I think it’s important to remember that as recently as a few years ago, these were the pinnacle of sonar performance, target separation, and fish finding capability.  Not to mention, they’re of the few ice electronics packages these days that still are offered in a softpack, which is an important consideration to many folks.  Choose the M3 if you fish primarily featureless soft bottom lakes and don’t fish near many people, and the M5 with it’s switchable ducer for $100 more if you’re always fishing sharp breaks or tight to a buddy.  Switching to the narrow cone will alleviate sonar shadow on steep drop-offs, and unit interference from nearby ice electronics.

Of course, if you could always get these offerings in a Lithium Combo, as both the M3 Lithium Combo and the M5 Lithium Combo feature the Lithium Shuttle (also sold separately) with extended run-time, incredible lightweight, and a host of other features.  This category is the biggest, and really allows the consumer the most flexibility.

marcum-m1-review.jpg

Entry Level, Youth, and Back-up– For just over $300, you can get a Marcum entry-level unit that exceeds the limits of all competitor starter setups.  The M1 has bottom zoom, a softpack, and best in price class 2” target separation, meaning you don’t have to feel like you’re sacrificing quality to back off of price.  I own a few of these, and they’re simple to operate, which means they’re great for my kids or first time anglers. 

Also, don’t feel bad if this is the unit you prefer!  The previous iteration of this unit was the VX-1, and I used it to really clean up on Red Lake walleyes back in the day.  I appreciate features in more advanced units, but I also don’t feel handicapped having one of these along for the ride. 

Cliff Notes

I always tell people that when it comes to ice electronics, especially these days, it’s hard to go wrong.  Consider them an investment in your fish catching and fun, and an investment that’s easily recouped.  Provided you buy them right, worst-case scenario, you’re selling a 1-year old unit on the used market during peak season the following year, and you lose $100.  That’s the cheapest 1-year Marcum rental you’ll find anywhere, and is testament to the fact that these things hold their value.  Especially the basic versions.

So be honest in evaluating yourself and how you fish, then take these recommendations to heart.  I’ve fished with literally dozens and dozens of models of Marcums over the years, and this advice comes with myself, friends, family, and fellow ice-anglers in mind. 

Joel

How to Keep Your Otter Lightweight

Here’s the bare-bones XT Cabin in an X-Over. Adding some lightweight accessories to it really extends the fishability of this house!Photo Credit - Ben Larson - In-Depth Media Productions

Here’s the bare-bones XT Cabin in an X-Over. Adding some lightweight accessories to it really extends the fishability of this house!

Photo Credit - Ben Larson - In-Depth Media Productions

Kyle S. asks:

Hey Joel, I’m moving from a hub to a flip over. I’m looking at the new xover pro cabin. Besides hyfax and a cover, what are must haves for the sled? Sportsman caddy? Led light? Cargo bin? Thanks! I’ll be moved by human power so trying to stay light as can be.

Great question Kyle, and good choice as the Otter X-over series is lightest in class among comparably sized flip-style shelters.

The Pro is nice with the bucket seats, but the XT will offer some weight savings and I actually prefer the bench personally. Don't worry about the hyfax, at least initially. Unless traveling consistently over gravel, ramp concrete, or ground, I've found that they're a nice accessory but you can do without if looking to shave weight. Not to mention, you can always add later.

Consider shaving out the caddy as well. Though it’s one of my favorite accessories, you won’t use it on an XT series anyway as there’s no center aluminum bar to connect it to. That said, make sure you have a hitch and hitch pivot (for the times you WILL have access to snowmobile/atv).

Instead of the caddy, I'd get both the 3 pocket cargo net and the overhead storage net, along with shelter hooks - all of which are nearly weightless. I equip every house I own with them, as they’re nearly essential for the way I fish. It just so happens you can do so with little weight being added. The 3 pocket cargo net holds supplies of all kinds (some of the stuff I’d have in the caddy). The overhead storage net is so incredibly nice for drying gloves, hats, etc. The shelter hooks I use as rod holders, and more importantly, in the back high corners of the shelter as a place to hang up the jackets we wear outside but are more comfortable without when fishing inside.


The LED light kit is awesome, but the battery to power it will cost you some weight, and you'll already be adding an auger, heater, rods, electronics, etc. I'd say to start here, and add other items later if you feel you need them.

Joel

What Features for Your Yetti?

Photo Credit - Bill Lindner Photography

Photo Credit - Bill Lindner Photography

I seen you have a yetti. I’m having one built right now. Anything you did or didn’t do or wanted to do after the fact? It’s going to the finisher in the next couple weeks. Thanks!

Dave D.


Thanks for the note Dave, it’s a good one.  I credit you for doing your homework and asking lots of questions as these are big decisions you want to get right the first time.  I’m actually in the process of trading off last year’s Yetti and ordering a new one as well, so your timing is perfect.  Here’s how I’ll break it down:

Primary Use – I think you have to be really honest with yourself on current use and what your schedule allows.  I know I had planned on camping a bunch with ours, and because of my open-water fishing habit, I did so a bit more sparingly than planned.  Instead, I’m using it more for hunting trips (spring and fall), as well as a few summer camping trips, though my primary use is ice-fishing.  Focus then on maximizing features for the primary use part of your buy.

Doing Again - Here’s the add-ons I’ll be doing again:

  • Summer Package – A/C, awning, vent fan in bath, exterior outlet, etc. allow for the best full season use.  I wouldn’t order without.

  • Electronics Package – This should be considered standard, great add

  • Lighting Package – Ambient interior lighting is really great, and the perimeter light strip helps people who are meeting you on the lake find your Yetti.

  • Small Flip-up Table near front door – extra surface is great

  • Bunk Ladder – stows great and way safer for the kids

  • Rear View Camera System – Really handy in tight quarters, and great for trailering down the road!

  • Window Shades – Really great to moderate the amount of light on really bright days

  • Spare Tire Mount – Never had to use it, will be happy to have it if I ever do!

Maybe Not - Here’s the add-ons I did last year that I likely won’t be doing again:

  • Ramp Door Screen – This is an incredible add-on if you’re doing more camping and taking advantage of it, but I could probably do without.

  • Cutting board sink insert – I ended up just doing food prep on a regular cutting board

  • Full Bathroom – I didn’t know where to add this one because I’m on the fence still.  A full bathroom with all of the hookups is phenomenal for extended summer use.  We used our facilities about 3 times this past summer and though we were happy to have them, the State Parks where we camped had their own.  It’s not a need, but I can see especially in other campgrounds or when away from civilization this would be great.  We didn’t use them in the winter, and many folks are using a portable toilet in the same space without the provided toilet, shower, sink, etc.  This is something to strongly consider.

Non- Factory Add-Ons - There’s just a ton of great ways to modify your Yetti to any use you can think of – check out this article for some ideas that helped me equip mine!

ASK YOUR DEALER EVERYTHING! - Make SURE to pick the brain of your dealer.  All of my best questions were answered easily because they help people make these decisions (and use the product) themselves a great deal.  My dealer, Casey Boutain of Glacial Lakes Dock - has a direct connection to the Yetti factory and just lives to help people with these questions.  He’s not close in location to me, but has been a great help in selection of a house that fits my family.

Joel 

Best Wheelhouse Camera?

Photo Credit - Ben Larson - In-Depth Media Productions

Photo Credit - Ben Larson - In-Depth Media Productions

John W. asks:

Hey Joel - I saw you got a Yetti last year and am wondering what underwater camera you’d recommend for inside of a permanent. We mainly fish for walleyes on Mille Lacs but sometimes fish for panfish nearby.

Thanks,

John

Thanks for the question John. I’d consider two options, one mobile unit for panfish and another system for the house, but would lean most heavily towards what you do most. That sounds like fishing on Mille Lacs. Fair word of warning, walleyes are notoriously camera-shy, so always be ready to pull the camera if you see fish come near baits but get nervous.

That said, a quality camera for the house is an investment to better fishing no matter where you’re at, regardless of species. Perch aren’t usually worried about the camera, and I know you probably run into them a fair amount out there as well. Not to mention, so often the camera is used just to confirm the presence of fish or ID them, let alone observe the area you’re fishing for rocks, gravel, etc.

The big issue in past years has been camera quality of image, especially at depths like you fish in Mille Lacs. This problem is exacerbated, even in the shallows, when taking a non-HD image, and blowing it up to a big-screen TV as are so popular in todays wheelhouses. Marcum has a new camera called the Quest that I tested all last year and was very impressed by, especially when plugging into the big screen on my Yetti. It’s the first HD camera to my knowledge, that actually allows an HD image to be ported to your TV screen, via an HDMI cable. All of that means the clearest and cleanest image I’ve seen from an underwater camera, up on the TV screen - to date.

If you’re less concerned about porting the image to a TV, then I’d opt for mobility and pick from either the Recon 5 or Recon 5+. Both are extremely capable and portable units that will work for panfish outside of the house, just as well as they’ll work inside. The major difference in the 5+ is that it has on screen temp, depth, and direction display, which can be critical components for chasing big panfish, especially in weeds. It also has a DVR to record what you’re seeing if that’s of interest. If you plan on bringing it inside, I’d opt for a mount like this - which will keep it steady and pointed in the right direction for you at all times.

Whether you’re viewing the image on the big screen or natively, there’s some great options out there these days.

Joel

Which Croix Custom Ice (CCI) Rod?

St.Croix232-1619.jpg

Matt R. asks:

I saw St. Croix released their new CCI rods. I just had a couple of questions in regards to them.

First, as far as for panfish what rod would you recommend for fishing tungsten flys, jigs, smaller spoons, and number three rip n raps. I would also like to be able to see the bite.

The other rod would be for walleyes. This I would be fishing number 4 rip n raps, 1/8 spoons, jigging raps. Which one of the CCI’s would you suggest for this type of fishing. Thanks for your reccomendations! I look forward to hearing back from you! Thanks, Matt Rischette

Appreciate the questions Matt, and I know there’s lots of people that will want to know the same thing. You’ve highlighted a number of techniques for several species. I want to point out that there would likely be a few ways to address these needs, depending on what you want to spend and how much you do each of them.

You may be able to get away with 2-3 rods that are multi-faceted enough to satisfy many different roles, but keep in mind that these rods were designed to address specific situations, and the very best experience may involve getting a rod for each style or bait you’re fishing. I’ll break them up in that scenario to address strong suits for each rod/technique, but ultimately it’s up to you as to how much you fish each tactic and whether or not a rod-per-bait is the right approach for each person.

  • Panfish Tungsten flies and Jigs - You indicated you wanted to see the bite, and in that scenario, the Tungsten Tamer (CI28MLXF) is the far away best choice. This rod was crafted to deflect easily enough to detect both “up-hits” and standard bites, while standing up to the weight of today’s tungsten jigs and not overload. More importantly, the backbone of the rod and where in the hookset that power is felt, will make it one of the most popular panfish rods in the lineup.

  • Small Spoons - Tony spent alot of time with this rod, and without speaking for him I know he spends a good deal of his winter for perch and panfish with micro spoons. The Micro Spoon Rod (CI28LXF) addresses the popularity of tiny spoons being used for big gills and other panfish, that can often be lighter than the tungsten jigs we’re using. This rod’s power accounts for that and just like the Tungsten Tamer, properly handles the weight of the bait used for each technique.

  • #3 Rippin Raps - This bait is a feel bait. Pull it through the water column at even a slight “rip” and you' know what I mean. It would stand to reason that you’d want a feel-rod to pair it with. If you fish the smaller #3 alot, or simply prefer feel over the visual for most of your fishing, the Pan Finesse (CI24LXF) is the right tool to use. Taking a cue from their open water sticks, no one does a true XF action like St. Croix. You’ll see that same lightning fast deflection in this feel-rod, and specifically for this bait, you want to know the nuance of this bait’s action at all times. Most people overwork these baits, as they strive to feel that vibration, leading to the bait tangling itself or just scaring too many fish away. Feeling the subtlety of a Rippin’ Rap in action leads to working it more properly, and I wouldn’t hesitate to use the smaller Jigging Raps with this rod either.

  • 1/8 oz. Spoon Rod - Pat Smith of the old Thorne Bros. days really changed my line of thinking on these styles of rods maybe 15 years or so ago. Take a look at your ice tackle, and you might find that 60-75% of what you own for perch and eyes anyway, is of the 1/8 oz. size, which makes finding the perfect rod to fish that size paramount to your success for those species. The Perch/Eye Spoon rod (CI28MLF) was designed to be an 1/8 oz. staple, and swiss army knife rod for most walleye applications. If you own one walleye rod from this lineup, this is likely the one.

  • #4 Rippin’ Raps and Jigging Raps - Both baits will fish better on the Search Bait Rod (CI32MF) given the weight of them, the power of these rods (M) and action (F), with the action being a key component. Ultra fast actions are the rage for ice rods, and though they certainly have their time and place, too fast for crankbaits in open water is just the same as too fast with hard baits through the ice. Keep in mind, a St. Croix fast action is already a touch faster than most manufacturers, but too fast prevents maximum swing, action, and fish-landed. I’m of the opinion that a fast action keeps more fish buttoned all the way to the hole, which is a huge consideration with hard baits and hard walleye mouths.

  • Bigger Jigging Raps and #4 Rippin’ Raps - Certainly the largest baits, and even the #4 Rippin’ Rap work better on the open ice with a slightly longer rod. Think trophy scenarios, big head-shakes, and trolling the open ice. If a good portion of your fishing involves these baits on these waters, I’d have no hesitation in recommending the Outside Eye (CI36MF).

So there you have it, it’s what I’ve been fishing for the same baits in last winter’s testing phases, as well as what I’ll be stringing up this winter. Let me know if you have any followup questions, and kudos to you for doing your homework, as pairing the best rod to the job at hand will always lead to a better experience and more fish.

Joel